
The Manitou Incline, or just “The Incline” as it’s more commonly known, is one of the more famous (infamous?) trails in Colorado. But it’s really hard to find any information about it, and all the folklore about how steep and challenging it is can make it seem totally out of your league as a beginner. I’ve hauled myself up it twice, once as a total beginner and once as a slightly-more-fit beginner.
My favorite part about the Incline is that there are legitimately ALL KINDS taking it on. Bonkers fit people, total beginners, all body sizes, all ages, moms with kids, teenagers, literally everyone you could think of. People are struggling, people are making it look easy, everyone is just on their own journey.
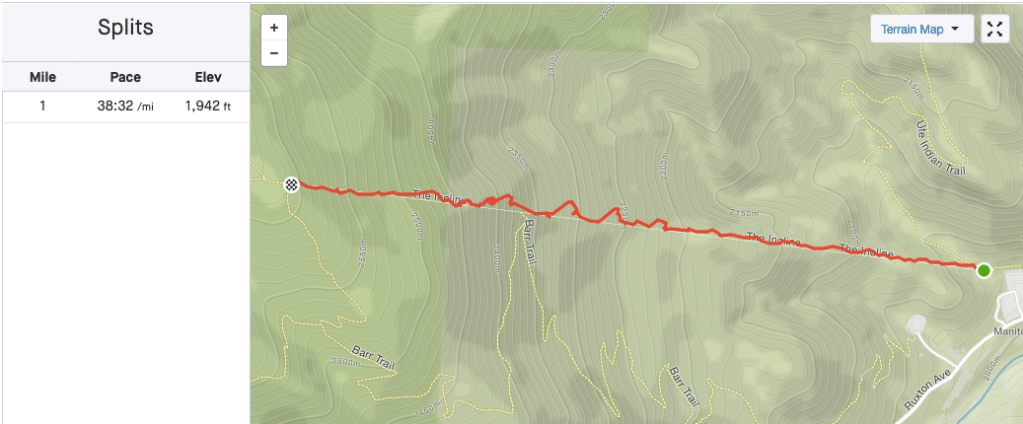
Going up the Incline is one mile. The most beginner-friendly option to get back down is to take the Barr Trail, which is an additional 3.1 miles, putting you at just over four miles round-trip for this uniquely challenging trail.
How do I get there?
Before you go, you’ll need to make a reservation. The reservation is free, but parking is not. You can find information for both here on the City of Colorado Springs website.
The Incline is just outside of Manitou Springs, which is about an hour and a half south of Denver. It’s an easy drive until the very end, when you’re on a narrow (but paved) road up to the Incline. This part only gets tricky because it’s extremely crowded on the weekend. If at all possible, go to the Incline on a weekday to avoid this (and even then, it can still be crowded).
It costs $10 as of 2021 to park in the lot at the bottom of the Barr Trail, which is also where the Incline starts from. There’s a free shuttle that leaves from elsewhere in town, but I haven’t experimented with that. Considering the trail itself is free to access and is expensive to maintain, $10 is a reasonable fee (in my opinion). Make sure you have a credit card handy to pay!
Where do I go?
There is only one way to go – up! The beginning of the trail is very well marked and there’s only one way to go once you get started. About 2/3 up the trail, there is a bail-out option for you take the Barr Trail back down. At this point, you are 80% of the way there, so I was too stubborn to take the bail-out. I was just too close to finishing to not go all the way. But if you need the bail-out, it’s an option. The Incline is one mile long one way.
There are two options for getting back down: the way you came up, which is too steep for my liking, and the Barr Trail. The trail is 3.1 miles long, zig-zagging back down from the top of the Incline. It’s tricky because it’s downhill the entire way, so your knees and quads take a bit of a beating. But it’s also very beautiful, and in my opinion, a nice jog back down. Follow signs for the Barr Trail, not Pikes Peak or Barr Camp, which will only take you higher up (the last thing you want at that point).
There are port-o-potties in the parking lot, and nothing at the top of Incline except for a great photo op.
What is the trail like?
It’s obviously difficult. But make it your own challenge. Like I said, there are all kinds of people taking it on. You’ll get passed by people older than you, fitter than you, and carrying kids on their back. You might pass other people yourself. It doesn’t matter – take your time, pace yourself, and see what you can do!
There are railroad ties that make the entire trail like nature’s Stairmaster, which actually makes it easier to climb up the whole thing. You don’t have to worry about sliding back down on the steep parts because it’s basically a staircase.
There are a few parts with wider steps of metal grating that help the trail drain properly. If you’re using hiking poles, be careful not to get them stuck in there. There are also plenty of points where you can pull over on the side if you need a break or to get out of the way for faster hikers. The trail is a consistent width all the way up that makes it easy for people to pass if you’re at a point that there isn’t a place to actually get off the trail. Just try to get as far over the right as possible when you do need to take a breather.
There’s a false summit that you can see right away. You’ll look at it and think there is absolutely no way that it isn’t the real summit. I didn’t believe people when they pointed it out to me. But please believe me, there is more to come after what looks like the top. Don’t be fooled – that was pretty emotionally crushing to me the first time I did it.

Assuming you take the Barr Trail back down, which is the most beginner-friendly option, there are parts that get a little rocky and technical, but nothing too advanced. It’s downhill the entire way and controlling your speed can be difficult, so your quads will be a-burning by the time you’re done.
It took me 40 minutes to get up the Incline the second time I did it, including multiple breaks. I was able to run down the Barr Trail in about the same amount of time. For context, I was running pretty regularly at this point preparing for a four-mile section of the Colfax Marathon Relay – averaging two or more 2-3 mile runs per week. I only provide my time for your planning purposes – remember, this is all about challenging yourself and seeing what you can do personally. Plan on being out for two or more hours just to be safe.
There’s very little shade on any part of the trail, which means it’s a great option for winter (assuming it’s dry) or spring. If you go in the summer, start early to beat the heat!
What should I wear and bring?
Because there is no shade, make sure to slather on plenty of sunblock and wear a hat and sunglasses.
I’ve done the Incline on a warm, sunny day in December and a cloudy day in May, both of which were ideal weather. I wore shorts and a t-shirt both times, but could’ve used a long-sleeved layer for the way back down (particularly the time I hiked down). Because the hike up is so strenuous, I would recommend wearing your grippiest running shoes so you aren’t bogged down with the weight of hiking boots. For this reason, and because I planned on jogging down, I wore my trail running shoes.
Hiking poles will certainly make your life easier, particularly helping out your knees on the way down. But the trail is at no point technical enough that you would absolutely NEED them. In the winter, if it’s icy, you might want some extra traction like microspikes.
I regretted not bringing water with me the first time I did the Incline. The second time, I wore my running vest and brought water and snacks (just in case, I always have snacks just in case) as well as chapstick with SPF in it and a long-sleeve shirt. I did my best to pack light since I certainly didn’t want to make going up the Incline any harder than necessary by having a heavy backpack!
Is it crowded?
Yes. Even on the weekdays, there has always been a crowd when I’ve done the Incline! On the weekdays, it’s totally manageable. I was in no way alone either time I’ve done the trail, but people were at least pretty spread out.
I imagine the weekends would be much more challenging, mostly because the road the Incline is on wasn’t built to handle the huge crowds it attracts. I’ve been lucky to do the Incline as part of my workday both times, so I haven’t had to contend with Saturday or Sunday crowds in the parking lot or on the trail.
Anything else I should know?
While I believe almost anyone can do the Incline if they take their time, I don’t think it’s a good idea for someone visiting from sea level unless you are already VERY fit. Colorado altitude can kick your butt on a regular hike, but adding on a hike that is a mile straight up probably isn’t the best idea.
However, if you’re already in Denver or elsewhere in Colorado, it’s less of an extreme. The hike is definitely very challenging, but like any hike, as long as you take your time, listen to your body, and give yourself enough time to complete it in good weather and during the daytime, it’s worth a try. Age and body type aren’t the best predictors of how physically fit someone is, but I’ve seen people of all ages, weights, and fitness levels (based on how out of breath they are when I see them) trying it out.
I’m also not a medical professional, so take on the Incline at your own risk :’

Hi Laura,
I’ve been doing long duration zone 2 walking on treadmill 4 mornings a week for a couple months. Worked up to 2 hours 4 days a week in zone 2. Muscles never get sore and you can weight train the other 2 days. My heart has never felt stronger, my resting heart rate is in the 50s. Anyway left sea level on a flight that landed in Colorado Springs, great airport by the way, at 11:30. Hopped into a rental car and was at The Cliff House at Pikes Peak before 12:30. I was on the Incline by 3:00. Your article was so awesome because you described it perfectly and captured the essence of the many experiences. People of all ages, shapes, sizes etc. Lots of groups of friends and families. I agree you get into your own zone. It’s a singular focus to get to the top so you can stop the pain! There are tortoises and hares. It’s funny how many times you pass the same people who are resting on the side and then they pass you and then you see them on the side again taking a breather as you pass. Don’t try to do the incline for time on you first journey up, it will surprise you about halfway, maybe sooner, that you should have paced yourself. I wore a hear rate monitor, just started wearing about 4 weeks ago after reading some good stuff about keeping track of your bpms while exercising. Take Laura’s advice and cruise down the switchback at a slow pace. You can’t look a scenery AND jog down a trail with rocks and loose gravel so enjoy the fun of the run and focus. Stop every now and then and take in the scenery. It’s really cool when you start to hear the stream you know your getting lower. I did it 4 days in a row and let the hear rate monitor set the pace. The hike up and the jog down are an awesome 2 hour workout that will test your quads and knees. Landed on a Wednesday, left on a Saturday and did it all 4 days. Manitou Springs is a really cool tourist town. Free shuttle bus to the starting point from various points in town run every 20 minutes so just park along the bus route and don’t stress over parking. Thank you again Laura for your article.
LikeLike
This is wonderful to hear!! Thank you for all the awesome tips and first-hand experience!!
LikeLike
Thank you for such a detailed account. My daughter is a student at the Air Force Academy and each Labor Day we go to Colorado Springs for parents weekend. We have talked about doing the Incline every year, but have chickened out. This is her senior year so possibly our last chance to do it together. While I am still nervous about the hike, your post was very informative and I believe I will do the Incline this year. Thanks for taking the time to write.
LikeLike
Congrats!! Take it slow and at your pace. Try to stay curious about what your body can do and listen to what it’s telling you. Even trying a few steps is an exciting victory!
LikeLike
This was a fabulous post, thanks! I just turned 66, and asked my kids to do this with me. Although I was (am still) a little hesitant, I’m also really looking forward to it after reading your post. Great job!
LikeLike
Mark that is wonderful to hear!! I hope you can get out there soon with your kids and have fun at your own pace 🙂
LikeLike