What’s it like to pace or crew the Leadville 100 Ultramarathon?

Ultramarathon and beginner are two things that you may not think go together. While beginner runners certainly can’t stick with someone for 50 miles (the maximum length you can be a pacer runner at Leadville), there is absolutely a place for us at one of the most iconic trail races in the world.

Even if you aren’t a beginner runner, there can be a steep learning curve if it’s your first time in Leadville or if you haven’t been part of an ultramarathon before. This guide will cover just about everything you need to know, focusing on crewing since it’s the most beginner-friendly option.

What does it mean to crew?

First, let’s all get on the same page. Running an ultramarathon is a really difficult thing to take on, so most races recommend you have a crew to support you along the way. The person or people who make up the crew meet their runner at some or all of the aid stations along the way.

Your runner wants to spend as little time at the aid station as possible so they can get back on the course and finish the dang thing. The crew arrives at each aid station well ahead of their runner with a bin of supplies you’ve organized with them ahead of time and/or the drop bag they packed for that aid station. The aid stations at Outward Bound and Twin Lakes let the crew pick up a runner’s drop bag, which is a handy time-saver.

Once you get to the aid station, you set up shop and wait for your runner to arrive. Once they get in, you leap into action like a NASCAR pit crew and get them in and out as efficiently as possible.

Of course the ONE photo I took all day was of all the dudes helping our male runner. Ladies were represented too, I promise!

You make sure their pack is full of all the food and water they need, that they have appropriate clothing for the next leg (in Leadville, runners have a river crossing, 15,000+ feet of elevation change, and very chilly nights, so this is a must!).

The crew is critical because you need at least one person who is reasonably well-rested, not worried about running, and whose sole focus is “do we have everything we need?” This only gets more important as the race goes on and the runner’s cognitive abilities and general executive decision making get more and more compromised. You’re their back-up brain! Plus it’s a big morale boost for runners to see friends and loved ones throughout the race.

What does it mean to be a pacer?

For the last 50 miles of Leadville, runners are allowed to have one person run with them. This is a pacer. You’re there to keep them moving at a steady pace (whether they have a time goal or simply need to finish within the time cut-off) and serve as a kind of on-the-go crew, particularly once nighttime arrives and fatigue sets in!

For Leadville, you’re also allowed to carry the runner’s pack for them. But mainly, you’re there make sure they’re eating, drinking, moving, and at least somewhat happy (as happy as you can be trudging through 100 miles). If you have cell service, you can also communicate to the crew what your runner might want at the next aid station.

Pacing is a delicate balance of knowing when to encourage someone, when to give them some tough love, and when to go easy on them. It can be difficult to pace someone you don’t know or if you aren’t familiar with long-distance running yourself, but trust your instincts and discuss what kind of feedback motivates your runner ahead of time.

Trying to stay warm before my leg of pacing! Behind me is the spread for three runners – it’s more organized than it looks!

Most sections of the race are at least ten miles, but it’s possible to be a beginner runner and help pace. There’s a four-mile section that is actually incredibly helpful for a runner to have company for because it’s in the middle of the night through a very boring cow field.

If you have a training goal of running a longer leg, get after it! Just remember that this is not at all about you. You run when your runner wants to run, you run at their pace, you walk when they need to walk – your runner comes first. You’re there to support them, not to worry about your own distance or time goals.

What do I need to know to crew?

Honestly, it’s not rocket science. You have to be organized and able to follow your runner’s directions. You also need to be flexible, be able to think on your feet, and have a good sense of humor.

You need to take care of yourself (more on that later) but also keep in mind that you’re doing this in service of someone else’s goal, not for yourself. It’s not the end of the world if things go wrong, and it’s not helpful to get mad at your runner or fellow crew members. You just need to problem solve!

Plans change, things go off the rails, runners forget to tell you things, but at the end of the day it’s a wonderful privilege to be worried about the logistics of an ultramarathon. If that’s the worst thing happening in your life, you’re doing pretty well.

What should I do before the race?

Familiarize yourself with the aid stations. The race is one long out and back, so the runners go through every aid station twice. As of 2021, crew and pacers can access the May Queen, Treeline (unofficial crew access between Outward Bound and Halfpipe, a lot of people just call it Halfpipe or the field at Halfpipe), and Twin Lakes.

Remember how I said you need to be organized and have a sense of humor? I forked up the directions to the Treeline (unofficial) aid station on our way back from Twin Lakes, and my friend and I ended up driving to Mount Elbert by accident.

Fortunately, we had over an hour of cushion, so we still arrived to the actual aid station with plenty of time and didn’t miss our runner. And the drive was really beautiful, to be honest.

But also to be honest, I had a brief panic attack when I realized my mistake. My friend just thought it was a funny and interesting side adventure. Fill your crew (and your life) with people like that!

Crews, pacers, runners, and the beautiful views at Twin Lakes.

Make a plan. It’s important to sit down with your runner ahead of the race (even if it’s just the night before) and familiarize yourself with what they’re packing in their drop bags or what they would like you to bring to every aid station. That way you’ve discussed everything when they are alert and well-rested (the opposite of what they will be in the middle of the night).

For example, my runner really wanted hot soup at a particular point so I was waiting for her at that aid station with a thermos in hand. And, because I forgot to ask where they were ahead of time, I was scrambling to find her caffeine pills when she specifically asked for them later on.

Know when they’re arriving (approximately). You also need to estimate when they’ll be arriving at each aid station so you can plan accordingly. You should be ready to see your runner at least 30 minutes before you think they’ll arrive, which means you are physically at the aid station with all of their stuff ready to grab and go.

Buffer time is most important for getting to Twin Lakes it’s kind of a sh*t show to get to. In 2019, we had to park almost a mile away from the aid station at Twin Lakes. In 2021, we got to Twin Lakes at probably the busiest time (11 am) and ended up frantically walking/jogging two miles to try to meet our runner.

I love a good spreadsheet, so I put all of this information in a Google sheet, downloaded the app, and kept it handy throughout the weekend (remember to make your sheet available offline). You can see it here.

Cell service will be spotty. Download the race guide, maps, and directions to all of the aid stations ahead of time. You also won’t be able to communicate with your runner or track exactly where they are, however you can sign up for text alerts for when they go through each aid station. This helps you guess more accurately when they will show up, but the app (Athlinks) is honestly incredibly unreliable. It gave my friends a scare in 2021 when it popped at their runner DNF’d (did not finish) when in reality he was still running.

In the second half of the race, if they have a pacer and you have the pacer’s phone number, you may be able to call or text them to get an update on roughly how far out they are. But keep in mind that the pacer may not be able to regularly check their phone because they’re keeping the runner going!

What should I bring to every aid station?

Pack light and bring a few things for yourself. This might be difficult if your runner is channeling any anxiety into packing ALL THE THINGS, but try to pare down as much as you can.

Bring only the essentials for yourself: a camping chair, water, snacks, an extra layer, sunscreen, your wallet, and your phone. Always make sure to bring a camping chair (the Helinox Chair One has come in SO clutch here because it’s so lightweight, but it is expensive).

I keep more of my stuff in the car and repack what I need to bring in my backpack for each aid station. This includes hand sanitizer, bug spray, plenty of snacks, and extra sunscreen along with all of my layers for the weekend.

You’ll likely also have a bin or some other container of your runner’s stuff to carry.

The bin! And everything that went in it, plus some back up supplies that I brought in my backpack.

Every aid station has port-o-potties that the crew can access, but you can’t access the water or other snacks at the aid station. Those are for pacers and runners only, so make sure you stay hydrated throughout the day (10,000 feet of elevation is no joke).

What should I wear?

The temperatures (and weather in general) can vary wildly. You’ll need plenty of warm layers for overnight, but in the daytime, it’s quite hot in the sun (and cold in the shade). It might also rain! Or hail! I bring a small duffel bag of a bunch of different layers, including:

  • Winter-weight leggings
  • Beanie
  • Gloves
  • Winter coat (doubles as a rain jacket)
  • Fleece jacket or pullover
  • Shorts
  • T-shirt
  • Light-weight long sleeve shirt
  • Baseball hat and sunglasses

My winter coat unzips into two layers, which helps me save space. I kept the outer shell with me all day as a windbreaker or raincoat, and swapped out other layers in my backpack as needed. Just make sure you have something warm and a raincoat!

I wear running shoes all day. It can be nice to change socks halfway through the day as a little pick-me-up, so I usually bring a few pairs. You’ll need warm clothes for the start and for once it gets dark. Make sure to bring your own headlamp and, if you have them, lanterns for your car for crewing in the dark. This lantern from Black Diamond is my favorite.

What’s it like to crew for Leadville?

You will walk a lot. Every runner has at least one car following them, meaning there are at least 800+ vehicles attempting to meet a runner throughout the day. As people drop out or get cut off, this obviously goes down. Cars also get more spread out throughout the evening as the runners get more spread out, but for the first half of the race, be ready to park far away (potentially 1-2 miles) from the aid station and walk there.

In 2019, I walked more than seven miles. I didn’t even go to all the aid stations, and I was actually trying to limit my walking for the day! (I was preggo and had symphysis pubis disorder).

You’re going to be very tired. It’s a very long weekend emotionally, so even if you’re not running, you’ll be headed to bed at 7 pm on Sunday. You need to make sure you get some sleep before then though. You can’t support your runner well if you’re also completely frazzled.

Trying to catch some z’s …what a view to sleep through!

You can split the day into two semi-reasonable shifts if you skip a few aid stations. You can either have multiple members of your crew to make sure all the aid stations are covered, or discuss with your runner which ones they would be okay with you skipping (particularly if they’ll have a pacer with them).

Most of all, it’s going to be an experience like nothing else. The trail running community is awesome. There is a sense of camaraderie that I haven’t experienced anywhere else, that maybe can only be forged when you’re running 100 miles through the woods (or helping someone do so). Leadville is a world-famous race, but the competition is far from cut throat and everyone is out there to help each other and have as much fun as they can. You’ll be tired, you’ll be inspired, you might cry at the finish line.

It’s a really cool experience that anyone can be a part of – so don’t hesitate to join in if you get the chance!

What does your typical weekend look like?

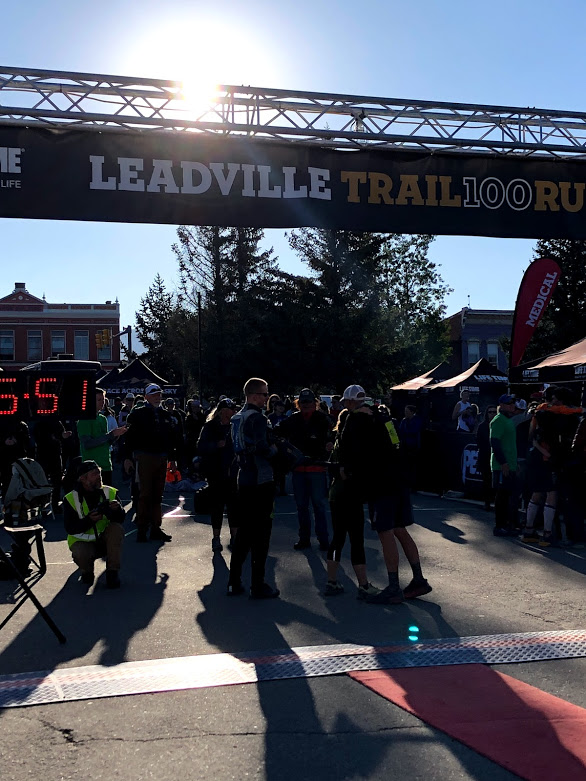
The race starts at 4am Saturday, and if all goes well your runner will finish sometime Sunday between midnight and 10am.

This was how I did it in 2019 with my husband and our friend (both pacers, but helped me out as crew when they weren’t running). For reference, this was our third year crewing/pacing and I thought we did the best job logistically this time!

We stayed together all day except when one of them was pacing, so you could cover more aid stations if you split up more then we did. Our runner prioritized nighttime pacing and morale boosts, so as always, talk to your runner about their own preferences.

  • We woke up at 3:30 am to go to the start line with our runner. We went immediately back to the house and went back to sleep afterward, so we were back in bed by 4:30 am or so. We skipped May Queen because the crew can’t do much for you there. This is a point where you could split up if it was really important to your runner to see someone at every aid station.
  • Arrive at Outward Bound to really start the day (8:30 am for my runner). Be prepared to be out until after lunch time.
  • Next you have the option to meet your runner at Treeline (unofficial crew station along the road), or go straight to Twin Lakes. We went straight to Twin Lakes because we were worried about parking being a nightmare (it was). There’s a food truck at Twin Lakes and a general store if you need to buy anything. Both accept credit cards as of 2021!
  • In 2019, we skipped Winfield because of the shuttle fiasco and because our runner didn’t want a pacer until she came back through Twin Lakes. In 2021, Winfield wasn’t an option for crew or pacers anymore.

~NICE BIG BREAK~

We went home, ate, slept, and got ready for the night shift. This was at approximately 12:30pm for us. We didn’t need to leave for Twin Lakes until 4:30pm.

  • Arrive back at Twin Lakes. We weren’t going home again until 11pm or later, so both pacers brought all of their running stuff with them. Your runner’s needs at every aid station vary, but at this point, your runner will be wet and it’ll be dark or getting dark, so a change of clothes and a fresh headlamp is a must for this aid station.
  • Meet runner and pacer at Treeline for a quick morale boost. This is usually your biggest break because Twin Lakes and Treeline are about 20 minutes apart driving but takes several hours to run. This is a great time to sleep in your car because you just park right next to the road your runner comes down. Our runner got into Treeline at 10pm.
  • Go directly to Outward Bound, switch pacers, and go home to sleep (this was around 11:30pm for us). We left May Queen to the overnight pacer because we wanted to wake back up at 3:30am to see our other friend finish and we knew we wouldn’t be able to do both. But, we kept our phones on loud in case anything went awry.
  • Wake up and meet your runner at the finish line! We did this twice to see both friends. If you only have one runner finishing, you could add on May Queen overnight and not feel TOO horrific if you’ve gotten a nap earlier in the day/evening.

Have other Leadville questions? Book a 30-minute consultation with me for just $15.

Beginner’s Travel Guide: Three-Day Weekend in Moab, Utah

Moab is a popular destination for Denverites, Coloradans, and plenty of my other neighbors out west. If you haven’t made a road trip to this desert destination, put it on your list! The only challenge is deciding what sights to see (and resigning yourself to the fact that the town is way less cool than all of the crazy awesome nature surrounding it).

Yes, Moab the town is not my cup of tea. The Main Street is a four-lane highway that isn’t the most pedestrian-friendly. There are long waits to cross the street and lots of traffic noise since there are semis and off-roaders galore driving through. There are huge crowds and a lot of tourist trap restaurants and stores.

But, it’s all worth it for the surroundings. Arches National Park, Canyonlands National Park, Dead Horse Point State Park, and other public lands around the city are all stunningly beautiful. There’s enough to make two weekends out of it – here’s how I’ve spent them myself.

Getting There

If you’re driving from Colorado, make sure to take the scenic route down Highway 128. It only adds about 15 minutes to the drive and you follow the Colorado River for the entire second half of the drive. It’s absolutely gorgeous and 100 times more scenic then taking I-70 the entire way. Take 70 home so that you can save the time on the return trip – it can feel like a long drive back otherwise.

Another hot tip for Coloradans: stop for lunch at the Hot Tomato in Fruita (best pizza ever) and then mosey over to Best Slope Coffee for a caffeine roadie and some snacks to tide you over for the rest of the drive. Once you leave Fruita, you’re kind of also leaving civilization until you get to Moab, so make sure to stop in this funky little town (I’m biased, it’s one of my favorites).

Where to Stay

If you can arrive by mid-day Thursday, you can try to score a free BLM campsite along Highway 128. There are a ton of options, but they fill up quick.

Your non-camping, but still affordable, alternative is the Lazy Lizard Hostel. Billy and I have stayed in one of the cabin rooms (pictured above) as well as the dorm-style rooms in the main house. The hostel is certainly not fancy, but it’s clean and super cheap.

All of the rooms at the hostel have shared bathrooms, but they’ve all got hot showers and are shockingly hair-free considering how many people go in and out of them. There are also plenty of hotel options, they’re just super expensive.

When to Go

Spring and fall are the best times to go to beat the heat and the crowds. It is sweltering in the summer in Moab, plus the parks are even more crowded since everyone is on summer vacation.

I’ve gone twice in late March and had beautiful weather and empty trails both times. I like going in the spring because it’s typically warmer than Denver during the day and gives me a little preview of summer when I’m super tired of chilly weather at home.

Day 1: Friday

After arriving to town, grab a quick dinner at the Food Truck food court that’s right downtown. Parking is…a mess so don’t even attempt to get into the parking lot that backs up to the food truck area. Just find street parking on a nearby street, even if you have to walk a few blocks. Moab is flat, so you’ll be fine!

Catch the sunset at either Canyonlands National Park or Dead Horse Point State Park. Make sure to pack layers (it gets surprisingly windy and cold!) and a headlamp, flashlight, or your phone to make your way back to the car safely.

Both parks are about a 45-minute drive outside of town. Billy and I got to town at 5, grabbed dinner at the food trucks, and then went straight to Dead Horse Point to make the 7:40 sunset. This left us about 30 minutes to walk around before staking out our spot for sunset. Here’s my trail guide >>

Sunset at Canyonlands

If you go to Canyonlands (Island in the Sky is the name of this region of the park), you’ll be almost totally alone, which some people prefer. Drive through Canyonlands until you get to the Grand View trailhead. There isn’t a bad spot, so wander around on the trail until you find a rock to sit on that’s facing west.

If you’re comfortable staying until it’s dark, the stargazing at Canyonlands is unreal. Just make sure you download a stargazing app before you leave town so you know what you’re looking at!

Day 2: Saturday

For First-Timers

If it’s your first time visiting Moab, start at Arches National Park and do the Devils Garden hike (trail guide here).

Double O Arch at the end of Devils Garden Trail.

You’ll want to get an early start to beat the heat and the crowds, and there are no quick options for breakfast in Moab (even the McDonalds is pretty slow). You’ve got access to a kitchen at Lazy Lizard, so pick up a few staples at the grocery store on your way into town. To be honest, I normally just get Pop Tarts to eat on the way to the trail. #vacation

For Trail Runners

Get a run in on beautiful desert single track at the Pipe Dream trail just outside of town. You’ve got rolling hills (okay, there are a few big ones), views of the mountains, panoramas of the town and the desert, and you can choose your own adventure. The trail goes for just over nine miles, so go for as long as you want and turn back for home when you’re ready for lunch.

In heaven on Pipe Dream!

After a shower and a nap, head out to dinner at Arches Thai. This is my favorite dinner spot in Moab – and yes, I know, it seems random for a good Thai place to be in this small little town in the middle of this giant state of white people. But trust me!

For Return Visitors or If You Have 4 Days

If you’ve already been to Moab, or if you have four days, make the drive to the lesser-visited Needles area of Canyonlands National Park. It’s an hour and a half south of Moab and a really unique landscape. The drive is beautiful and easy, and you have your pick of tons of beginner-friendly trails. Here’s my beginner-friendly guide >>

The Needles area of Canyonlands is like a trip to Mars…and I mean that in the coolest way possible.

For Sunset

No matter where you spent the day, if you’re feeling up for another trip out to a park for sunset, go to Arches (yes, even if you’ve already been there). Delicate Arch is a complete zoo at sunset, but the Windows Loop Trail is less crowded and you see multiple different arches that still make good photo ops!

The view from the top of the Window Loop trail in Arches National Park at sunset.

Day 3: Sunday

Before you head home, grab breakfast at Elektra’s. Just be ready to wait! It’s a small little cafe on your way out of town with plenty of yummy options and a fun local feel.

If you’re feeling super ambitious, you can get up at the crack of dawn to do sunrise at Mesa Arch in Canyonlands National Park. However, I’ve never had it in me to get up that early and also be with hundreds of my best friends.

After breakfast, it’s time to head back to reality (unfortunately). While the tourist trap-ness of the town is less appealing, to me it’s worth dealing with for everything that surrounds it. If you can swing four days, make sure to hit all of the spots I’ve mentioned. If not, just make sure you go back!

Beginner’s Trail Guide: Needles Area of Canyonlands National Park

If you’re making a return to trip to Moab, I highly recommend blocking off a day to go to the Needles Area of Canyonlands National Park.

Needles is a totally different landscape than what you see at Islands in the Sky (the main section of Canyonlands) or at Arches National Park, two of the more popular destinations in the area. Since Needles also is much further from town, it’s way less busy.

Because of the longer drive, the trip is only worth it if you also want to hike for a few hours. I recommend hiking part of the trail to Druid Arch, but there are also options for combining a bunch of overlooks or loops less than a mile.

How do I get there?

Needles is an hour and a half drive south of the town of Moab. There’s one rest stop along the way, but otherwise it’s very remote with almost no services. Unsurprisingly, the scenery is stunning, so make sure to switch drivers on the way home so everyone can get the views.

There’s a general store right at the park boundary, but it was closed the day that we went (a Saturday during spring time). It wasn’t clear when it is actually open, so don’t plan on it!

The drive to all the overlooks is on paved roads, but if you want to hike part of the way to Druid Arch, you do have to drive on an unpaved, narrow, windy road. It’s not super rocky or anything that needs four-wheel drive. If you get carsick easily, you may feel a little nauseous.

Where do I go?

The hike to Druid Arch leaves from the Elephant Hill trailhead. But first, drive to the Big Spring Canyon Overlook (stop at the Wooden Shoe Overlook on the way).

wooden shoe overlook rock formation beginner hiking needles canyonlands
The Wooden Shoe! It’s discrete. But worth the two-second stopover.

The entire hike to Druid Arch is 11 miles round-trip, which I didn’t want to get into, so we just planned to hike the trail until we wanted to turn around. The trail has the “needle” rock formations that the area of the park is named for, plus a lot of other red rock formations that are really beautiful and interesting.

But, if you don’t want to drive on an unpaved road or drive as far as Elephant Hill (it’s three miles on a dirt, windy road so it does take a while) there are shorter options.

You can do the .6-mile loop at the Big Spring Canyon Overlook and/or the Cave Springs loop on your way back out of the park. That loop is also just over half a mile total. The park website says ladders are involved, but we didn’t make it that far down the trail so I’m not sure what that actually entails. You can also stop in at the visitors center to get some ranger recommendations!

If you only go to the Big Spring Canyon Overlook, you won’t be disappointed.

What is the trail like?

Assuming you start the hike to Druid Hill, it’s steep at first before becoming much more rolling. I was having an especially bad day of morning/all-day sickness thanks to being in my first trimester of pregnancy, so I was admittedly on the struggle bus for the first 15-20 minutes of the hike because of how steep it was. I was glad that I brought hiking poles and also glad that the trail evened out shortly after that!

The trail itself is a mix of dirt and slick rock, which is what the red rock is called. It’s not actually slick (assuming it’s not currently raining) but it does make it harder to tell where the trail goes. Since it’s not as obvious, you do have to pay close attention to where you’re going. Be on the lookout for little piles of rocks, called cairns.

druid arch elephant hill beginner trail guide hiking canyonlands needs alrea
Billy (dark blob at the top of the photo between the two shrubs) is ahead of me on the trail. The tiny pile of rocks in the middle of the photo is a cairn marking where to go. So yeah. Not super obvious.

Since we weren’t doing the entire trail, I was worried we wouldn’t get to see any of the good stuff. I was totally wrong. You go through a bunch of different landscapes – starting out, it feels kind of like you’re on Mars. Later on, you walk through some wide-open areas with cacti and views of the “needles” rock formations. There were also some rocky canyons to scramble through (nothing too difficult though, just a fun adventure!).

We turned around just after going through the smaller canyon pictured below. The trail got really difficult to figure out after that point, so it was a great time to turn around! Just get a photo op first.

Almost to the turnaround point. I’m fairly petite and could still reach my arms out a little bit when we walked through. It’s a very short little slot to get through, so you shouldn’t have to worry about getting claustrophobic.
druid arch elephant hill hike canyonlands national park beginner guide
We legitimately couldn’t figure out where to go beyond this point, so we just turned around instead. Obviously, there are enough people around that you can ask someone to take your picture (which I like).

What should I wear and bring?

LOTS of water. There’s a place to fill up your reservoir or water bottle at the Visitors Center. Even in the springtime (the best time to go), it’s very easy to get dehydrated.

Most of the trail is in the sun, so make sure to slather yourself in sunblock, wear sunglasses, and throw on a hat.

I also highly recommend layers in the springtime. The days are deceptively chilly, even when they’re sunny! I was in pants and long sleeves the whole time, but was happy to start out with a beanie and light jacket on top of that. For the record, Billy thought this much clothing was totally overkill.

I wore trail running sneakers and was totally fine, but saw a lot of hikers in boots, so it’s up to you! Just wear something supportive and grippy since there are a lot of uneven surfaces. Here’s my complete guide to what to wear hiking >>

Since you can’t depend on that general store being open, make sure to bring plenty of food with you. You’ll have three hours of just driving, plus however long you hike for. I was ready for lunch by the time we got back to the car, so I was very grateful that we overpacked when it came to food (and, let’s be real, everything else). Those PB+J supplies came in extremely handy!

Here’s my list of what to bring on any hike >>

Is it crowded?

Spring is one of the most popular times to go to the Moab area, so you won’t be by yourself, but Needles is certainly less crowded than Arches or the Islands in the Sky part of Canyonlands.

The trail to Druid Arch is one of the more popular options at Needles, so it was a little crowded at the beginning of the hike, but then everyone spread out and we only saw people every 20 minutes or so. For me, this was ideal. I like to see people every once in a while so that I know if I were to break my leg, someone would run across me fairly quickly. Plus, you can always find someone to take your picture!

The trailhead is also the starting point for an off-road route. When we first parked, we saw about 10 Jeeps headed up an adjacent trail which was noisy, but ultimately didn’t affect our hike.

Anything else I should know?

Go in spring or fall if you can. The summer is just insanely hot and not pleasant, plus you run a much higher risk of dehydration (and just having a bad time). We went the last weekend in March and the weather was perfect.

We didn’t see any wildlife, but I was surprised to learn that this part of Utah is still bear country. It’s highly unlikely you’ll see one, but the Canyonlands website has good information about what to do if you do.

Make sure you pull over at Newspaper Rock on your way back to Moab. It’s an amazing place to see carvings of petroglyphs, and it’s right off the road!

Needles is well worth the drive if you have, but if it’s your first time in Moab, save it for when you come back. Start at Islands in the Sky and go to Arches for your first trip, and do Dead Horse Point State Park and Needles for your second time out.

Beginner’s Trail Guide: Sunset Hike at Dead Horse Point State Park

Arches National Park may get all the love for sunsets in Moab, but I’d much rather watch the sun go down over the jaw-dropping canyons of Dead Horse Point State Park.

The cheery name has just about as cheerful of a story behind it, but don’t let that keep you from going! The west side of the Rim Trail has a bunch of gorgeous overlooks or you can watch the sunset from the main overlook at Dead Horse Point. This is the most beginner-friendly option, not because the Rim Trail is particularly demanding – it’s just hard to keep track of at times!

How do I get there?

Dead Horse Point is a 40-minute drive outside of Moab, but in the busy spring season (the best time to go, weather-wise) it could take you a bit longer. We arrived in town around 5 p.m., quickly grabbed dinner to go from the food trucks downtown, and headed right back out to Dead Horse to make the 7:40 p.m. sunset.

The drive is easy to do with any car. The entire way is paved, and the only obstacle you may encounter are the free range cattle – just make sure to obey speed limits and be prepared to stop!

If you stay to watch the entire sunset, you will be driving back in the dark and there are absolutely no streetlights. If you’re uncomfortable driving at night, just leave at least 30 minutes before sunset and you’ll be fine. The overlook for the sunset itself is right at the parking lot, so there’s no hiking back in the dark.

Where do I go?

There’s only one road through the park, which makes it pretty difficult to get lost. The road dead ends at the parking lot at the Dead Horse Point overlook, so it’s also difficult to miss that. The West Rim Trail leaves from this parking lot.

The trail is harder to find, however, because it’s not particularly well-marked. The sidewalk to the overlook and the beginning of the trail is kind of hidden behind the bathroom. Follow the sidewalk to the bathroom, keep walking past the bathroom, and on the right you’ll see the overlook as well as the trail that takes you along the western rim of the canyon.

There are these handy signs periodically along the trail!

What is the trail like?

If you’re just sticking to the overlook, the path around it is completely paved. The West Rim trail is mostly sandy dirt or slick rock. Slick rock isn’t actually slick unless it’s raining; it’s just what people call the red rock you’re walking on top of.

The Rim Trail itself is very flat, so it’s beginner-friendly from an effort standpoint. But, it requires a lot of work and paying close attention to stay on the trail. In the desert, everything is the same orange color. It’s pretty, but harder to keep track of the trail. It’s not as obvious as hiking in the woods where it’s easy to tell where the brown strip of dirt is taking you.

This is as “hilly” as it gets. But as you can tell, it’s not super easy to see where the trail leads. This was about as obvious as it got.

There aren’t signs pointing you along the trail (except at the overlook points), so you have to look for little piles of rocks called cairns to tell you where to go:

what is a cairn desert beginner friendly moab hiking dead horse point state park
I’m pointing down at a cairn. Beyond it, in the upper right-hand corner, you can see another one (just barely). That’s how you tell where to go on several parts of the trail.

Fortunately, you’re not far from the road or a parking lot at any point, so it’s hard to get *too* lost. If you wander off the trail, you’ll either end up at the edge of the canyon rim or on the road.

We hiked for about 1.5 miles total without getting lost, but for a first-timer, it could be a little intimidating. You can always just stick to the overlook!

What should I wear and bring?

Tons of water! This goes without saying any time you’re in Moab, even if the weather isn’t that hot. There’s a fountain to fill up your water bottle at the visitor’s center (you’ll pass it on the way to the overlook) if you’re running out by the time you get to the park.

The wind in Moab makes it deceptively cold – even when it’s in the upper 50s, I’m pretty bundled up. Once the sun starts going down, it cools off very quickly. I wore winter running tights and a long-sleeved, toasty fleece to hike and added a beanie and my puffy jacket to watch the sunset.

I wore trail running sneakers, which were totally fine for the trail. You’re in the desert, so it’s obviously pretty dry. It’s very fashionable in Moab to wear Chacos or Tevas or some other outdoorsy sandals, but they just aren’t for me. If you like them, get after it!

For more information on what you should bring hiking no matter what trail you’re on, read my previous post here.

Is it crowded?

In the spring, which is my favorite time to go, we shared the sunset with about 20 other people. That may sound like a lot, but it’s nothing compared to Arches National Park. I still felt like I could enjoy the park’s solitude and natural beauty even though we weren’t totally alone. It definitely felt less touristy and crowded than Arches, and very few people were hiking the rim trail before sunset.

The crowds are comparable to Canyonlands, which is just down the road. We’ve also done sunset there and it’s another great option!

Anything else I should know?

Hiking around the western side of the rim is the more scenic side, but the eastern side (even if you just go to the other side of the parking lot) also has stunning views of the La Sal Mountains.

I didn’t see a single animal the entire time we were in the park, but it’s surrounded by open range, so you’ll likely see some cattle on your drive back to the main highway that takes you back to Moab. Rattlesnakes live in the desert, so always keep an eye out for where you’re stepping (just in case!) and don’t go digging in any rock piles.

sunset over deadhorse point state park
Sun setting over the canyon, as seen from the main overlook on the West Rim.

Beginner’s guide to hiking on a glacier in Alaska

Glacier-related activities are one of the main reasons to go to Alaska, and the absolute highlight of our trip was actually hiking on one. We signed up for MICA Guides‘ Advanced Trek on Matanuska Glacier north east of Anchorage, and despite the name, the only experience you need is a healthy sense of adventure. Time is running out (thanks global warming) to hike on the glacier, so if you’re thinking about a trip to Alaska, make it happen and go with MICA!

What does hiking on a glacier entail?

Walking around on a glacier does require equipment and expertise, but that’s why you go with a guide! MICA (pronounced Mike-uh) provided ice picks (although if you’re preggo they won’t let you carry one lest you trip and stab yourself), helmets, harnesses, and crampons (giant spikes to put over the bottom of your hiking boots) plus all the climbing equipment (ropes, etc) that was needed.

The hike approaching (and partially on) the glacier.

As you may have guessed, that means there is some climbing involved, but again, your guide is an expert. I’d been rock climbing once and ice climbing once, so I at least had an idea of what to do, but my husband had never done either and was totally fine.

The only climbing we did was up (and then back down) a small wall of ice. Going up wasn’t too difficult – I was pregnant and did it pretty quickly. Billy got to use an ice ax so that certainly makes the ascent easier! I did get really nervous having to descend back down, but Lacey talked me down (literally). Both up and down only takes a few minutes – it actually took way longer for Lacey to set up all the rope to belay us safely (which she’s doing, so there’s no way to fall!).

At no point are you teetering on the edge of some massive crevasse. Our guide Lacey took safety super seriously and always scouted out our route ahead of us before we proceeded as a group.

Basically, you hike out to the glacier, put on your crampons, hike around on the glacier as much or as little as you want, and then turn back for home. The Advanced Trek we did was kind of a build-your-own adventure trip. We were ultimately out for three and a half hours and covered just over five miles, but if you want to do less, that’s absolutely an option. This was my Big Activity for the trip that I was most looking forward to, so I went into it wanting to push myself to experience as much as possible.

My legs were VERY tired afterward, but your guide teaches you everything you need to know to actually do the trek. No experience necessary!

Lacey teaching me how to walk in crampons downhill to maintain traction and control my momentum. She was phenomenal!

Why did you want to go hiking on a glacier?

You experience a totally different side of the glaciers – you’re up close and personal, not far away like you are on a kayaking trip or cruise. Those are still amazing options, but I wanted something uniquely Alaska, and this definitely delivered.

I’m not a huge geology nerd, but I still absolutely loved finding out all the different characteristics and parts of the glacier. We got to see this crazy beautiful lake in the middle of the glacier, big ice walls, rushing melting water that formed little rivers under the ice, and all kinds of unique things. All surrounded by huge, lush mountains. What’s not to love?

Not something you see everyday.

Another good reason to go is that glaciers are melting, so you literally won’t be able to see them in the future. In just another few years, it won’t be safe to hike on Matanuska Glacier.

However, glaciers also naturally change all the time. So the insanely cool lake we saw during our trek? Probably gone in the next few weeks. And plenty of people wander elsewhere and never stumble upon it. Your experience is totally unique to you, and maybe just a few other people who happened to take the exact path you did within a few days of you. Pretty amazing.

What should I wear and bring?

Hiking boots. But MICA can provide those for you if you don’t have them. It’s not comfortable to put crampons over boots that don’t cover your ankle, so this isn’t negotiable.

Definitely make sure to have a windproof layer like a raincoat or winter jacket because it will be rainy or windy or both at some point. The glare off the ice is also pretty intense, so bring a baseball hat and wear sunglasses.

Long pants are also a must, and I wore hiking pants because they were my most comfortable option. Normally, I don’t advocate for buying new stuff unless you absolutely have to. But if you’re splurging on a trip to Alaska, you might as well also get some hiking pants and be super comfortable. Whatever fits you that you like is your best option – the one pair I liked at REI is now discontinued. Kuhl gifted me this pair and they are great hiking pants! I love that they have a drawstring at the waist to customize the fit of the pants. They also have tons of functional pockets!

Bring a meal to eat for lunch, plus a few snacks. You’re burning a lot of calories and you will get hungry. Fortunately, if you don’t bring enough, or if a random pregnancy craving for Cheetos strikes, you can get some snacks from the MICA office (actually a yurt). MICA also has a little coffee shop on-site if you need a morning pick-me-up.

Bring plenty of water as well – I brought a liter and drank almost all of it. You can pee on the glacier, but you can’t poop on it, so plan ahead 😉 There’s a bathroom at MICA with running water and a port-o-potty at the trailhead for the glacier.

Lodging and dining recommendations

We stayed at Alpenglow right next door, which is a very cool glamping experience that I highly recommend. We didn’t want to drive all the way back to Anchorage all in one day (we were EXHAUSTED after our trek) and glamping sounded intriguing.

Alpenglow was way cooler than staying at a lodge nearby thanks to beautiful views of the glacier and surrounding valley, complimentary check-in beer, yummy breakfast, and a hot tub! There are also lawn games and a fire pit to just hang out. We (I) was too exhausted to do that, and it was kind of rainy and cold still in May.

I was very nervous about being cold overnight because the tents don’t have heat. I don’t know what magical material the bedding is made out of, but we stayed toasty warm even with the weather in the 40s. I slept in a t-shirt and shorts!

Before settling in for the night, satiate your hunger at the Sheep Mountain Lodge. We followed our guide Lacey’s advice and she was spot on – don’t miss the berry crisp! You can pay to shower here if you want to, but we decided to stay grubby and head back to glamping after stuffing ourselves for dinner. The entire Matanuska Valley is stunningly beautiful, so the lodge is worth it for the drive and berry crisp alone.

Everything you could possibly want after a big day of hiking.

Overall, you don’t need any experience for this must-do Alaskan experience. You just need a sense of adventure! If you do one thing while you’re in Alaska, make it a trek on Matanuska (or any) Glacier and go with MICA Guides.