Beginner’s Trail Guide: Grewingk Glacier Lake in ​Kachemak Bay State Park

This six-mile trek around Kachemak Bay State Park was the most ambitious hike of my Alaska trip. But, it wasn’t as nearly as strenuous as I thought it would be thanks to the trail being almost completely flat except for the last mile.

You can do a slightly shorter hike by only hiking to Grewingk Glacier Lake and then coming back to where you started. We decided to continue on the Saddle Trail after Glacier Lake to a different endpoint. If you’re up for it, I do recommend the full six-mile route because it’s beautiful and the Saddle Trail is entirely different than the first part of the hike.

Purchase a detailed 11-day itinerary with:

  • Guided excursions
  • Beginner-friendly trails
  • Dining and lodging options
  • Packing list and more!

The whole 6.1-mile hike, plus an extended lunch break, took Billy and me three and a half hours. The most intimidating part of the hike was its location, not the trail itself, since like I said it’s surprisingly flat.

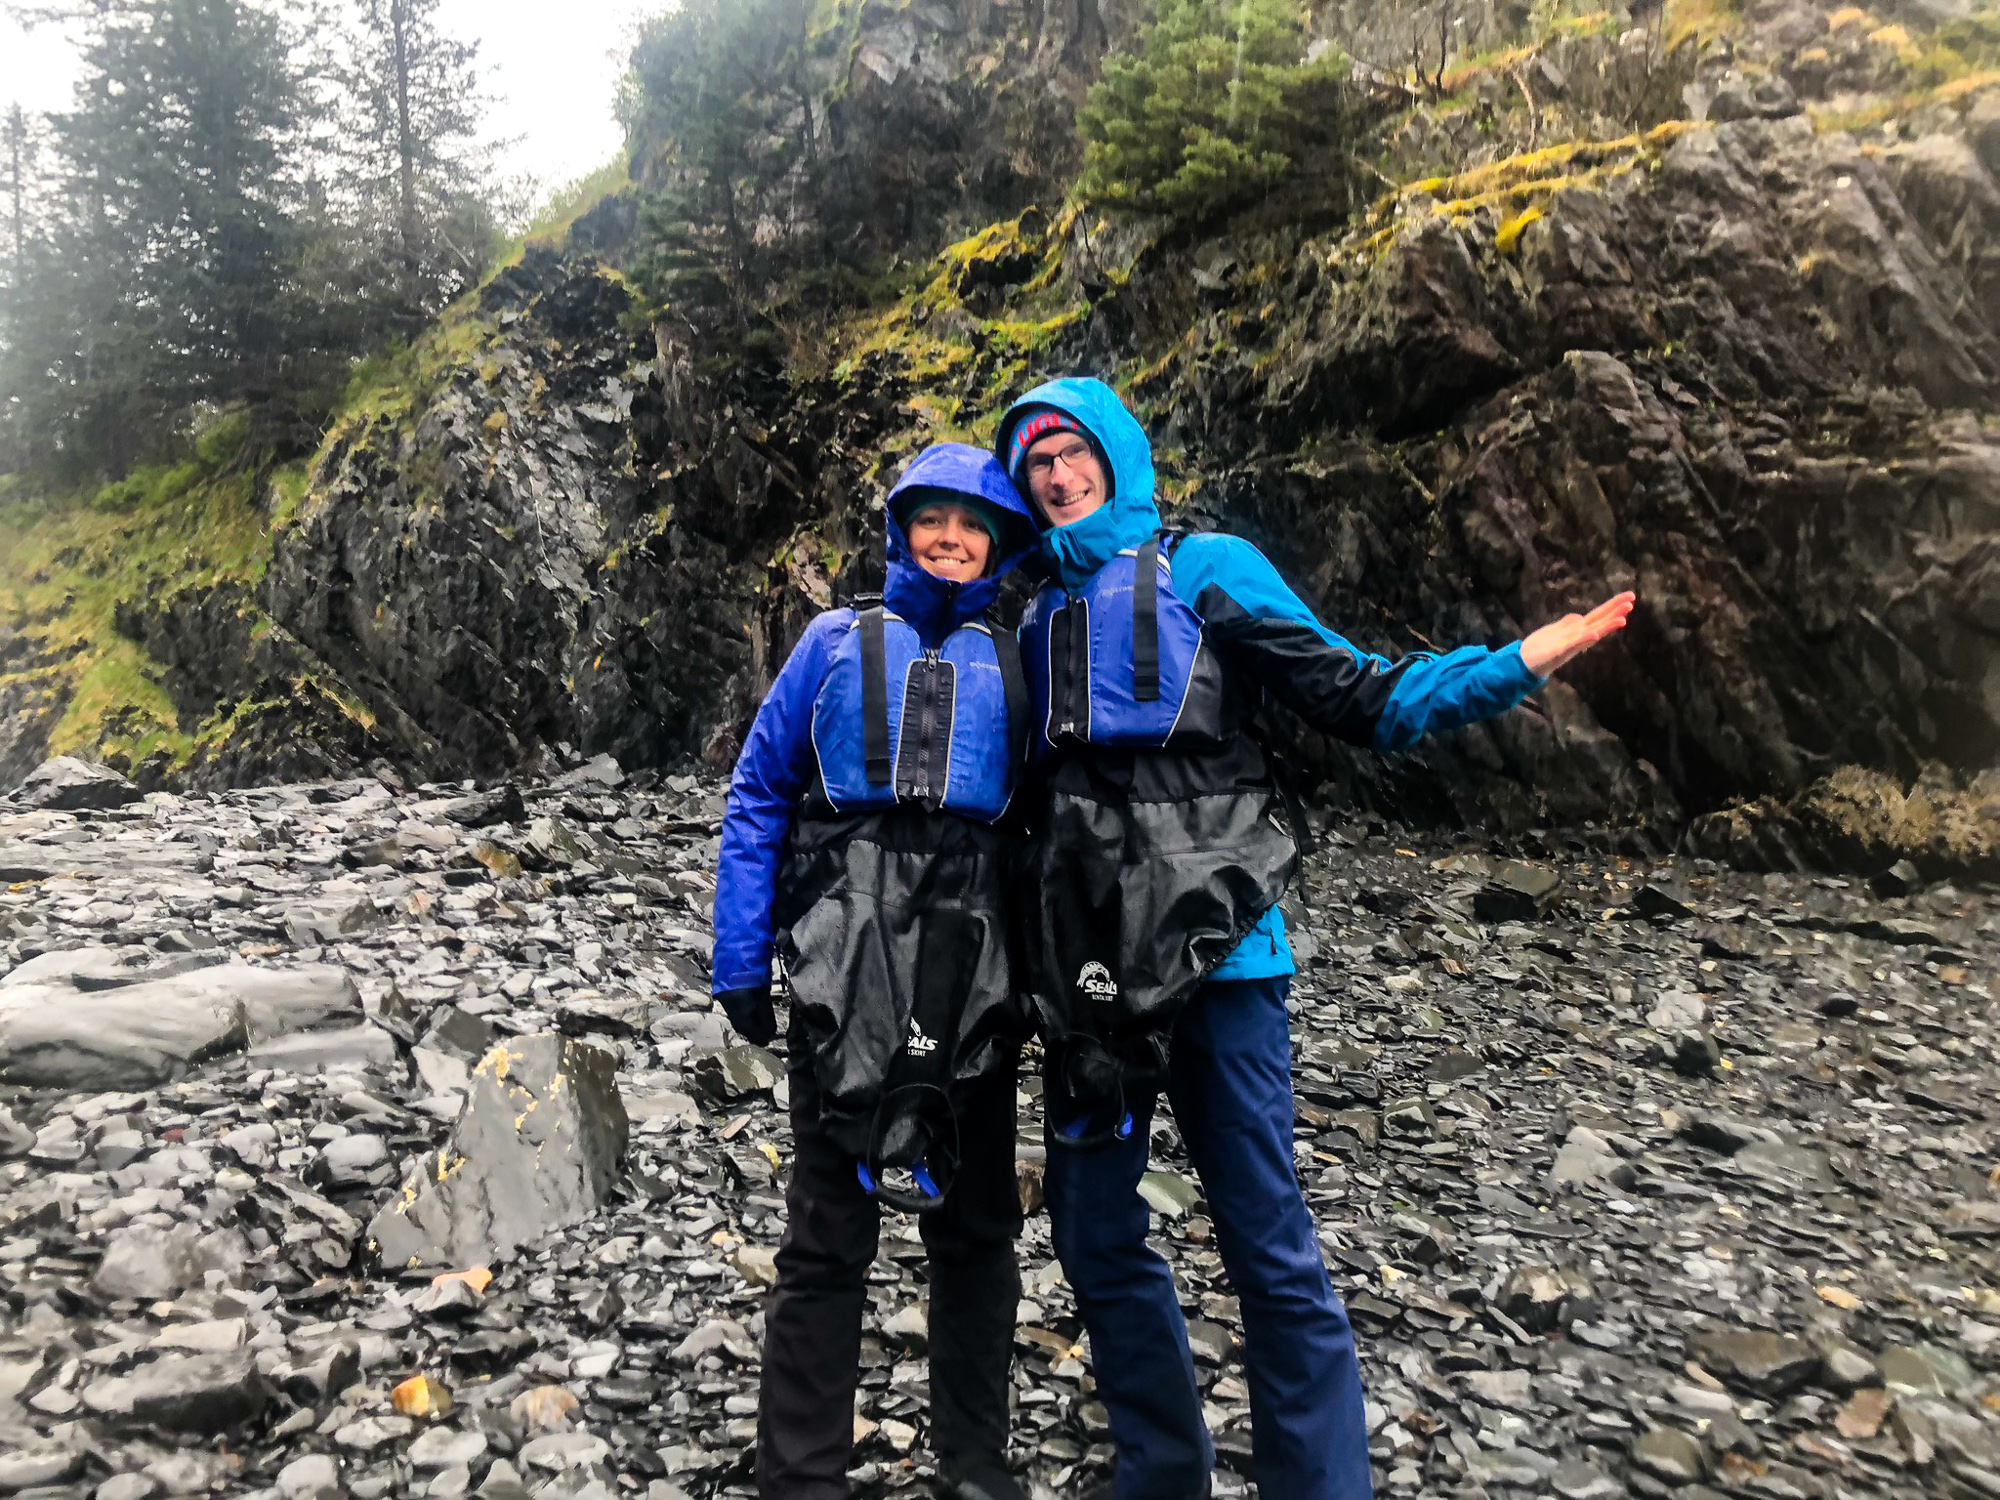
The nerve-wracking part is getting dropped off on a beach by a water taxi and then just saying “see you later at a different spot!” while you hike through a park with no civilization. That was the biggest leap out of my comfort zone, but I’m so glad I did it because the hike was a trip highlight!

kachemak bay state park homer alaska beginner friendly hiking
This is your final overlook at Halibut Cove when you are almost done on the Saddle Trail.

How do I get there?

Via water taxi from the Homer Spit. This is the expensive part of the hike. Round trip, we paid about $70 in 2019 for both of us to get picked up and dropped off. That also includes the state park fee for the two of us. So while technically it’s not that expensive if you consider everything that’s included, I initially had sticker shock.

Taking a water taxi also seemed logistically intimidating, but it actually turned out to be really easy. The night before our hike, we drove over to Mako’s Water Taxi to book our tickets. The staff was super helpful and friendly.

You can kind of pick your pick-up and drop-off times, but they’re trying to make their trips across the bay as efficient as possible, so they may not be perfectly aligned to your schedule. We had to wait about 30 minutes at the end of our hike before we got picked up, but we just relaxed on the beach, watched sea otters play, and snacked. It was actually quite delightful.

The water taxi dropped us off at the beach for the Glacier Lake trailhead and picked us up at the Saddle Trail trailhead in Halibut Cove. This is a pretty common route, and recommended because it’s steep getting up/down from the Saddle Trail trailhead and most people (including me) would rather walk down it than slog up it.

Looking very excited to be getting dropped off on a remote beach. This is the trailhead for the Glacier Lake trail.

Where do I go?

Once you get dropped off on the beach, you just walk until you see the bright orange triangles denoting the beginning of the trail. This was the first time I got a little anxious about there not being a highly-structured way of doing things. I kept thinking, “But what if we miss the sign? Why don’t they just drop you off right at the sign? How do I know if it’s the right sign?!” etc etc. Right around the time I was worried we had gone too far and missed it, we saw the (very obvious) sign to start the trail.

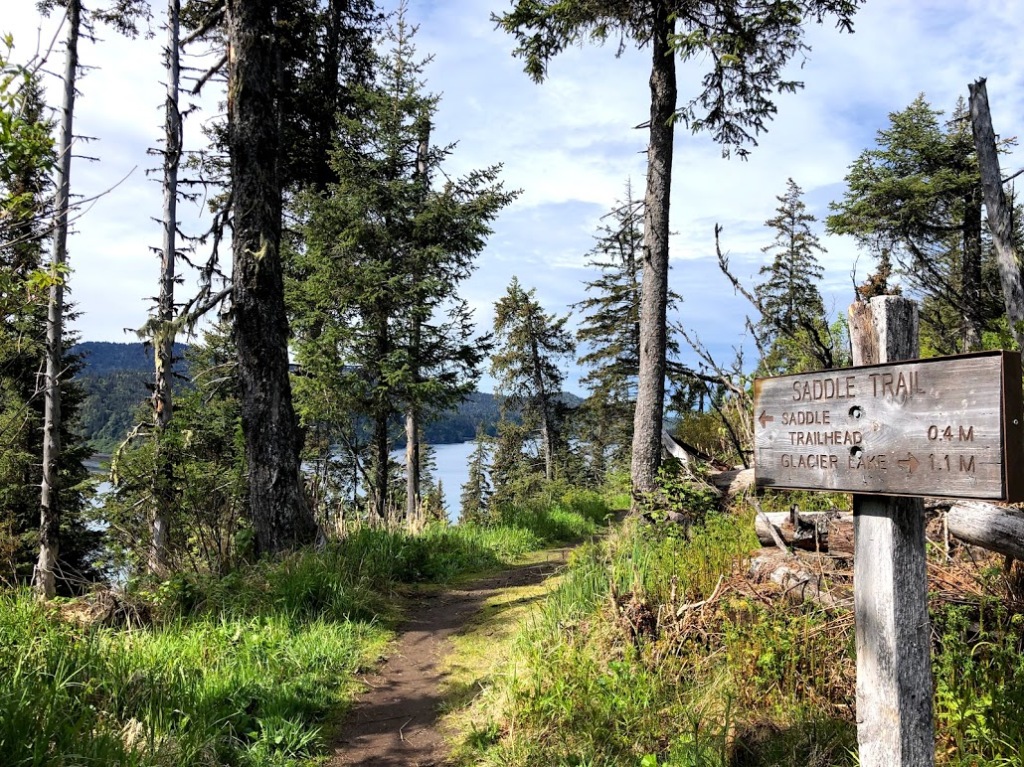
The entire trail was very straight-forward and surprisingly well marked considering how remote it is. There’s one option from the beach, and every junction had a sign telling you which way to go.

Everyone’s attitude about the outdoors in Alaska is fairly informal. The hike is “about” this many miles, just look for the orange triangle, you get picked up and dropped off on a random beach, don’t worry! This initially made me really nervous because I like to have ALL THE EXACT INFORMATION when I’m doing something out of my comfort zone. But it really did all work out easily and my anxiety was (shocker!) unfounded.

What is the trail like?

The first part of the Glacier Lake Trail starts in the forest on nice, wide dirt trails. Then it turns to a pebble/rocky trail and opens up for most of your walk to the lake. Had it been sunny, this would’ve been very hot. Mostly, it just got a little monotonous until we got to Grewingk Glacier (which was well worth it).

Something about walking on these pebbles made it feel like it was taking forever!

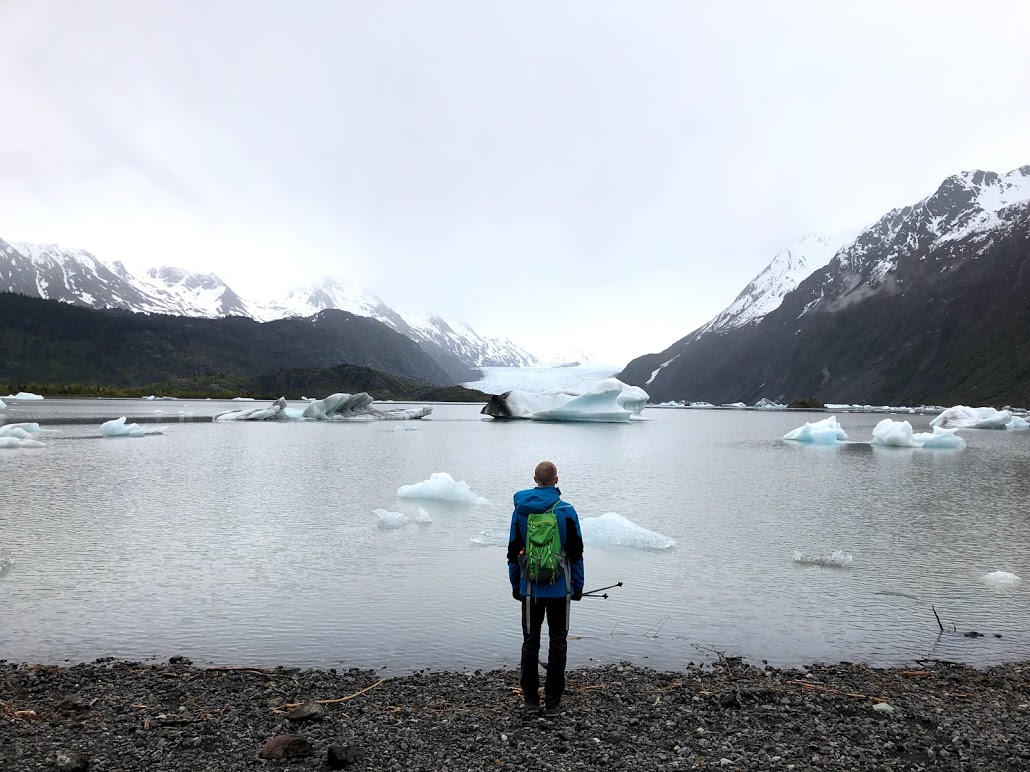
The glacier lake is super cool, with a bunch of little icebergs and obviously the glacier to ogle at over lunch. The glacier is at the opposite end of the lake from you, so you’re not super close, but it’s still very beautiful. The beach itself is rocky, so be careful if it starts raining because it will get slippery.

Once you get on the Saddle Trail, the scenery changes pretty quickly back into the enchanted forest-type experience you had at the beginning. The trail gets a little more narrow and there are more roots sticking up, so just make sure to pay attention.

Your final turn-off before you start going down.

The descent down to the beach on the Saddle Trail is steep, and I was really glad to have hiking poles for this section. It wasn’t rocky or otherwise technical, but the poles helped me feel like I could control my momentum a little better. There is a short flight of stairs at the end of the descent, which are very steep and made me a little vertigo-ey for a second, but again, the poles helped here. Plus, it was only a few dozen stairs. The picture in the water taxi office made it look WAY worse.

Totally doable!

What should I wear and bring?

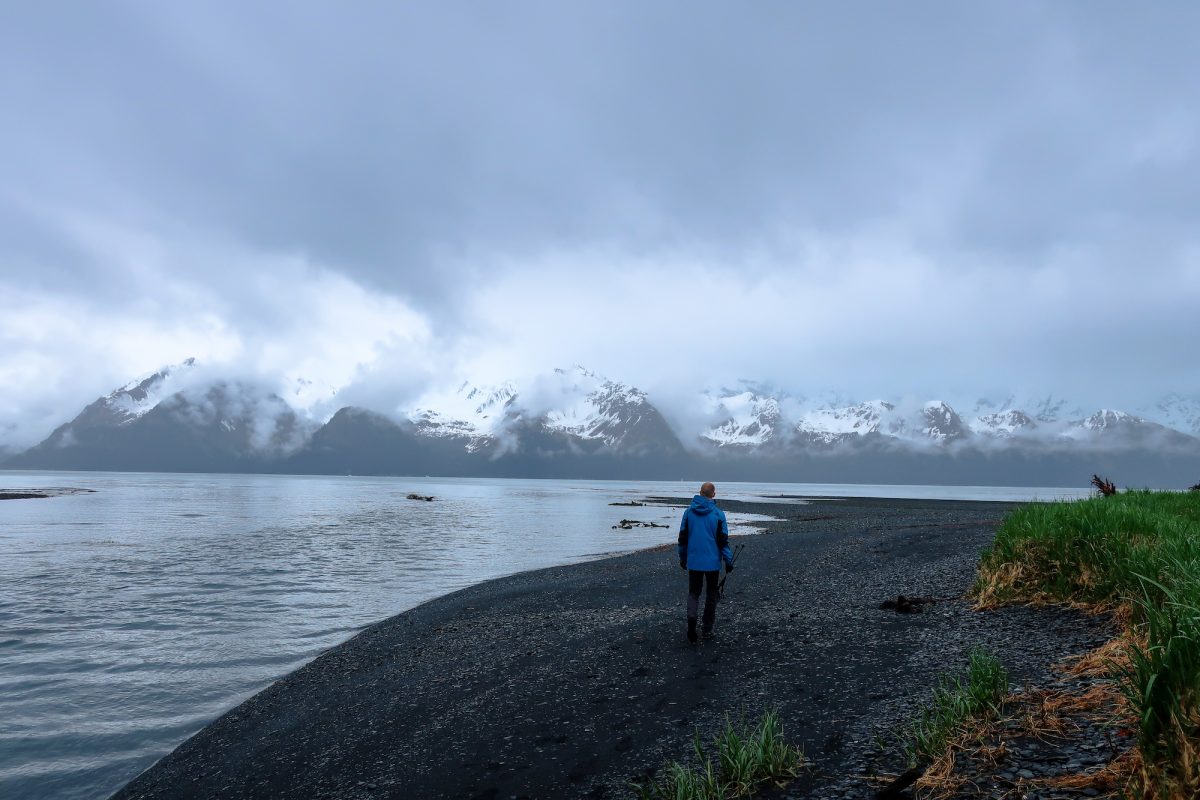
We had a cloudy start that turned into a beautiful, clear day with temperatures in the lower 50s in late May. I run cold, so I wore a long-sleeve shirt, hoodie, and windbreaker with long pants.

I ended up getting VERY hot on the Saddle Trail, since the sun came out and we did have to walk uphill for a little while. But if I had dressed any lighter, I would have been freezing sitting at the glacier lake for lunch. As with every hike in Alaska, dress in layers! And as usual, I wore hiking boots and was glad to have them; Billy wore trail runners and was happy in those. It’s personal preference since it wasn’t very wet.

Bring a meal with you to eat at the glacier and plenty of water to keep you hydrated throughout the day. My go-to combination is a PB+J, apple, and beef jerky. Also, don’t forget your bear spray. Our AirBnb host had some we could borrow – that’s the most convenient option if available since you likely won’t use it and you can’t bring it back on the plane. You’re kind of on your own out there (see the next section) so make sure to bring a first aid kit, too.

Binoculars came in super handy for our entire trip to Alaska, and I was really glad to have them with us again on this trail. We saw a bear (more on that later) and were able to enjoy the sea otters in Halibut Cove thanks to our binos – without them, we wouldn’t have seen any otters and the bear would’ve just been a black blob.

Here’s my list of what to bring on any hike >>

Is it crowded?

In May, it was laughably uncrowded. This was the other beginner-scary part of the hike. There’s a trail log at the trailhead that you fill out in case of emergency, so you know exactly how many people are out there with you.

The day we got dropped off, there was me, Billy, and another guy hiking around. That was it. It was at first kind of unsettling that there was legitimately NO ONE else out there, not even a park ranger. But I knew we had all the supplies we needed and that the water taxi company obviously wouldn’t be in business if they regularly left people stranded at the state park, so I eventually started to enjoy it and not feel so nervous.

Hanging out on the beach, just the two of us, waiting for the water taxi.

We were totally alone until we saw one other group of people once we got on the Saddle Trail who must have started on that side of the park. Then were by ourselves again until the water taxi picked us up. I was pleasantly surprised that I really got into the solitude and enjoyed it. The entire day was definitely out of my comfort zone, but felt like a great step forward for calming my nerves and feeling more comfortable in the outdoors. (Going to Yellowstone first and working through a lot of bear anxiety then may have helped me feel better on this trip)

Anything else I should know?

I know I buried the lede on this one, but we also saw a bear. When you arrive at the lake, there is a fairly long beach you can walk down and find a spot for lunch. Once we were done exploring and turned around, we saw a rather large blob that was (naturally) blocking the trail back.

After observing from a distance for a while (thank you binoculars!) we realized we didn’t want to get stuck on the beach or have the bear come toward us since there wasn’t a way for us to get out of the bear’s way in that scenario.

I had already been singing and shouting and making a ton of noise on the first part of our hike to help ease my anxiety about running into a bear. Billy and I reached an absurd new volume at this point, screeching at the top of our lungs as we walked back up the beach.

Unfortunately, we couldn’t keep an eye on the bear the entire time because of the curve of the beach. By the time we reached the spot we knew the bear had been, it was gone. I didn’t *want* to see the bear up close, but I would have liked to know just where it went.

We continued scream-singing and made our way back to the main trail, where we quieted down and didn’t see or hear the bear (or any other wildlife) again.

All of this is to say is that if you’re on a trail in Alaska and there’s not many people around, you might see a bear. But it’s going to be okay. They don’t really want to hang out with humans, and if you make a lot of noise, they’ll know you’re coming and won’t be surprised (which is where things typically go awry). Don’t let it stop you from getting out there!

Purchase a detailed 11-day itinerary with:

  • Guided excursions
  • Beginner-friendly trails
  • Dining and lodging options
  • Packing list and more!

Beginner’s Trail Guide: Exit Glacier in Kenai Fjords National Park

The three-mile round trip hike to Exit Glacier was the most beginner-friendly trek I did during our road trip to Alaska. And don’t worry, beginner-friendly doesn’t mean you lose out on panoramic mountain views and an up-close look at a big ol’ glacier.

The entire hike took me just over an hour, with plenty of photo op stops and breaks to take a breather. Most of the trail is flat (the first half is paved) and there’s really only one steep-ish hill. I hiked it three months preggo and it was definitely the most manageable (pregnancy hack: just use hiking poles all the time) of the hikes we did in Alaska.

Purchase a detailed 11-day itinerary with:

  • Guided excursions
  • Beginner-friendly trails
  • Dining and lodging options
  • Packing list and more!

How do I get there?

Exit Glacier is conveniently located just outside of the town of Seward. It’s inside Kenai Fjords National Park, so you will have to pay a fee to access it (or be prepared to show your national parks pass!).

The drive there is completely flat and all on paved roads (with stunning views, may I add). I recommend stopping for breakfast crepes at Le Barn Appetit. We were in town early in the tourist season (mid-May), and Le Barn Appetit started out being our last ditch attempt at finding a breakfast place that was open (and, I still wanted breakfast at 11 am). It turned out to be a super cute and delicious stop pre-hiking. Word of warning: the crepes are no lie a foot long, so Billy and I split one and were both full at the end of breakfast.

Go for the massive, delicious strawberry rhubarb crepe. Stay for the eccentric owner’s stories about how much he hates Belgium.

After Le Barn Appetit continue on Exit Glacier Road until it dead ends at the national park. It’s pretty much impossible to take a wrong turn; there are a few campgrounds and overlooks along the way, but just stay on the main road and it will dump you right into the main parking lot.

Where do I go?

There’s only one option from the parking lot, so that makes it easy! The Lower Trail leaves from the nature center (which in Mid-may was unfortunately closed) and continues to the base of the glacier (or, at least, where the base of the glacier used to be). Don’t worry, the bathroom at the trailhead is open year-round!

The Harding Ice Field Trail is a more advanced trek that in May was still mostly snowed in. You can always hike up part of it if you’re there later in the summer; it’s supposed to be beautiful!

The Lower Trail turns into gravel after starting out for the first 3/4-mile or so on a wide, paved path. The map at the trailhead makes it look like the glacier overlook is super far away, but it’s about 1.5-miles of mostly flat trail to the overlook. We stayed on the main trail and didn’t take any turns, following the sign for Exit Glacier Overlook.

On the way back, we took an extra little loop by following signs that said they took you to the parking lot. Admittedly, the trail loop names were a little bit confusing and not consistently marked like they are on the map. Besides the Harding Icefield Trail, everything is a loop that will eventually get you back to the parking lot, so you can’t get too lost.

The other half of the loop we ended up taking went down ti the riverbank, which provides another really beautiful view of the surrounding mountains and forest. Plus, the river water is a super weird, milky color that was cool to see up close!

milky grey water forms the river flowing out of exit glacier in kenai fjords national park beginner-friendly hike
I didn’t get the chance to ask the park ranger on duty why the water looks like this, but I assume it has something to do with all the minerals draining out from the glacier as it melts.

What should I wear and bring?

Most of the hike isn’t in the shade, and we happened to have a beautiful, clear day with temperatures in the lower 50s in late May. I run cold, so I wore a long-sleeve shirt, hoodie, and windbreaker with long pants. You won’t work up too much of a sweat on the trail, since like I’ve said, it’s pretty flat. But the wind seems to always be blowing, so I was very glad I was dressed as warmly as I was. I recommend a windbreaker layer on top of whatever you wear.

I wore trail running shoes, and there’s not really any reason you need hiking boots or any waterproof footwear. The one water crossing has a a nice, wide board for you to walk over and half of the hike you’re on the paved path. I even saw one woman doing it in Uggs!

I brought water and food even though the hike was “only” an hour because I was pregnant and eating every four seconds. You’re probably fine not bringing a backpack or much besides your car keys and phone (and a camera and binoculars). But I’m not an expert, so bring what makes you feel comfortable. Here’s a great list that I’ve put together >>

Is it crowded?

A cruise ship bus dropped off about 50 people right as we were on our way out, and it definitely felt crowded with all of them on the trail at once. I imagine it’s much worst in the main tourist season when there are multiple cruise ships in town at once. That’s why we decided to go in May!

Even early in the season, this was one of the more well-traveled hikes that we did, but I never felt annoyed or crowded until we ran into the cruise ship group. I try to remember that everyone’s just experiencing the outdoors in the way that works for them, and we’re all lucky to get to see this crazy cool place in real life!

Anything else I should know?

Exit Glacier is a prime example of why you shouldn’t procrastinate going to Alaska any more than you have to. The park’s interpretative signage does a remarkable job at highlighting how the glacier has changed, and how those changes have accelerated as our climate changes.

For example, I was wondering why they built this fancy seating area with such a crappy view. Then I read the signs nearby that explained that the benches had a perfect view of the glacier when it was built. It’s receded since then, and the forest grew up in its absence. There are also signs throughout the park that mark where the glacier used to be in previous years – the one from 2010 really threw me for a loop.

exit glacier interpretative sign marks where the glacier was in 2010, about a half-mile from where the glacier starts today

Plus, the Exit Glacier Overlook only keeps getting further away every year. The park used to “chase” the glacier by extending the trail as needed, but at this point they’ve decided to stop. The view is still incredible, but changing all the time! If nothing else, make global warming the reason you prioritize going to Alaska for your next big trip.

Purchase a detailed 11-day itinerary with:

  • Guided excursions
  • Beginner-friendly trails
  • Dining and lodging options
  • Packing list and more!

Beginner’s guide to Kenai Fjords National Park kayaking trips

You don’t get many opportunities in life to kayak to a glacier, and it’s hard to know if those Insta-worthy photos you see are something that’s actually doable for beginners. Don’t worry – as long as you can follow basic directions and enjoy being on the water, you can do a kayaking day trip in Alaska.

But what if I have the arm strength of a toddler? Won’t I be freezing cold and wet? Is it really even that cool or just Instagram just make it look that way?

You can still do it. Neoprene is a magical material. And yes, 100% yes, it is really that cool.

(Although, disclaimer, my pictures from the kayak don’t look that cool because it was raining and we only had our phones taking photos through a plastic sleeve to keep them dry).

Which trip did you go on?

We booked a trip in late May with Liquid Adventures, which is based out of Seward.

Purchase a detailed 11-day itinerary with:

  • Guided excursions
  • Beginner-friendly trails
  • Dining and lodging options
  • Packing list and more!

Our trip was the Private Boat Ailiak/Northwestern Kayaking trip. I know you’re wondering, so let me just tell you now: Aialik is pronounced ay-EYE-lick.

“Private Boat” doesn’t mean we had the boat to ourselves. It just means that there is a privately contracted boat (Captain Jess RULES) that takes you out to the area where you actually go kayaking. I mean, we basically had the boat to ourselves because we went early season and there were only two other people booked on our trip (normally they have as many as fourteen).

What does a “day trip” involve?

As the name implies, you will be out for the day. If you’re not going kayaking immediately in Resurrection Bay (or whatever body of water is closest to you), you have to get to your kayaking spot first. Our trip involved a few hours boat trip out to Aialik Bay, kayaking around the bay and up to a glacier (the specific one varies based on weather, we ended up getting dropped off in Holgate Arm and seeing Holgate Glacier), eating lunch at the glacier, and then kayaking back.

Our guides at Liquid Adventures were absolutely fantastic. Erin and Josh were super safety-conscious, very knowledgeable about Seward/glaciers/kayaking in general, and a lot of fun to hang out with for the day.

At first, I thought the two-hour boat ride out to Aialik sounded super boring, but assumed it would be worth it for the kayaking part. Thanks to Josh, Erin, and Captain Jess, we had a great time (plus it was fun getting to know the other two people also on the trip). The not-so-fun part was the stormy seas we had, and I started getting pretty nauseous. Erin gave me some tips that made me feel much better, and Jess kindly gave me a break by pulling behind some barrier islands at one point.

What should I wear?

It rained the entire time during our trip, so I had bundled up in all of my warmest layers with waterproof outer layers. If you don’t have waterproof layers with you, you can borrow some from Liquid – the other two on our trip did that and were very happy with how dry they stayed! Josh and Erin gave us kayak “skirts” to keep the water out of the boats and outfitted us with neoprene mitts to put our hands in while we paddled.

Kayaking FASHION. The things around our waist are the skirts – they attach to the boat to form a seal that keeps all the water out when it’s raining (it rained a lot this day).

I was skeptical as to how much the mitts would make a difference, but they were a game-changer. They kept me nice and warm (and relatively dry) for the several hours we were out kayaking. Since you’re exerting a fair amount of energy while you’re paddling, you stay nice and toasty the whole time.

Do I need to know how to kayak?

I’d been kayaking twice before this, and honestly there’s just not that much to it. Although it’s not rocket science, Erin and Josh gave us a really helpful tutorial before we got started, taught us about the boats, and obviously were there along the way if we needed any help.

They also got everything on and off the boat (this looked like a real pain in the butt so I’m glad they did it). Erin and Josh made sure all of our gear and life jackets were on correctly and overall were super professional. They weren’t going to let anything bad happen to us or do anything that was outside of our capabilities (or lack thereof).

The water is really calm where you’re actually kayaking, so it’s not like you’re contending with waves or even much of a current. The wind will make certain directions a little bit more difficult, but that doesn’t have anything to do with your own skills.

If you’re concerned about getting crushed by a giant piece of ice falling off the glacier, that also isn’t an issue. Big waves and small kayaks don’t mix, so the guides don’t take you any closer than 3/4 of a mile or so from the glacier.

And, worst case scenario, you have a life jacket on! But Josh has been guiding paddle trips for years and said he had never had a client flip a kayak. It would honestly be really hard unless you’re REALLY horsing around.

But about my lack of upper body strength…

I said I was going to workout more and get stronger arms before we went to Alaska, but let’s be real, that didn’t happen. So I was nervous. About five paddles in, my arms were on fire and I was like, “Oh god, what have I done?!” Fortunately, I was in a double kayak with Billy (highly recommend having a stronger person in the rear of your kayak) so he could pick up my slack.

At first, we were trailing the others and I was starting to worry about holding everyone up. Then I took a look around and remembered we were all here to experience the stunning scenery. Plus, the other group did get tired eventually and we all evened out pace-wise.

Once you get into looking at wildlife, watching waterfalls pour down the insanely steep cliffs surrounding you, and oh yeah…paddling around freaking GLACIERS, no one is really all that worried about how fast you’re going.

My arms actually started feeling better the longer we were out (once they had warmed up/gotten used to what we were doing) and I ended up being totally fine. I wasn’t even sore the next day!

So what do you do in the kayak?

We saw bald eagles, mountain goats, sea stars, harbor seals, lots of birds, and also learned a ton about the stunning surrounding scenery in addition to just taking it all in. I have never seen anything like Alaska, and it was amazing to experience in real life (even in the pouring 40-degree rain, so that tells you something!). Besides the main show of the glaciers, you’re surrounded by super steep mountains that have waterfalls pouring down them. It’s pretty magical.

Seeing glaciers in real life and learning about the changes Alaska has seen does bring global warming and climate change to life, for better or for worse. But I didn’t feel super depressed/sad about the world. I just felt like I knew a lot more and would continue doing my best to be a good steward of the planet. And, selfishly, I felt incredibly lucky to witness it before things change even more.

Not a bad lunch view.

On days that it’s not pouring rain, you have a boat picnic and eat lunch out on the water (Liquid Adventures feeds you and their brownies are AMAZING). Since it was pouring, Jess picked us up a little early and we enjoyed the glacier views from the warm and dry interior of her boat. This was when I really realized that I had actually gotten pretty wet and was the first time I actually felt cold.

That two hour boat trip back sounds like it might suck though…

Things only got better on the way back because the focus is wildlife watching on the water. We saw sea lions, porpoises, and most importantly….orcas. I’m *obsessed* with orcas so this was honestly the highlight for me.

It was still pouring and cold out, plus windy being out on the ocean, and I was out there grinning like a fool watching the orca longer than anyone else. I was *that* person still out there after everyone else was like, “Okay we’ve seen the whale we get it let’s go.” Fortunately our boat captain was also a big wildlife nerd 😉

So incredible!!

Despite (or maybe because of?) our long orca detour, the ride back seemed to fly by. We were pretty exhausted afterward, and getting a “Bucket of Butt” at Thorn’s Showcase Lounge was the perfect low-key dinner before passing out early.

Thorn’s is a glorious dive bar that was recommended to us by our guides. They’re known for really good white Russians (Billy can confirm) and their “bucket of butt” which is fried chunks of halibut. After pairing that with cheesy tots, I was ready for bed immediately after we finished. Billy drove us back to our room at Alaska Paddle Inn and we were down for the evening (by 8 p.m.).

All in all, the kayaking trip was really spectacular and definitely something uniquely Alaska that is still beginner-friendly. I highly recommend it, and if you’re in Seward, go with Liquid Adventures!

Purchase a detailed 11-day itinerary with:

  • Guided excursions
  • Beginner-friendly trails
  • Dining and lodging options
  • Packing list and more!

Beginner’s Trail Guide: Tonsina Trail in Seward, Alaska

Seward was one of our favorite towns during our Alaska road trip. I could’ve stayed a week there for the hiking alone. There were a ton of great options, and the Tonsina Trail in Caines Head Recreation Area was a fantastic way to kick off the trip. While steep in places, this 4.1-mile round trip is worth the heavy breathing to reach the beach at Tonsina Point. You’re rewarded with panoramic views of Resurrection Bay and the surrounding mountains.

If you don’t want to go that far, normally I would say just go as far as you want and turnaround…but there aren’t really any cool views along the way. Just being in the northernmost rainforest in the world is pretty cool, but a there aren’t any breaks in the trees for pretty scenery until you get to the beach.

The less cool view…is still pretty cool. The featured image at the top of the blog is the beach view.

Hiking the 4.1 miles took me two hours from start to finish. Make sure to budget your time accordingly and bring plenty to eat and drink. Depending on the tides, you may not be able to walk as far out on the beach as we did. But you don’t have to worry about running out daylight in Alaska in the spring and summer!

How do I get there?

Lowell Point State Recreation Site is the easiest way to access Tonsina Point. The upper parking lot is a 10-minute drive from town and parking is $5 per day.

The drive is straightforward since there’s only one road to Lowell Point. However, it’s not paved and is also filled with potholes. You don’t need an SUV or any four-wheel drive capability, you just need to be prepared to go slow! Walking to the trailhead was uphill but nothing too steep. Keep an eye out for car traffic since the road is narrow. If you don’t walk to the trailhead from Lowell Point, it’s probably half a mile shorter.

Where do I go?

Once you reach the parking lot, there is one obvious option to take. The trail leaves from the end of the parking lot with the restrooms and informational kiosk. If you do get turned around, you may accidentally find the connector trail to the lower parking lot, which will take you the wrong way. Just make sure you’re headed uphill and not downhill and you’ll be fine!

This is the trailhead you’re looking for! I look shiny and wet because I was already a little damp. It rains a lot in Alaska!

There’s only one point on the trail that it’s a little confusing which way to go, which is in the first mile. You’re hiking along a private driveway at first, and eventually the trail splits from the driveway. Bear right at that fork to continue uphill and follow the signs for the trail. You won’t run into any other trail options while you’re out there, and the trail is very easy to follow through the forest.

What should I wear to hike the Tonsina Trail?

Something waterproof! We ended up hiking almost entirely in the rain, and I was very grateful to have a waterproof jacket. Hiking pants ended up being water-resistant enough that my legs stayed dry, too. I dressed in lots of layers, which is the key to any hiking in the springtime in Alaska.

It was in the mid- to upper-40s during our hike, so I wore a warm long-sleeved base layer, a fleece hoodie, and my winter coat plus a beanie and gloves. On the bottom, I had on long underwear and my hiking pants. I run cold, but I did end up getting quit hot on the hike back since a lot of it is uphill. Make sure to leave a little room in your backpack for peeling off layers.

There are two water crossings, plus you’re walking along a beach that’s pretty wet, so I was very glad to have waterproof hiking boots on. My husband wore trail runners that weren’t waterproof and was just extra careful crossing the water. Definitely wear something with more grip than regular running shoes, as the trail has a lot of rocky and irregular surfaces that are often also wet.

What should I bring on this hike?

Since you’ll be out there for a few hours, make sure to bring water and snacks. I was about three months pregnant when I did the hike, so was eating and drinking much more than normal. I brought trail mix, beef jerky, and a liter of water.

Later in the season, people watch bears go fishing from this bridge!

I also recommend bringing bear spray, particularly if you are hiking this trail later in the summer once the salmon are “running” (as the locals say). It’s pretty common to see black bear fishing there, apparently! We didn’t see any, but pack bear spray just in case and make lots of noise while you hike. My personal favorite way of doing this is remixing popular songs. My husband and I have turned Hey Jude into a rousing bear safety number called Hey Bear.

For more information on what you should bring hiking no matter what trail you’re on, read my post here.

Is it crowded?

We purposefully went to Alaska in late May before the main tourist season kicks in. We saw a few dozen people on the trail, but still had the beach to ourselves. It was a perfect balance of not feeling alone but also not being jammed on the trail with a hundred of my best friends.

Anything else I should know?

Like I said, the trail is a doozy coming back up. It’s got a few steep hills on your way out but is generally very rolling until you start descending down to the beach. It didn’t feel that steep coming down, but I had to take a few breathers (and an emergency bathroom break) coming back up. Bring hiking poles if you have them, drink lots of water, and take as many breaks as you need.

The only bathroom is at the trailhead, so take advantage of it! Fortunately, since you’re in a rainforest, there is plenty of cover should you need to make an emergency pit stop. Just make sure you’re not close to a water source when you do so!

Purchase a detailed 11-day itinerary with:

  • Guided excursions
  • Beginner-friendly trails
  • Dining and lodging options
  • Packing list and more!

Beginner Race Guide: Desert RATS Trail Half Marathon

So. How’d my first half marathon go?

Let me back up a little bit. The second half of my training had a lot of ups and downs.

Three weeks before the half marathon, I was working toward “peak week” with my highest mileage run and feeling really strong. But then I found out I was pregnant. I’m thrilled and super excited, but was worried about what this meant for all the work I’d put in over the last six months. It was really hard to go from feeling super strong to feeling like I needed to nap 24/7. But fortunately Billy pulled me out of my pity party and convinced me to at least finish my training and see how I felt.

I initially signed up for the Desert RATS Trail Half Marathon because if I was going to do the dang thing, I wanted it to be somewhere pretty and not around a golf course in suburban Denver. Colorado’s western desert was my best bet for dry trails, decent weather, and cool scenery. Gemini Adventures puts on a real good race, so the weekend was a blast.

Registration + Perks

Desert RATS was one of the more affordable half marathons out there, particularly once I took advantage of their Black Friday sale. I signed up early and used the Black Friday code and ultimately paid $52, which isn’t nothing, but I discovered very quickly that’s quite cheap for half marathons.

I’ll be honest, though. If you’re in it for the medal, you’re going to be disappointed. It’s basically just a dog tag. However, the rest of the swag is worth it, particularly because I didn’t really care about the medal. The race shirts were a technical fabric with gender-specific sizing, and I got a free Buff and stickers at packet pick-up. Plus, there’s a free race photographer who takes pretty stunning pictures of you running above the Colorado River.

The snack spread at the aid stations and the start/finish line was SO legit. I never knew that potato chips were the perfect salty snack for running, but I discovered that at Desert RATS. Every aid station had water, electrolytes, Honey Stinger gels, potato chips, cookies, and M&Ms. Even better, there’s a breakfast buffet with a pancake spread at the finish line as well as more salty snacks (who knew that pancakes and cheese puffs went so well together?!)

The Course

The 2018 course got significantly harder as the race went on (I know, so rude, right?).

There were two hills before the 5k/3.1-mile mark, but from there to mile 7 was nice and flat, following the top of the canyon that the Colorado River runs through. The scenery is stunning, and it felt great to cruise along the mostly flat middle part. Then, you go downhill to the halfway point aid station (god bless whoever puts the port-o-potty there) before you start the big hike up. For basically the rest of the race. I packed hiking poles because I knew the giant hill was coming, and I’m not too proud to need some help hiking.

I thought the course was appropriately challenging, but it certainly isn’t a walk in the park. To me, the big hill was worth being able to run on beautiful trails in good weather.

Surface-wise, the first and last few miles are on a gravel road, but other than that you’re on glorious dirt trails. It got rocky in a few places, but wasn’t overly technical, particularly if you’re hiking most of the uphill like me.

The weather is obviously unpredictable in Colorado in the springtime, and over the years this race has seen literally all the weather you could possibly have. We had great luck; it was cloudy and in the upper 50s. I was really cold at the start (it was in the 40s then) and had a beanie and jacket on with gloves that I dumped back in the car before the start. Make sure to get there at least 45 minutes before the start so that you don’t have to talk to far from your car.

Ultimately, I ran in a long-sleeve shirt, tank top, and calf-length capris. I run cold, and that combo ended up working great for me.

Having my parents come to the race was super special! You can also tell how chilly it was based on my mom’s outfit.

Other People’s Athletic Prowess

Even if I wasn’t pregnant, I still would’ve finished in the back of the pack. Being preggo meant I walked a LOT and ended up in the last third of finishers. I took more than three hours, but I was fine with that.

I was interested to see how I’d feel about it at the end of the race, though. I knew the award ceremony would start before I even finished, and I wasn’t sure how packed up things would be. I packed enough food and water to not need an aid station in case they weren’t still fully stocked by the time I rolled in, and readied myself for a finish line that wasn’t super celebratory.

But the opposite was true.

The aid stations were totally up and running, with eager volunteers excited to see me. As I jogged the last half-mile, spectators were ringing their cowbells and cheering us on. I turned the corner to the finish line, and the race director stopped the awards ceremony, everyone turned around to face the finish, and cheered me on until I crossed the finish line. This happened for everyone who came in after me, too. The pancake breakfast was also kept in full swing until well after the last runner came in.

This may sound super simple, but I’ve read a lot of slow runners’ accounts of races that are packing up the show before everyone’s even finished. Being slow, especially somewhere like Colorado where everyone’s an elite athlete, can be really intimidating or demoralizing at races. I was so relieved and happy that us back-of-the-pack runners got the same recognition and perks as the ones that were getting awards.

Logistics

The race was very well-run. It started on time, and like I said the entire operation was really beginner-friendly.

Packet pick-up did take a while on Friday night and wasn’t the most efficient, but it’s a hard thing to do and totally dependent on volunteers so I don’t fault them much for that.

The race packet said to get there early – they are not exaggerating when they say parking runs out quickly. Get there at least 45 minutes ahead of the start so your car isn’t too far away, and carpool if you can!

There were tons of port-o-potties at the start, and a port-o-potty at the halfway mark which was an actual lifesaver for me. All the port-o-potties also had hand sanitizer and didn’t run out of toilet paper, which is pretty impressive considering hundreds of people were using them.

Miles 2-3.1 were a bit crowded because we were sharing the course with the 10k folks, and after we got off the nice wide road onto the much more narrow trail, there was a bit of a bottleneck. But once we split off from the 10k, everyone got very spread out (particularly because I was at the back of the pack).

Photos + Timers

Runners that finished earlier did get finish line photos, but the photographer also sits at one of the most scenic spots on the course, so I was thrilled to just have those. Particularly for free!

Your bib has a chip in it, but since my only concern was just finishing, I wasn’t too worried with the time tracking method. I’m not sure if chips on your shoes or certain companies are better, but I was satisfied with the timer.

Overall Impression

The beginner/slow-runner atmosphere was really excellent, and you can’t beat the location and likelihood of good weather for a trail race in Colorado in the spring. The snack spread was awesome, the race shirt was high-quality, and you get great photos. The course is stunning and Fruita is one of my favorite towns in Colorado.

The race does require an overnight trip out of Denver, and driving home for four hours afterward wasn’t the *best* idea I’ve had, but it’s worth the trip for a high-quality trail race in April that’s driveable from Denver. You could also just stay the night in Fruita after the race if you’re able to get the time off.

If you’re looking for races a different time of year, make sure to check out Gemini’s fall series in Eagle and May race in Fruita, one of which I may make my post-partum running goal!