How to start biking to work

I already got up on my soapbox about why you should bike to work, so now let’s talk about what you actually need to start biking to work (besides a bike, of course).

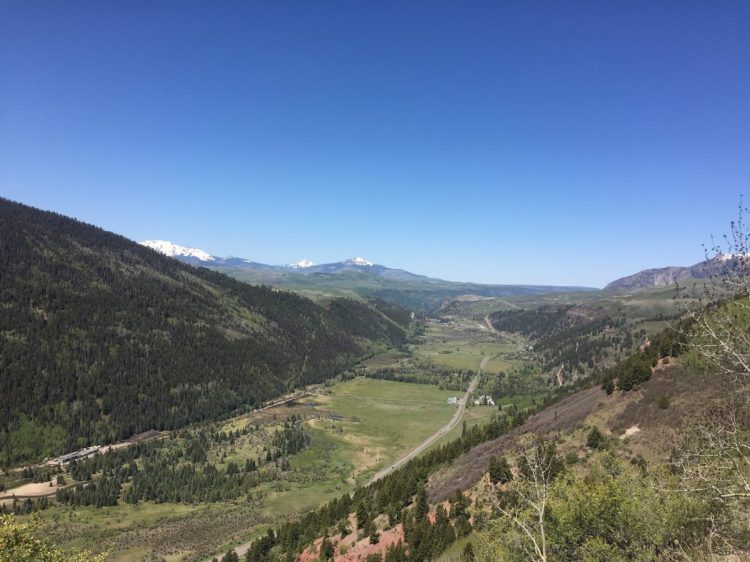
Honestly, the first thing may be kind of limiting: a safe route.

Google is not always the most reliable when it comes to streets that are actually good for biking – it has routed me onto a six-lane road instead of a street with a bike lane, so do your research. Scope out the route in your car ahead of time or try it on the weekend on a bike to see if you feel comfortable and to explore side streets that may be safer.

I wish it wasn’t this way, and that cities were built for bikes, and that cars were much more courteous, but sadly it’s not.

Next step: Helmet time. 

Yep, this is a requirement. I don’t care how confident you are in your immortality. I don’t care that you think it looks dorky. I don’t care that it’s “inconvenient.” It ain’t worth it. Anytime I’m driving in traffic, my helmet is on. It’s a preeetttyy small inconvenience considering the downside (concussion, death, etc).

Find a helmet you like, that fits securely, and is comfortable. I tried on almost every helmet Target offered and this Bell helmet was my favey.

I loved Bell’s adjustable fit system – you can turn the dial on the back of the helmet to make sure it fits your head perfectly. It also didn’t look totally dorky, and the price was right (the theme of this blog is “I wanted to start biking for as cheap as possible without being unsafe”).

But what about helmet hair?

Dudes, I have no advice for you. I’m sorry. But ladies, I got you!

I have basically given up on wearing my hair down at any point in the summer. I sweat too much for it to recover from the bike ride, plus I realized that not blow drying my hair means I can sleep in another 15 minutes.

My bike helmet hairstyle is super simple. You just need two bobby pins and either a claw clip or ponytail holder (dealer’s choice). I pin the front section of my hair back from my face and then clip the remainder into a low bun. Don’t worry, I’m completely beauty-impaired, so it’s not difficult:

My hair is SUPER thin and naturally pretty straight, and I still look professional (ie not like a swamp rat) when I get into the office after a three-mile ride.

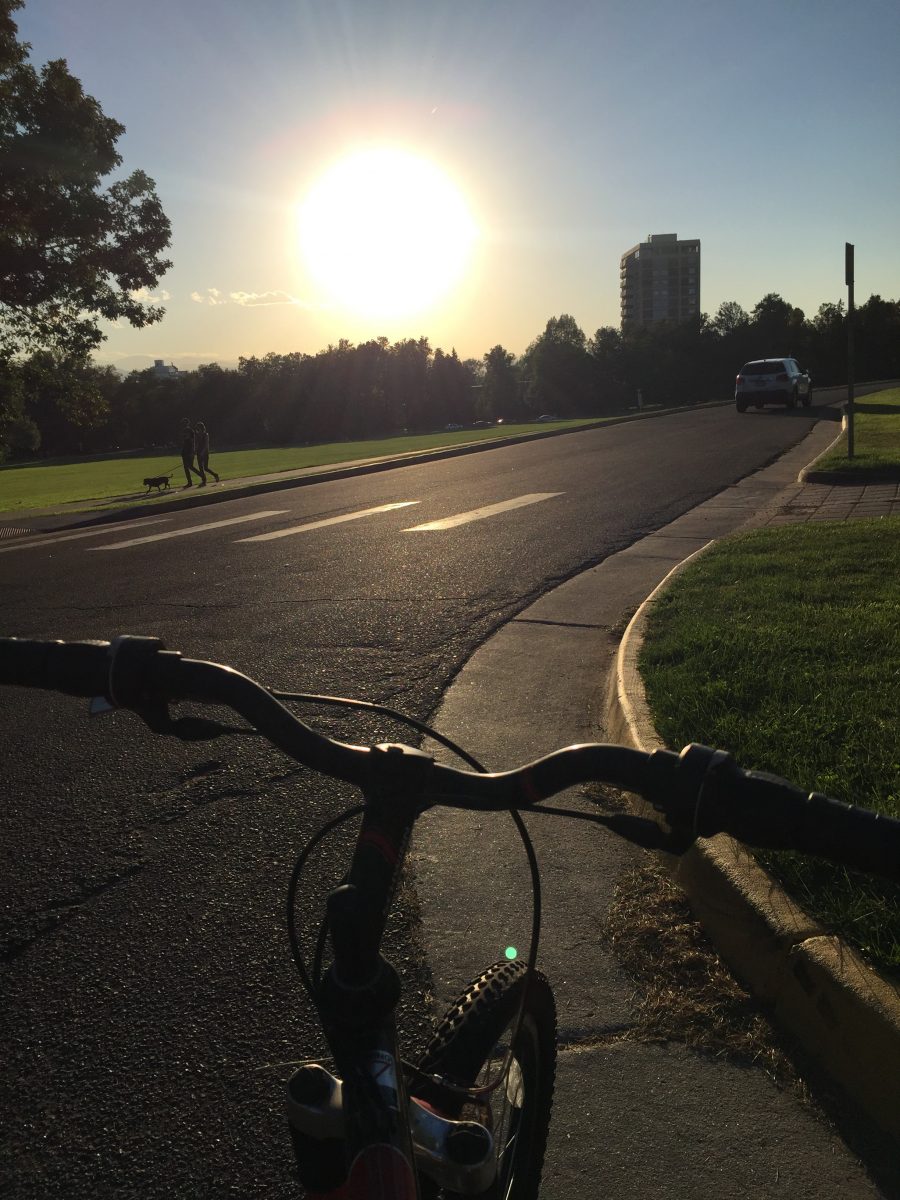
Let there be light(s).

Regardless of your work schedule, eventually Daylight Savings Time will get you and you’ll need lights for biking home after work. Even if you can still see okay without them, you should absolutely have your lights on so drivers can see you.

I started out with this front and rear light set, but I only recommend the front one. The rear light was complete trash. But the front light is super bright and has blinking settings, which can help cars see you and tell how quickly you’re moving.

The only odd thing about the front light is that there are two blinking settings, one of which is basically a strobe light. I never use it because it makes me seriously concerned I will set off an epileptic episode for some poor passerby or driver. And, I don’t need to feel like I’m at a rave.

This rear light is not garbage, even though it is equally affordable. It’s also super bright and has multiple blinking settings. Once I snapped in batteries, it took less than ten minutes to install both of them on my bike.

Lock it up.

There are a billion different lock options, and if you really want to dig into some internet research, you can check out Wirecutter’s exhaustive analysis of the best bike lock.

Admittedly, this coil lock came with my bike, so I didn’t do much market research. But bike theft isn’t so rampant in Denver that I’ve felt like I need to up the ante on how un-breakable my lock is. That coiling bike lock is affordable, easy to store, and gets the job done.

I wind it around my bike seat and keep the keys on my regular keychain so it’s essentially impossible for me to forget either. Plus, I can use it to lock two bikes if I’m with someone who doesn’t have one.


It’s called fashion. Look it up.

In the summer, I straight up wear athletic gear head to toe. Sports bra, sneakers, the whole nine yards. I change in the bathroom when I get to work and keep my work shoes under my desk so I don’t have to carry them in each day.

Sidenote: if you’re sweaty like me, pack face wipes and deodorant with you to freshen up when you get where you’re going. Also, if you have an office with a door, but it also has a window, you can get a cheap tension rod and curtain to make your own dressing room.

In less sweaty months, I just wearing leggings and sneakers with layers up top once it gets colder. Once I’m not getting sweaty, I’m less concerned about biking in the shirt I’m going to wear to work all day. I’ve personally never been able to bike in jeans or other regular pants without major lady part discomfort, but all the more power to you if you can go head-to-toe work clothes on your bike.

Pack mentality.

I quickly reverted to my high school days (literally, I still had my backpack from high school) to carry everything. Particularly in the summer when I have to bring an entire outfit back and forth, it’s just easier. You can definitely make do with your purse on your handlebars, but a messenger bag or backpack will make your life way easier.

I continued to use the same backpack I had laying around from high school and college. Any backpack that fits all of your stuff will do. My old faithful Columbia lasted me 10 years, and I recently I treated myself to a new one from Patagonia that will hopefully last me just as long.

Both packs have a 32-liter capacity (I do not understand why liters are used to measure backpacks) and that has been clutch. I tried a 28 liter and was really surprised that I couldn’t fit all of my stuff in it (outfit, lunch, wallet, water bottle, etc).

One last tip – find your bike on Craigs List! CL is chock full of people with bike buyers remorse.

Beginner’s Trail Guide: Jud Wiebe in Telluride

The Jud Wiebe Trail is one of Telluride’s most-loved, and it doesn’t take long to figure out why. A minute in, and you’re already getting some of the most spectacular panoramic views that Colorado can offer. And they somehow just keep getting better.

How do I get there?

One drawback about Telluride is that it isn’t a quick trip from Denver. It’s at least six hours from Denver without traffic, so if you’re planning a visit, make it part of a road trip or a longer stay than just the weekend (unless you just really, really like driving).

The drive is one of my favorites in Colorado, with incredible scenery and plenty of fun places to stop along the way. Here are some ideas from my 2016 road trip.

Since you’re driving across almost the entire state (if you’re starting in Denver), there are multiple mountain passes you’ll have to drive over. You’ll be driving on all paved roads, but mostly on two-lane highways and not on major interstates.

Where do I go?

The trail leaves right out of town on North Aspen Street, so you can walk to the trailhead from just about anywhere. If you’re camping nearby, drive to Mountain Village, park, and take the free gondola into town.

I recommend starting at North Aspen Street so that you come down on Tomboy Road, which is a very rocky Jeep road that would be really unpleasant to hike up. Starting on Aspen Street is also very steep, but also beautiful and smooth.

What is the trail like?

Jud Wiebe, while not particularly long at three miles round-trip, is not for the faint of heart. It gains 1,300 feet of elevation over those three miles, or for us laymen, a s***-ton of hills.

Straight up, right off the bat.

You basically go straight up for the entire first half, then you get some flat, and then you go pretty sharply downhill for the last quarter of the trail. That kind of terrain can be tough on knees and lungs, especially with Telluride’s already-impressive elevation of nearly 9,000 feet (for reference, Denver is 5,280).

That’s not to say you can’t do it.

My lungs and legs were burning, but I took a ton of breaks (and brought lots of water!). You will get passed by old people that clearly do this trail every day. I would budget three hours to get through the trail just to be safe, meaning you’ll need to start early in the morning during summer to avoid storms.

The trail is exceptionally well-marked. There’s also really only one option while you’re out there (until you get to Tomboy Road) so it’s not hard. The entire trail is fairly smooth dirt.

What should I bring and wear?

Lots of water! I would recommend at least one liter per person for the hike, considering the elevation gain and the altitude.

The beginning of the hike is uphill and in the sun, so you’ll stay warm pretty easily. It doesn’t hurt to bring a light long-sleeved layer in your backpack since it can be chilly in the shade. Here’s what I bring on every hike.

Is it crowded?

Jud Wiebe is a very popular trail. But I’ve also hiked Bear Creek (another popular option that I do recommend) and found it to be much more crowded, maybe because it’s a jumping off point for a lot of longer trails. We saw several dozen people, plus a few mountain bikers, but not to the point that it was annoying. On a holiday weekend, it will be more crowded.

Anything else I should know?

If you’re torn between this hike and another, do Jud Wiebe. Bear Creek is beautiful and will always have my heart since it’s where my husband proposed, but the panoramic views on Jud Wiebe are second to none.

If you’re torn between this hike and Bridal Veil Falls, I’d also recommend going with Jud Wiebe. Bridal Veil Falls also has stunning views, but you are just hoofing it up a bumpy and rocky dirt road the entire time, so it’s not a great hiking experience.

The long drive, the uphill hike, the high altitude – the incredible scenery makes it all worth it. You get jaw-dropping mountain views, aspen tree meadows, rushing mountain creeks, and pine tree-lined forest. You can see Bridal Veil Falls, the town, and the entire valley floor. It’s a can’t-miss!

Views to the south of the entire Telluride valley

Why I bike to work

When I signed up for the free women’s bike maintenance class at REI, I was surprised to see it was only half full just a few days out from the event. Once I got to class, I quickly realized I was the only woman there that biked primarily for commuting, not recreation.

And the more I thought about it, the more I realized how few other women I see on my commute each morning. And that I was the only woman in my office that biked to work, even though four men did (in an office of 16).

I never entertained the idea of biking to work until I moved outside of walking distance from my office in Denver. I desperately didn’t want to drive (#Millennial), and taking the bus just took so.much.time. It’s a 15-minute drive from my house, but I budget at least 40 when I’m taking the bus.

Plus, I already had a bike, helmet, and lock. And bus pass expenses were adding up.

Considering I had not ridden said bike very often, and the last time I regularly rode a bike Aaron Carter was as popular as Justin Bieber, I knew I was going to suck at this. Not only skills-wise. I also wasn’t entirely positive I was physically able to bike nearly three miles one-way to my office.

But I thought I’d give it a shot.

Pretty quickly, I realized that the days I biked to work, I was in a much better mood than if I had been waiting for and sitting on the bus for 40 minutes. I was in charge of my own commute again.

And even though I was significantly sweatier and had to give up hope of wearing my hair down, I was also significantly happier (especially after I started storing body wipes and deodorant in my desk).

Sure, there were plenty of evenings where I was wiped out from work and just didn’t feel like getting on my bike. And there were plenty of times where I cursed myself for doing this as my legs went numb and I just prayed I would make it to the top of this hill somehow.

But I never regretted biking to work. I only regretted the days I spent even more time sitting on my ass once I was stuck on the bus.

And now that I know I can bike to work, I know I can bike to the store for errands. Or to a friend’s bridal shower that’s only a mile from my house. Or to happy hour so I don’t have to find parking. It’s really empowering to be your own mode of transportation, to find your way around your city and to have your legs be what’s taking you there.

Yes, your legs are really tired sometimes. And sometimes the bike lane ends and you have to try to make it on the sidewalk without mowing anyone down. And sometimes the safest way on a bike is not the most efficient.

But it’s usually the most scenic.

Even in crappy weather (and hey, if it’s too bad you can always go back to the bus!). Even when I’m huffing and puffing up that damn hill to East High School and getting passed by tons of dudes on their fancy road bikes with their giant calf muscles and their freakish ability to not look sweaty or even mildly out of breath.

When I bike to work I feel independent. I feel strong. I feel more connected to my community and my surroundings. It doesn’t hurt that I’m not contributing to traffic or car emissions, but to be honest my reasons are the much more self-centered ones.

And it makes me sad that I don’t see many other ladies out there with me.

Maybe it’s just the route I take to work, but after going to that class at REI, it made me think that wasn’t it. I’d love to know what keeps you from biking to work if you’re close enough to do so and safe routes are an option. I hope you’ll give it a shot (B-Cycle or your local bike share is a great way to get your feet wet!) and that maybe my reasons for biking to work will help get you there too.

Beginner’s Trail Guide: Black Canyon of the Gunnison National Park

Black Canyon of the Gunnison National Park (whew, that’s a mouthful) was the last stop on our 2016 road trip. I’ve said it before and I’ll say it again, but this park has crazy cool scenery, a great campground, and no crowds. 

When we went in June, we were en route from Durango, but if you’re coming straight from Denver it’s an easy (if long) five-hour drive.

Like Colorado National Monument, we quickly realized that the best beginner-friendly hikes were a bunch of shorter overlooks. Also like the Monument, it’s one of the cheaper national parks with just a $15 entrance fee.

Black Canyon of the Gunnison Beginner Hiking

I have to give all the credit for this route to the delightful park rangers at the Visitors Center, which is a must because of the aforementioned delightful park rangers and legit souvenirs. I naturally bought a stargazing poster because I was all jazzed up about the park being an International Dark Sky-certified site…and then it was cloudy all night. But I digress.

Each of these hikes are just a few minutes from where you park, except Warner Point Trail at the end, which is 1.5 miles round trip. Unless you’re a certifiable badass (aka a super experienced wilderness adventurer), there aren’t any options for hiking down into the canyon. There is a driving option, which I’ll get to later.

We hiked the South Rim instead of the North Rim since we were camping there and because it’s better suited for hiking than the North Rim (according to my fiance’s internet research, which is historically very reliable).

We started at the Visitors Center since we were already out of the car and there – the overlook at Tomichi Point is gorgeous and a great introduction to just how steep and narrow the canyon is.

IMG_1738

From there, we continued on to Pulpit Rock, Cross Fissures View, and Devils Lookout. Each of these took maybe ten minutes out and back from the car. The only reason we skipped Rock Point was because there was a lot of minivans parked there and we’re antisocial. On the subject of crowds, we were there on a Thursday in June and had the place almost to ourselves.

From Devils Lookout, we continued on to Painted Wall. This is definitely the most-hyped section of the canyon, and it was pretty spectacular in real life.

IMG_1697

To feel like we had actually done some hiking, we drove out to the end of the road to hike Warner Point Trail.  Not only did the trail have some spectacular safety signage (see below), it had panoramic views of the valley to the south and the entire canyon in almost every other direction.

IMG_1642

IMG_1651

The Warner Point Trail was very well maintained, and while steep in some places, completely manageable for anyone. You can definitely get away with wearing sneakers, too!

Not wanting to get stuck in the dark, we booked it back to Sunset Point to, you guessed it, watch the sun set. The views are stunning and this is a must-do. The sun reflecting off the Gunnison River as the sky turns pink…it’s just gorgeous. I couldn’t get enough, and photos don’t do it justice. Just sit there and enjoy the beauty.

Getting down to the river is another story. Like I said, it’s not beginner-friendly to hike down into the canyon itself. We still wanted to get a look at the river, so we took a ranger’s advice and drove down the East Portal Road.

Screen Shot 2017-04-18 at 8.39.06 PM

The road is steep and full of switchbacks but honestly pretty easy to drive. There aren’t any crazy drop offs, and as long as you aren’t towing anything (because of the switchbacks) it’s totally doable in any car. There’s a really nice campground down there that would be a great picnic spot if you’re looking for a place to eat lunch.

IMG_1692

An Un-Campground Guide: Affordable lodging in Moab

For the uninitiated (aka me before this month), spring is high season in Moab. This is because it’s hot as hell by June. If you go to Moab and you haven’t planned ahead and reserved a campsite, you’re left with first-come, first-serve options on BLM land along Highway 128.

The good news is that these campsites are free. The bad news is if you have a day job and live several hours away from Moab, you’re gambling with your sleeping arrangements.

We didn’t want to put all of our eggs in one BLM basket before heading out to Moab this month, so we started to look for a cheap backup plan.

Enter the Lazy Lizard Hostel.

Lazy Lizard was also the name of a bar in my college town, so I immediately was into this place. Mostly because of nostalgia (it also looked like a summer camp), not because I was hoping to throw back some Blue Kamikaze shots (still do not know what was in those. #college).

Lazy Lizard checked all our boxes – super cheap, clean, and a very solid backup plan since they have a pretty lax cancellation policy.

And thank god we booked it. The campgrounds were packed (not shocking for a Friday afternoon in April), so we headed to the Lazy Lizard to make good on our $12/night dorm reservation we made a few weeks in advance.

The dorm does involve a common sleeping area, but there are plenty of private options too, including private rooms, cabins, and group houses. We ended up getting a private room after someone else canceled last minute.  We just paid the difference at check-in.

You may be thinking, “But are you a little….old for a hostel?”

And yes, as an anti-social 27-year-old, I was a little concerned about things being too hostel-hippie-dippie. It’s also located right behind a sketchy-looking storage unit complex, which raised my blood pressure a few points when we pulled in.

But the Lazy Lizard was absolutely perfect. On top of being crazy cheap, our private room had a comfy bed with AC and heat. No one was getting crazy or partying, and keeping to yourself was totally an option.

The bathrooms were spotless, and the showers were hot with good water pressure. The rooms are cleaned daily, and towels and linens are provided. The wifi is also good, and even with shitty T-Mobile, we had LTE and plenty of service the whole time we were there.

Our little room was a perfect base camp for sleeping, which is all we really used it for. The only thing I would do differently? Make use of the community kitchen instead of spending money on Moab’s astonishingly mediocre food scene. #unpopularopinion