Beginner’s Campground Guide: Canyon at Yellowstone National Park

Between the cost of indoor lodging and the incredibly nice campground amenities, it’s a no-brainer to camp for at least part of your trip to Yellowstone. The Canyon Campground is located on the eastern side the park and is named for its proximity to the Grand Canyon of the Yellowstone.

None of the campgrounds at Yellowstone are particularly private, and Canyon wasn’t an exception. Since that’s par for the course at the park, consider that Canyon is located near lots of amenities and some of the most stunning scenery. In addition to the Grand Canyon of the Yellowstone, it’s an easy drive to the Lamar Valley for wildlife watching. Plus you can reserve your campground ahead of time so you don’t have to freak out about grabbing a first-come, first-serve site.

Directions

Yellowstone National Park is in the northwest corner of Wyoming, and the Canyon area itself is almost 10 hours from Denver.

map of yellowstone's roads figure eight beginner's guide
The figure eight formed by Yellowstone’s main road system. Canyon is on the east (right) central side of the eight. Old Faithful is on the lower west (left) side, and the Lamar Valley is up off of the northern east (right) side.

The drive has stunning scenery and is totally manageable from a road quality perspective, but obviously, that distance is a haul. We stayed overnight in Riverton, Wyoming to split it up. Lander is the more popular stopping point, but despite what the sign says, it isn’t a more direct route to Yellowstone. The difference is maybe ten minutes. We were looking for an IHG hotel to book with points and there is a very nice Holiday Inn in Riverton, so that’s where we headed.

Campsites

Canyon is a huge campground with several loops. Unfortunately, you don’t get to pick where your campsite is when you make a reservation. We were on the E Loop, which was a nice distance from the main road without being too far from the campground services building. None of the campsites are particularly private, but the more we drove around, the more we realized that was just the norm for Yellowstone.

beginner camper points to the E Loop of the Canyon Campground in Yellowstone National Park

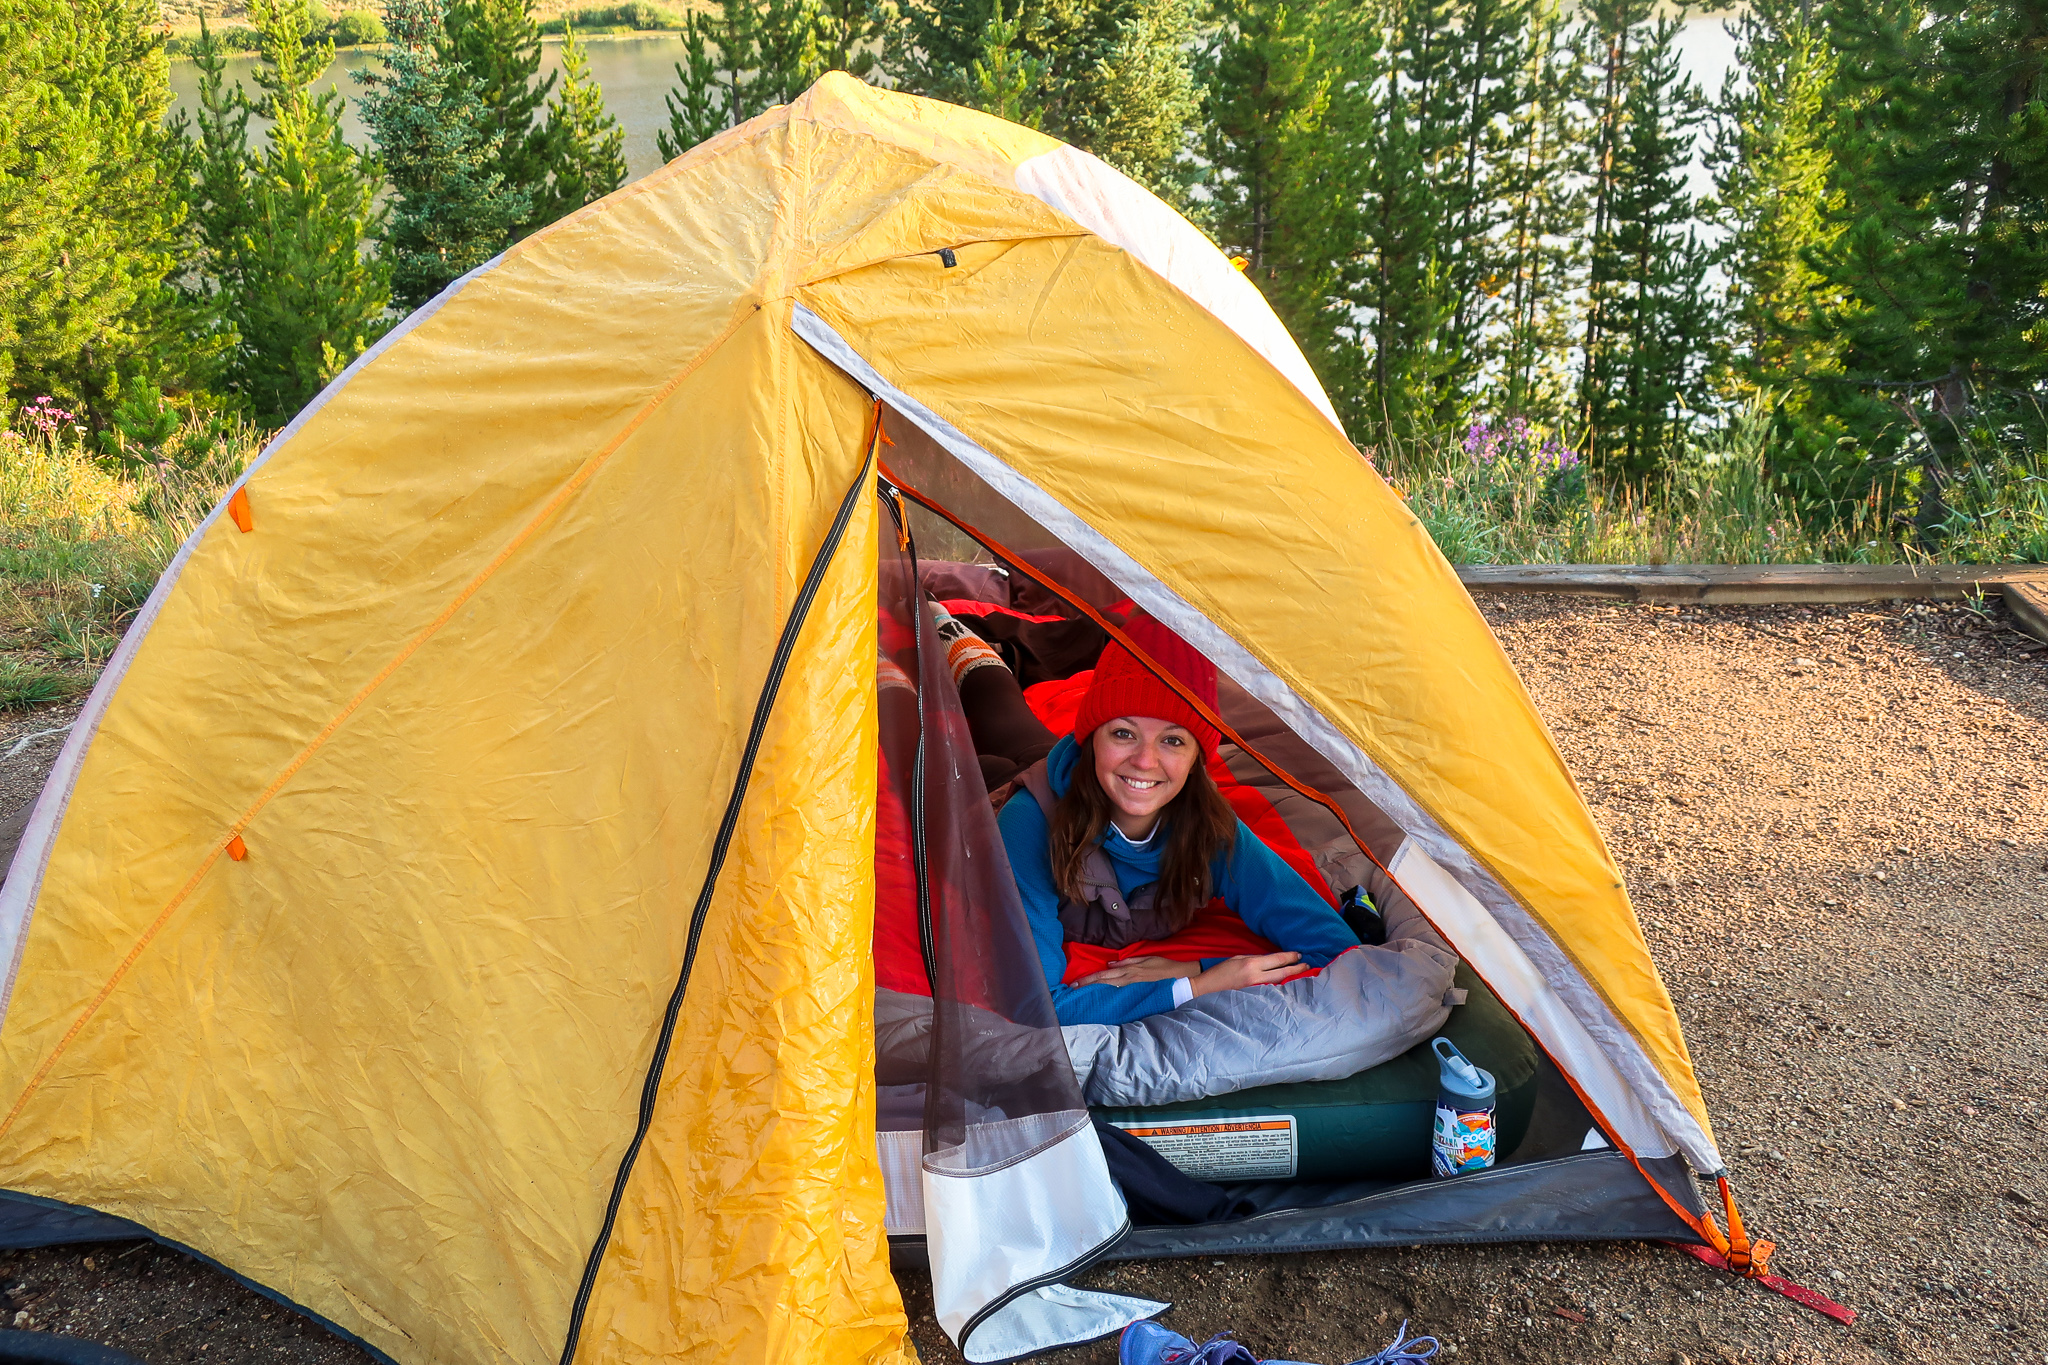
All the campsites have fire rings and picnic tables. There isn’t a designated tent pad area, so you can set up shop wherever is the flattest. The campground is heavily shaded thanks to being in a huge forest of pine trees.

Firewood and kindling can be bought at the campground services building where you check in. For some reason, we couldn’t get ANYTHING to stay lit our first night, so we ended up having to run to the general store that’s part of the Canyon Village area. You can get fire starters and a lighter there, plus literally any other item you might need. On one late-night run, we bought a memory card, ice, beer, and aforementioned fire supplies. It’s amazing.

Campground Fees and Reservations

It’s Yellowstone. You’ve got to book EARLY. September is considered the less-busy season, and we still were booking our reservations right when they opened up at the beginning of the calendar year. Again, you can’t pick what specific loop or site you want, but you can specify you’d like a tent-only campsite so that you don’t end up on a loop with a bunch of RVs and trailers.

If you’re also planning on camping in the fall, you are making a little bit of a gamble on the weather – it can get down to freezing by mid-September. Fortunately, hotels and campgrounds both have really lenient cancellation policies (seven days in advance).

We booked a campground and a hotel for each night of our stay, and then made our final call when we could see the 10-day forecast. Our line in the sand was temperatures below freezing, which we weren’t forecasted to have. So, we canceled our reservations at the lodge and committed to camping. Our wallets breathed a sigh of relief since the lodge would have been $200 or more per night.

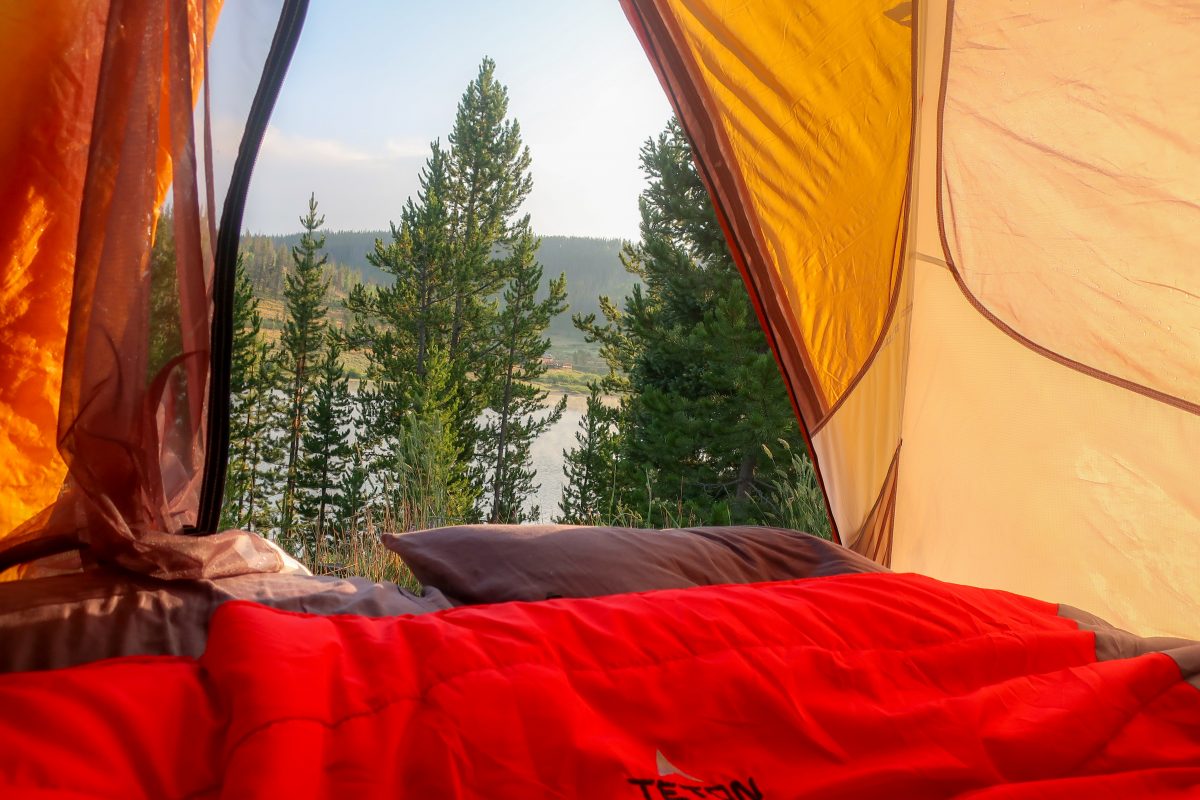
We did end up having one night that got down to freezing, but it was totally doable. I just bundled up and snuggled into our double sleeping bag.

Campsites at Canyon are $30 per night, which is pretty standard for a national park. Your campsite fee also includes one shower per night, so it’s a pretty good deal (particularly when you’re staring down a $260 per night hotel room). Keep in mind you also have to pay to get into the park. Information about entry fees can be found here.

Toilet Situation

Freaking AMAZING. There is full-fledged indoor plumbing, electricity, hot water, the whole nine yards. Everything is clean. It’s amazing.

buffalo safety wildlife watching sign in yellowstone campground bathroom
Plus, the bathroom has helpful tips and tricks for wildlife watching.

Showers are also available back at the campground services building. Loop E is about five minutes from the building with summer camp-style showers – a bunch of stalls (with curtains) all in one bathroom. In the middle of the bathroom, there are sinks, mirrors, and electrical outlets. No toiletries are provided, but you do get a private area to change and shower.

The showers were was packed the night we went and I was pleasantly surprised that the hot water didn’t quit on me. This was especially impressive considering every shower was full and had been going non-stop for at least an hour. There was (of course) a line for the women’s shower and not the men’s, but I only waited about 15 minutes. Despite the insane amount of women cycling through there, the bathroom was clean and hair-free. My husband reported the men’s showers were also spotless!

Nearby Activities

Well…you’re in Yellowstone. There are a lot of nearby activities. You’re an hour from the Lamar Valley (crazy good wildlife watching and beautiful hikes), Old Faithful, and Yellowstone Lake. You’re right at the Grand Canyon of the Yellowstone, and to get there from the southern entrance you get to drive right by Yellowstone Lake.

We saved Old Faithful and all geyser activity for the second half of the trip since we were staying at the Old Faithful Inn and stuck to the canyon itself and the Lamar Valley during our stay in Canyon.

grand canyon of the yellowstone lower falls north rim
These views are around the corner from the campground…if you’re into that kind of thing.

You’re around the corner from the hike to Artist’s Point. We enjoyed doing the hike past the overlook at Artist’s Point, but actually liked the views from the North Rim Drive overlooks more than Artist’s Point itself. Make sure you don’t skip Brink of the Upper Falls and Brink of the Lower Falls. Both are short trails (the lower falls is a bit more difficult since it’s straight down and then back up, but the view is worth it so just take a lot of breaks) with out-of-this-world vantage points on two humongous waterfalls.

Shortly before our trip, I read the book American Wolf and became completely obsessed with the Yellowstone wolves. We got up before sunrise for wolf-watching in the Lamar Valley, which was 100% worth the 5 a.m. wake-up call. We just drove until we saw wildlife watchers and their scopes, pulled over, and took out our binoculars.

wildlife watching lamar valley yellowstone wolves beginner'sg uide
The view without binoculars or scopes is obviously not great. All those brown dots are bison, and somewhere amongst them were the pack of wolves we were watching.

The binoculars did basically nothing, so, fortunately, all the wildlife watchers are happy to share their knowledge and high-powered viewing scopes as long as you’re courteous and respectful. We saw an entire pack of wolves thanks to their skills and equipment, so I can now die happy. We napped off the early start later on – the campsite was completely dead during the day so we had no trouble finding some peace and quiet.

Other Intangibles

Canyon Village is basically its own town. You’re nestled in the woods when you’re camping, but at the same time, you’re a five-minute drive away from a massive visitors center, lodge with restaurants, fully-stocked general store, and gas station. Driving out into the middle of nowhere gets a lot less intimidating when you have that kind of supply available.

Speaking of things that are intimidating, you get a TON Of warnings about bears. The only wildlife we saw in the campground were deer and ravens, but that’s because everyone was following the rules with keeping food and toiletries locked up. Follow the rules, but don’t let the warnings scare you away completely. We didn’t see any bears the entire time we were in Yellowstone.

We ate at the campsite both nights, so I can’t speak to the quality of the restaurants but our general experience with food at Yellowstone was that it was pricey and just okay (we ate at the Old Faithful Inn area restaurants later on). Loop E had a very nice dishwashing room with two huge sinks and lighting, so cooking at the campground was much less work than I thought it would be.

There is no cell service or wifi unless you want to buy it at one of the lodges. We enjoyed the time to unplug and waited until we were at Old Faithful to buy wifi, and only did so we could check in with our pet sitter and family. I highly recommend going dark as much as you can!

Overall Impression

Yellowstone absolutely lives up to the hype, and camping there saves you a ton of money. Canyon’s central location and fantastic amenities don’t make you feel like you’re roughing it, but you certainly aren’t sacrificing any solitude or time in nature for the little luxuries.

Beginner’s guide to packing your car and staying organized on road trips

Packing your car for a road trip, and then keeping it organized so you can actually find things, is a massive game of Tetris.

Sometimes, things start getting messy. Your car quickly turns into that worst-case Tetris scenario where you’re running out of room and nothing really fits and you also can’t find anything you need. Basically the real-life version of this:

awful car tetris

We knew we had to get our acts together and stop shoving things in random places – we were headed to Yellowstone and Grand Teton national parks for a week-long road trip, much of which would be spent camping.

On our August camping trip, we were driving ourselves crazy after the first night. Clothes were everywhere, supplies were in random spots, and unpacking back home was a mess because we couldn’t grab all of our clothes or all of the cooking supplies at once to put away. And that was only two nights – now we were staring down a six-night road trip.

First, we laid some ground rules. We promised to abide by the car organization.

This means taking the extra minute to put things back where we got them from. I have a horrible habit of shoving my clothes in random spots when I’m changing, or just tossing things back in the closest car door because I’m “in a hurry” (on vacation? Who am I?) and don’t ~feel like~ putting things back where they belong.

This basic step made a HUGE difference.

We made sticking to the organization easier by keeping clothes, food, and other high-use items easy to get to.

diagram from above how to pack a car for camping road trip
We have a Subaru Forester and folded the entire back row of seats down to achieve this layout.

When you’re camping, you most often need to get to clothes, food, sleeping stuff, and supplies like sunscreen or bug spray. These should be the easiest things to access immediately upon opening a door or the trunk.

We used the pockets in each car door to store small items like sunscreen, bear spray, and binoculars.

To keep clothes easily accessible, we put each of our duffle bags by a rear door. We each packed a trash bag for dirty clothes to keep them contained. Our shoes all went into another duffle bag that we kept on the ground behind the driver’s seat. Headlamps were in our duffle bags as well.

On the left side of the trunk, we put all of our food and water along with our camp stove and skillet. Each meal’s supplies went in its own container. All the breakfast supplies went into one box, desserts and coffee supplies in another, and since lunch and dinner were pretty interchangeable, I stuck all of that food into one more box. I just used a fabric storage bin that we normally use for our mail, a leftover Amazon box, and a shoebox, so you don’t need to get fancy!

I also made sure that you could tell what something was by looking at it from the top so that we didn’t have to pull EVERYTHING out to find that one thing. Anything that I couldn’t immediately tell what it was got labeled on its lid.

I put all of our cooking/eating supplies – plates, spatulas, fire starters, etc – into a Trader Joe’s grocery bag, with each category of items in their own plastic bag. For example, everything we needed to start a fire went in its own plastic bag to make it easy to grab – fire starters, matches, and a lighter. The grocery bag didn’t quite fit in the food area, but we still wanted to be able to get to it easily, so it lived behind the passenger seat.

On the right side of the trunk, we put all of our camping gear. Our tent, rain fly (aka the cover that goes over your tent and keeps it dry), and stakes were all in their own bag. This went inside a larger duffle bag that also held the air mattress, pump, sleeping bag, camping chairs, and extra blankets. The nights you’re camping, this space in the car is obviously empty so it’s easy to fill it in with random crap, but do your best not to!

We used the dead zone in the middle of the car for things we needed to get to less often.

We have a Subaru Forester and long arms so, fortunately, we could reach any area of the car from a door. Still, it’s more difficult to reach into that middle dead space that we created.

This is where we put things we weren’t using every day, like hiking poles, backpacks, dirty clothes, and trash.

Were we perfect? No. But starting organized and committing to staying as organized as possible made a huge difference.

I certainly didn’t put my clothes back immediately, but before the end of the day, everything was where it should be. It was SO much easier to find things and six nights basically living out of the car (we were in hotels a few nights) went a million times better than our road trip a few years ago.

Once we got home, it was easy to triage the car and just grab dirty clothes, trash, and toiletries to get what we needed to get out immediately and go to bed. Hauling the rest out of the car the next day was also easier because we didn’t have a bunch of random tiny items on their own. And, putting everything away went faster since everything was categorized.

I’m working on the final step now – creating a very basic gear corner in our basement so when we’re packing next time, we don’t have to look in six different places for all of our gear and supplies.  Stay tuned!

Beginner’s Gear Guide: Teton Sports Double Sleeping Bag

I’m not too proud to admit that I don’t like sacrificing snuggling while camping. Unzipping one sleeping bag and using it as a blanket isn’t warm enough, plus it always slides off. And what’s the point of sleeping in the cold if you can’t snuggle your significant other?

I put the Teton Sports Tracker Ultralight Double Sleeping Bag on our wedding registry, and I’m a little embarrassed to reveal that it took us a year to finally use it (life gets in the way of camping unless you make a reservation and force yourself to keep it).

The verdict? I loved it.

woman tent camping with double sleeping bag

Honestly, the bag you store the sleeping bag in is what sealed the deal for me. Rolling things back up after camping and attempting to stuff them back into the bag is the absolute worst.

The bag has magically shrunk since you took your sleeping bag out of it, and you can’t quite get the roll of the sleeping bag right. Now you’re sweating and trying to keep it rolled up while you jam it into the bag, and now you’re cursing at inanimate objects. Yes, I’m speaking from personal experience.

Teton made a huge carrying bag, plus it has a bunch of straps around it to help you compress it down once it’s in there (so you can actually close the dang thing). Sure, there was still a bit of jamming and stuffing, but it was a million times easier thanks to the roomy bag and compression straps.

Plus, you know, it kept us warm.

The sleeping bag was big enough for my 6’1″ husband and me (I’m 5’7″ and we’re both skinny). It was roomy enough that if I didn’t want to be right next to him, I could still roll away from him and stay plenty warm.

Before, when we were using single sleeping bags, I had to wear a TON of clothes to bed. The first time we used the Teton double bag, I just wore some cozy leggings and warm top, a beanie, and was good to go in 40-degree weather. We also camped in Yellowstone and Grand Teton in the double sleeping bag, where temps dipped below freezing but not under 30 degrees. I had to bundle up a little more, but I actually found myself getting too hot a few nights because of how much heat we generated in the bag together.

I found out the hard way that the zippers aren’t waterproof, but considering our tent itself was apparently no longer waterproof either, that was the least of our worries. I got a significant amount of water dripped on me thanks to a night of pouring rain, and the sleeping bag only really gave in around 5 a.m. so I was impressed.

The zippers are high-quality and initially didn’t get stuck on the fabric while furiously unzipping to get out of the rain. In Yellowstone, we started struggling with the zippers a little bit once we were already in the sleeping bag. But I’ve yet to find a bag that is in our price range that doesn’t have zippers that catch every once in a while.

There are also zippers on both sides of the sleeping bag, which makes it easy for both people to get out without having to crawl over each other. If one person gets hot at night, it’s also easy to unzip your side as a little vent without freezing out your beloved.

Some reviews on Amazon complained about the size and weight, but I’m a car camper, so I’m only carrying the bag from the car to the campsite, which has never been more than 20 yards. So weight wasn’t a concern for me. Overall, I’m thrilled with this sleeping bag and am so glad we got it!

Beginner disclaimer: As always, you DO NOT need expensive gear to get outdoors. I can’t say that enough. If you decide you do want to upgrade with some fancy gear or nicer clothes, I hope Outdoor Beginner will help you decide what might work for you with reviews from a beginner’s point of view. Now get out there and have fun!

Beginner’s Campground Guide: North Michigan at State Forest State Park

North Michigan is one of five campgrounds in State Forest State Park, a hidden gem in northern Colorado near the tiny town of Walden. Michigan Lake is a great option for car camping, particularly if you don’t look for reservations early enough and don’t get into Crags (this totally didn’t happen to me).

North Michigan is in an area of the park hit hard by pine beetle, which resulted in a lot of trees dying and being cut down. The campground is a little exposed, and for that reason wasn’t my favorite. BUT if it’s important for you to be near water, or to be able to take out a paddleboard, then it’s a great option. There are tons of little trails that take you right onto your own private beach, which was a great place to watch sunset.

north michigan reservoir state forest state park camping beginners guide

If hiking is your main priority, and you don’t want to be around RVs, I would highly recommend getting a reservation at the Crags Campground. It was sold out by the time I looked, but we went to check it out on our way back to Denver. The campground was nestled into the thick pine tree forest and was adjacent to the American Lakes trails, which were some of the most beautiful hiking we’ve done. North Michigan isn’t a bad back-up, though.

How do I get there?

State Forest State Park is a beautiful – and easy – drive from Denver. I recommend leaving as early as possible, though, to beat traffic on I-25. Driving through Poudre Canyon is stunning, as is Cameron Pass (where a lot of people have seen moose, but sadly, we did not).

The road into the campground is dirt and a little bumpy, but nothing novice drivers can’t handle. You could take it on in a sedan, just drive slowly since there are a few potholes.

If you have an annual state parks pass, you can skip the Visitors Center and drive straight to the campground. If you need a day pass, or want to buy an annual one, then the visitors center is on the way to the campground. Be prepared to wait if you’re getting there on a Friday evening!

Which campsites are the best?

North Michigan is fairly small, with a 15-site loop on the south side of the reservoir and additional RV sites and cabins on the north side. We stayed in the middle of the loop at site 222, which was not very private at all. It had a great trail down to the reservoir, though, so we dragged our campchairs down it to have a little more privacy (and shade!).

I would recommend reserving the first few sites that you see when you drive in – 215 or 217. Or, going to the end of the loop and reserving 248. All of the sites have tent pads, picnic tables, and fire rings (although there was a fire ban when we went). The other thing I didn’t like about our site (222) was that the fire ring was in the same area as the tent pad. If we had made a fire, it would have been about a foot from our tent, which sounds risky and smoke-filled.

north michigan campground state forest state park beginner's guide
Note proximity of both the fire ring and our neighbors (white blob to the right of Billy).

By the way – if there’s still a fire ban and you need a campstove, we LOVED this one. One burner, idiot-proof to use, and super powerful. We picked it up at the Fort Collins REI, which was right on the way. If you forget to get butane at REI, they don’t have it at the King Soopers on the north end of town. You can stop at Glen Echo further along, or you can drive into Walden (about 30 minutes from the campground).

Do I need a reservation? How much will it cost?

Like I said, I didn’t jump on reserving a campground fast enough and lost out on Crags. “Not fast enough” means I was looking in February to reserve in August. BUT North Michigan still had plenty of openings then. Regardless, if you want to book a summer camping trip within four hours of Denver, reserve early!

At $28 per night, State Forest is a few bucks cheaper than state parks closer to Denver. There is also a $9 fee to enter the park.

What’s the toilet situation?

She’s basic. There are two small vault toilets. This means no flushing, basically a toilet over a very deep hole (which can give you a rush of cold air when you sit down). Make sure you bring a headlamp with you to the bathroom, and bring plenty of hand sanitizer. And be prepared to hold your breath.

What can I do nearby?

We wanted to hike to American Lakes, which was about a 15-minute drive away. The Lake Agnes trailhead is in the same area. The only recreation within walking distance is if you want to fish or get on the water.

american lakes hiking trail state forest state park

At 71,000 acres, State Forest State Park has a TON of hiking options. If you want to be walkable to some of them, stay at Crags (are you sensing which campground I would have rather stayed at yet?).

Anything else I need to now?

The little town of Walden is about 30 minutes away from the park and has everything you might forget. Since we stayed two nights and did a long, sweaty run/hike Saturday morning, we were also in desperate need of showers. We stopped at the Chedsey Motel and paid $20 for both of us to shower. The owner was one of the most delightful humans I’ve ever met, and the hot shower was so clutch to not feeling disgusting the rest of the evening/next day.

margarita local bar walden colorado state forest state park
Mansker Station knows how to do a margarita. Note $3 seltzer special in the background.

If you want a meal besides Spaghettios or hot dogs, or if you just want a drink and a taste of life in Walden, stop at Mansker Station. It has a giant sign for wood-fire pizza and cold beer, so it’s difficult to miss. Being a most basic white girl, I was thrilled that they also had $3 cans of spiked seltzer. My pizza-loving husband was equally excited about the wood-fired pizza, which absolutely lived up to the highway sign hype. Stop there on your way back from showering, then head back to the park to enjoy a relaxing evening!

What’s the bottom line?

I’ve made it pretty obvious by now that I would rather camp at Crags than North Michigan, but I would happily go back if it’s the only option to get into State Forest. Sure, it’s a bit longer of a drive from Denver, but there are way fewer crowds, great hiking and wildlife watching, and stunning scenery. Not to mention, at 8,500 feet it’s much cooler than the city.

Camping one night probably wouldn’t be worth the trip from Denver, so make a weekend out of it and experience the North Park region of Colorado!

State Forest State Park North Michigan Campgound Outdoor Beginner

Beginner’s Race Guide: Colfax Marathon Relay Race

So your coworkers have peer-pressured you into running the Colfax Marathon Relay. Don’t worry! I was in your shoes. You’ll have a great time, I promise.

Between my aversion to paying a bunch of money to run somewhere I already go all the time and the fact that the Colfax Marathon Relay didn’t have a leg under four miles, I politely bowed out of my workplace’s team earlier this spring.

So how did I end up at the start line, excited to run? Well, a little peer pressure. And a lot of boundary setting.

One of our coworkers had a travel conflict and had to drop out, leaving me as the lone person in the office who was both available that weekend and theoretically capable of running four to six miles.

My first line of questioning was around performance expectations. I don’t mind being slow unless everyone else is very invested in me being fast. In fact, I can totally suck at something and still have a great time as long as everyone I’m with isn’t attempting to coach me to greatness.

Admitting you’re a slow runner or that you will have to walk sections of a race is very hard to do without feeling self-conscious. I get that. But each time you speak up and unashamedly set boundaries and expectations, it gets easier. And you feel much more empowered.

My coworkers said they were okay with me being slow. But how okay were they…really. I’ve been fooled one too many times about “slow” running groups to take that at face value. I love my coworkers, but I needed to test the waters.

As luck would have it, three of my four teammates were on a work trip with me a few weeks out from the race. As the peer pressure encouragement hit a fever pitch, I organized a group run the next morning. I wanted to see if they would be frustrated with my pace or if I would feel intimidated running with a bunch of super athletic guys.

In general, I never run with anyone besides my husband because I’m always worried about slowing people down. So I was admittedly nervous when I met everyone in the lobby of our hotel bright and early the next day.

“Doing it anyway” is hardly the easiest advice to follow when you’re self-conscious about being a beginner. But since starting this outdoorsy journey, I’ve promised myself I’m not going to not do something just because I’m scared of looking stupid.

Telling your teammates you’re slow and going for a run with them and setting your own pace feels super intimidating. But pushing through and doing it anyway is not only the best way to find out if your relay team is going to be a fun fit, but also a great way to build your own confidence in your abilities. Just because you’re slow doesn’t mean you’re “bad” at running.

So back to that morning. Despite being very nervous, I did it anyway and went for a run with my coworkers at the nearby state park. (Because why run on a flat surface when you could make an already intimidating situation more difficult?)

Considering how much I like working with this group, it shouldn’t have been a surprise that they were equally fun to run with. I was incredibly relieved that they were all happy to run slower with me, and not once did I feel anything besides that I was enjoying a run with some friends. This was a group that had absolutely no expectations for the relay besides fun.

I know the Colfax relay comes with substantial fundraising opportunity, and I don’t want to diminish the importance of that, but if you’re a beginner not on a team prioritizing fun, you’re probably going to have a bad time.

The other way to make sure you don’t have a bad time is to negotiate for the shortest leg of the relay, the four-mile “Screaming Downhill” section. As you may have guessed, it’s completely downhill. But not in a way that destroys your knees…in a way that makes it really easy to run! Even if the sections may vary year-to-year, the bottom line is to be upfront about wanting to run the shortest parts.

And no, four miles does not seem like a short run to me. But if you’re doing the relay, it’s the best you’ve got.

Relay teams have runners of all sizes, shapes, and abilities, from the seriously fast to the people out for a Sunday stroll (and everywhere in between). You’ll fit in no matter how beginner you are, so don’t worry!

Piling into one race car that traveled to each of the relay hand-off points was fun, but a little more hectic than I was expecting. The race is really well organized, but you can’t not have chaos when thousands of people are doing a relay race together.

Because you have to drive between each leg and they’re all spread across Denver, we eventually just had to rush from place to place (I literally ran from the car to the hand-off zone to meet my teammate in time). The traffic and driving wasn’t helped by the fact that it was cold and rainy, so it’s not like it was ideal weather for hanging around outside.

I was hoping for a little more camaraderie, but it was still really fun to cheer on my teammates, even if only for a few seconds. And you get an actual baton to carry and hand-off, which was super fun.

If you’re an anxious beginner runner like me, you want all the information ahead of time for where you’re supposed to be and how everything operates. So how does the organized chaos actually work?

Each leg of the relay has a hand-off zone that is organized by bib number. The entire team has one bib number, so you’re always going to the same zone. You meet your runner at the section for your bib number, grab the baton, and get on your way. When you finish running and hand off the baton, there are bathrooms, snacks, water, and freebies to greet you.

Traffic is a legitimate nightmare, so stay north of the course as much as possible to navigate from leg to leg. Don’t bother dropping your first runner off at City Park unless you get there so early you can walk from one of the surrounding neighborhoods. 17th, part of York, and part of Colorado are all barricaded off and everyone and their mother drops runners off on 26th and Colorado. I normally live a five-minute drive from my boss, and it took me more than 20 minutes to get to his house on race day. Not terrible, but not great.

One last hint is to bring a backpack with you to pack snacks and extra layers that you can easily carry around when you’re walking to and from a race leg or around the festival. After running my leg I was obviously sweaty, but I didn’t bring a change of clothes or extra layers which really put a damper on the post-race festivities for me.

This was truly unfortunate because City Park is totally transformed for the Colfax race weekend. Your entry into the race includes at least one alcoholic beverage, lunch, and there’s a smorgasbord of snacks and freebies. Kaiser Permanente has a free produce stand (and you’ve already gotten a free reusable grocery bag when you finish your leg). It would have been a blast to hang around, but by the time we all reunited at City Park I was freezing and grumpy.

At $50 a pop, the race isn’t cheap. Since my portion was just running past strip malls on West Colfax, I can’t say I would’ve paid for it myself. But if you’re workplace is covering it like mine did, the relay is a really fun way to spend a Sunday in May. The race atmosphere is great, the freebies are awesome, and you get to set a personal record if you get the downhill section!