In an effort to de-stress and simplify my life,my knee-jerk reaction was to unfollow all the brands and magazines I was following on social. I wanted to get rid of the constant barrage of tweets and posts telling me to do X epic adventure instead of whatever “lame” one I may have planned or that I need to buy all of this shit to properly be outdoorsy.
There are just so many things constantly marketed to us that we allegedly need, and social media went from something that gave me cool ideas or inspiration to making me feel like what I did or what I had wasn’t enough. And I’m a middle-class white person with (some) disposable income!
So ignore what “they” say. Plan the trip that you think is it epic, even if you’re camping ten steps from your car and indoor plumbing. Go hiking 30 minutes from your house. Hell, go for a walk around your neighborhood and notice the cool places you miss when you’re on the bus or in your car. Make s’mores on your grill. Or in your oven for that matter, as long as you sit outside to eat them.
I know I’m just another white lady with a blog. But now that I took away all the stuff you’re supposed to buy or do to be a “real” outdoorsman, or even just to call yourself kind of outdoorsy, I can kind of just relax and enjoy myself.
That’s the beauty of going outdoors. That’s what the outdoors should be. You don’t need to go far for it to be epic. You don’t need much other than what’s in your closet. You don’t need anything except the willingness to give yourself permission to just enjoy the little things.
–EDIT– I’ve been mulling over this blog post for a week or two, and coincidentally Heather at Just A Colorado Gal addressed the same topic and totally hit the nail on the head. Check her post out if you’re wondering whether experienced outdoorsy people are in your corner.
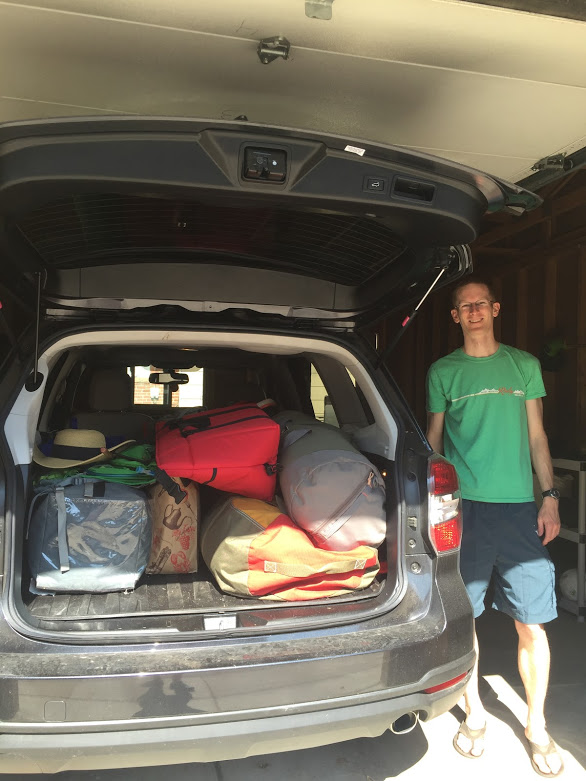
After a summer of buying a house, moving my horse cross-country, and general craziness that kept us close to home, Billy and I took an entire week to really kick off summer and see the West we had yet to venture into. We hit almost all four corners of Colorado, got a taste of things we wanted to see more of, and learned a whole lot about our new home state (oh, and got engaged!).
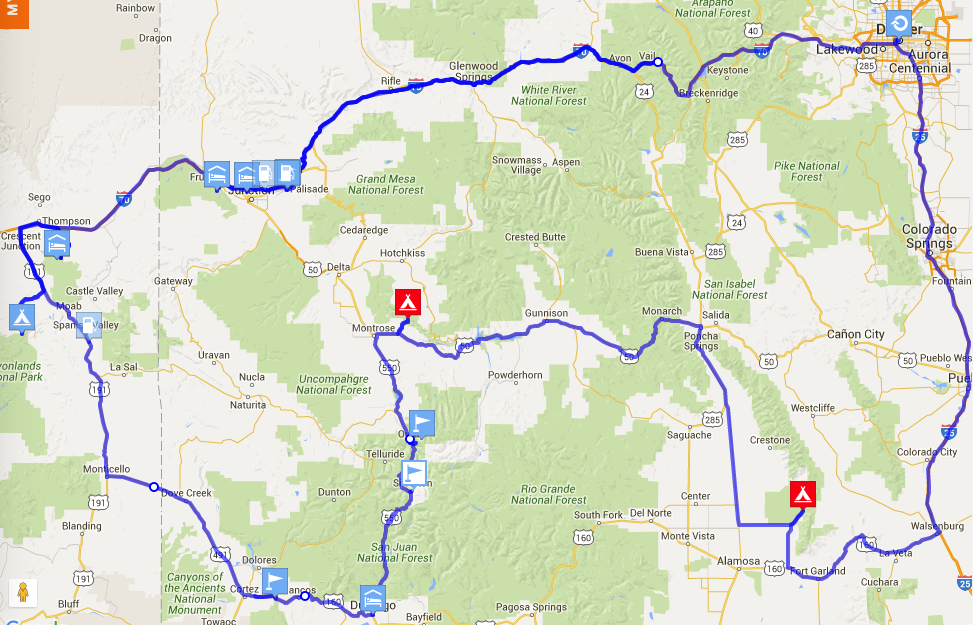
Our original route
The original itinerary was:
Grand Junction, Colorado National Monument and Palisade
Moab (Utah) to see Arches and Canyonlands national parks
Heading south to Mesa Verde National Park and Durango
Taking Million Dollar Highway north through Ouray and Silverton before camping at Black Canyon of the Gunnison National Park
Last stop: Great Sand Dunes National Park
Then we learned how hot it gets in Utah in June (110 degrees) so we headed back to the mountains after sweating it out in Grand Junction. We also got homesick (or at least sick of camping) on the second to last day of the trip, so we skipped Alamosa and the Great Sand Dunes to go straight home from Gunnison.
Where we went wrong
We still saw a huge amount of Colorado (I had never been west of the ski resorts before this trip!). Our biggest missteps that changed our plans were not fully appreciating how quickly it gets hot in the deserty part of the west and not fully appreciating how much we appreciate showers and a hotel room.
I thought it would be relatively cool still in mid-June. I was very wrong and should’ve Googled more in advance. In mid-June, highs were in the triple digits in both Grand Junction and Moab, so we decided to only subject ourselves to one extremely hot locale before trying to get high (altitude-wise). Similarly, I thought Durango would be cooler since it was technically in the mountains. But in reality, it’s actually not much higher then Denver, so it was in the upper 90s there when we arrived.
We also didn’t know how often it rains early in the summer, and ended up bailing on our second night of camping because we were stuck in yet another rainstorm (it’s just not that fun to hang out in a tent with no campfire for multiple nights).
It also rained when we were in Black Canyon of the Gunnison, so we had to hurriedly pack up our gear in the rain before setting out for two more nights of camping in Alamosa at Great Sand Dunes. By the time we stopped for lunch in Gunnison that day, we were 1000% over the idea of hauling out all our camping gear again and not just heading home to sleep in our own beds.
Our actual week-long itinerary
It was honestly so hard to pare down the list of what we wanted to do and where we wanted to go, so we tried to stay open to doing whatever we felt like that day. Except for the day Billy proposed – that day he was pretty adamant about going on a certain hike 😉
Here’s what we actually ended up doing, along with a few other suggestions of things we’ve since gone back for or that are still on our list now!
Day 1: Denver to Grand Junction
Starting off the trip with a drive across the state was the perfect way to discover Colorado. It’s kind of bananas how different the state is from end to end. After climbing up into the mountains from Denver, the red rock reappears as you drive through the incredible Glenwood Canyon and follow the Colorado River. The mountains then fade away and turn to desert (for a while it kind of looks like you’re on Mars) before spitting you out in the Grand Valley, which is filled with orchards, vineyards, and desert mesas. So savor that four-hour trip!
Pit StopSuggestions
Red Canyon Cafe in Eagle (almost exactly halfway)
Sauce on the Creek in Avon (just over halfway)
The Argentos Empanadas in Dillon (less then halfway)
We planned to arrive in Grand Junction later in the day because we were camping that night in the Colorado National Monument and wanted to beat the heat as much as possible. We stopped in Palisade for some peach vodka drinks at Peach Street Distillers before hitting up Meadery of the Rockies and a few other Palisade spots.
When we arrived at the monument around 7 p.m., it was still QUITE warm. We ended up having to make a few emergency trips into Fruita (the closest town to the campground) and we were not upset about having more time in the air conditioning. Click for my full guide to camping at Saddlehorn Campground in the monument >>
Our campsite – a little buggy and not a lot of privacy. But it worked!
Day 2: Colorado National Monument and retreating to the air conditioning
Thankfully, we were smart enough to book an AirBnb (with a pool!) for the next night. We woke up incredibly early to beat the heat – nothing says vacation like a 6:30 a.m. start time for hiking! It was totally worth it, however, because the monument is stunning and has a ton of short, beginner-friendly hikes along the scenic road that runs through it. Here’s my full hiking guide >>
Totally worth that early wake up!
After hiking, it was time for some wine! Well, first we had breakfast. By the time we were done hiking, packing up, and in Palisade, it was a totally acceptable time to start drinking. We visited a bunch of different Palisade wineries, but my favorite was Maison La Belle Vie. It’s patio/outdoor seating area is heavenly (thanks to the huge trees providing plenty of shade) and you get panoramic views of the grape vines and Bookcliff Mountains. Taste some wine, order the charcuterie board, and say “ahhhh.”
What’s not to like?!
To save money, we had lunch at Riverside Park using what we packed for camping. This awesome cooler helped us keep everything edible (and reasonably cold) in the hot weather and was a great investment that ultimately saved us money throughout the trip!
By late afternoon, we were ready for some time in a pool or air conditioning or both. Our AirBnb (unfortunately no longer listed) totally delivered, leaving us relaxed and ready to go to the mountains the next day!
If you’re okay with adding a not-insignificant amount of time to your drive, you could spend the night in Palisade (also probably more expensive) and backtrack a little to drive over the Grand Mesa on your way to Telluride. We optimized for time and cheap camping for this trip!
Day 3: Grand Junction to Telluride
Our last-minute detour put us in Telluride the same weekend as the Bluegrass Festival (arguably the biggest event of the year in Telluride), so again, we really should’ve Googled a bit before this trip. We needed to get to the campground ASAP since it was first-come, first-serve, so we high-tailed it out of Grand Junction first thing in the morning and started the drive to snag a campsite.
This did not seem like real life.
I think the mountains of southwest Colorado are the most beautiful in the state. We were in complete awe once the San Juan range started popping up on the horizon, and that only continued as we drove into Telluride. We were lucky to get the last campsite, right on the river, at Matterhorn Campground outside of town.
Pit Stop Suggestions
Horsefly Brewery in Montrose
Daily Bread Bakery and Cafe in Montrose
Telluride Restaurant Suggestions
Caravan Middle Eastern Food
Brown Dog Pizza
Siam (Thai)
Save yourself the headache that is parking and traffic in Telluride and take the gondola from Mountain View (just a short drive from the campground). We had plenty of daylight after setting up our campsite, exploring downtown, and grabbing a quick lunch, so we took the gondola back into town ready for hiking.
The hike to Bear Creek Falls is a popular one – for good reason. It’s easy access right out of town and has stunning views. It’s a round-trip total of five miles, but is all downhill on the way back (yes, this means it’s all uphill on the way there). I recommend hiking poles. This hike will always be my favorite because it’s where Billy proposed, but Jud Wiebe is another iconic trail in town (also lots of uphill, everything is steep in Telluride).
I realize this isn’t the waterfall, but doesn’t that tell you something that the waterfall wasn’t even the coolest part of the hike?!
We celebrated back at the campsite with mini champagne bottles (there’s a liquor store right off the gondola when you get back to Mountain View!) and a basic campfire dinner before settling in for the night.
Day 4: Telluride…and the rain starts
After a beautiful morning in Telluride exploring Bridal Veil Falls and Trout Lake, our plans to hike near Lizard Head Pass were foiled by an incoming storm. We spent the afternoon reading in the tent before heading to town for dinner. The sun had come out, but it was raining again by the time we got back, so a campfire was out of the question. We hunkered back down with our books.
The views of Bridal Veil Falls from where we got tired of driving up the gravel road that takes you all the way there 🙂
After a few more hours, we were totally over being stuck in the tent in the rain. It was getting humid and damp inside the tent and generally uncomfortable. It was 10 pm, but we wanted out. We decided to drive south to get a cheap hotel and a hot shower in Dolores.
This was a super fun detour since there is not a whole lot between Telluride and Dolores, and the Dolores Mountain Inn was everything you can imagine an old motel in an extremely small town being – bad wallpaper, endless tchotchkes in the lobby, the whole nine yards. AND there were hot showers with amazing water pressure. It was amazing and totally worth the midnight drive (plus we saw a bear along the highway so that was kind of cool).
Day 5: Mesa Verde and Durango
In hindsight, we should’ve spent more time in Durango and less time in Mesa Verde. I’m of the unpopular opinion that Mesa Verde just isn’t that cool. It took over an hour to drive into the park, and I realized at that point that two additional hours of driving just wasn’t worth it for me to see cliff dwellings. I thought I was pretty into ancient ruins, but it turns out it wasn’t my jam.
To be fair, some people have said this is because we didn’t do a tour of the cliff dwellings. We didn’t coordinate our arrival time well enough to do that, and I don’t think going to Mesa Verde is worth it without that tour.
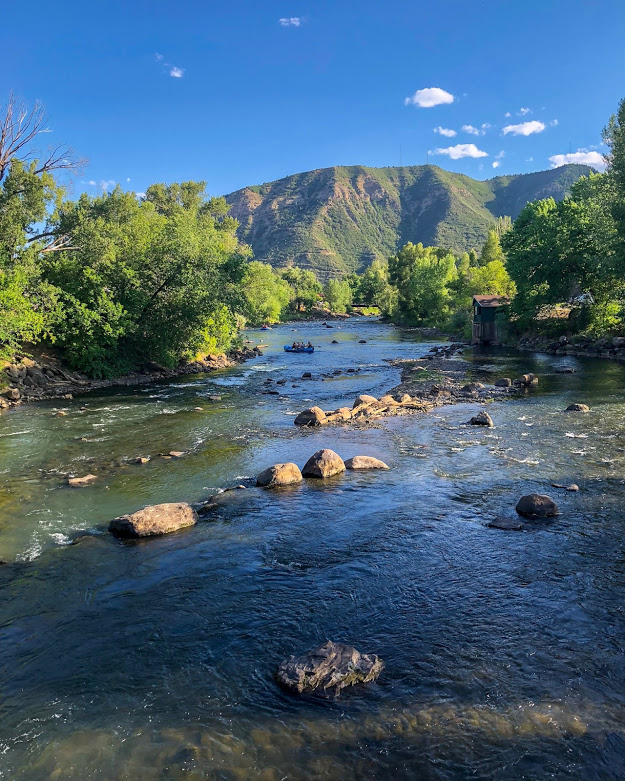
Durango itself is a really cool town with plenty to explore. Like I said at the beginning, we wildly underestimated how hot it was going to be. We should’ve dedicated more time to exploring downtown, but instead spent our limited time doing laundry and laying in the air conditioning.
Rent a bike to explore the Animas Riverwalk – the views will not disappoint!
When I went back to Durango for work in 2018, I spent a lot more time in town and really loved it. The views from Fort Lewis College’s overlooks and hiking trails are beautiful, as is the riverwalk path (rent a bike to explore more!). You can also wade or float in the Animas River to beat the heat!
Day 6: Durango to Black Canyon of the Gunnison
Driving north on the Million Dollar Highway is the way to do it. The road is full of steep drop-offs with no guardrail (honestly, calling them “steep” is such an understatement, but I’m not sure what other adjective to use). But for the worst parts, you’ll be on the inside and not right on the edge when traveling north.
Silverton is a great stop to make, but my favorite town along this route is Ouray. If I could do it all over again, I’d stay at least one night here as well (check out AlpLily Inn if you do).
Ouray on a sunny day (spoiler alert, we did not catch it on a sunny day).
Pit Stop Suggestions
Mouse’s Coffee and Chocolates in Ouray (get a scrap cookie!)
Ouray Brewery in Ouray
Taco del Gnar inRidgway
We arrived at the Black Canyon of the Gunnison, just outside of Montrose, with plenty of time to hike and explore before setting up camp for the night. I was extremely excited for the stargazing here since Black Canyon is one of the only Dark Sky-designated areas in the state, but it (of course) was cloudy and then raining, so that didn’t quite pan out. I hope you have better luck!
Black Canyon is fantastic for beginner-friendly hiking and also has jaw-dropping views of the incredibly steep canyon. Read my guides for camping and hiking there.
Views from the visitor’s center at Black Canyon
Day 7: Black Canyon to Home via Gunnison
We woke up to rain, so we hustled out of the tent to pack things up as fast as possible and hit the road. The secluded campsite would’ve made a great place for a nice, relaxing campfire breakfast, but it was not to be.
We started our day by driving to the bottom of the canyon, which is accessible to cars without a trailer attached. This was pretty, but took a long time and I’m not sure it was totally worth it. However, the campsite down there seemed really cool and could be a good alternate place to spend the night.
We left for Gunnison, setting out on another beautiful stretch of driving. Once we pulled into town, we stopped for lunch and a beer….and realized we SO did not want to camp anymore. From our table at High Alpine Brewery, I cancelled our Great Sand Dunes campsite, ate the fees, and immediately felt relieved.
The look of someone not camping in the rain again!
Knowing we were headed home next, we decided to drive into Crested Butte from Gunnison. Crested Butte is another fun and funky mountain town that’s a little like Telluride with a little bit more of its hippy soul preserved. Ideally, we would’ve gone hiking there as well but we were wiped out (oh and it was raining again).
If I were to go back, I’d go during wildflower season later in the summer and hit up the plethora of gorgeous trails in the area. I’ve also toyed with the idea of training for the Sage Burner trail race series in the fall for a leaf peeping trip!
The bottom line
However you do it, get out there and explore this incredible state. This road trip gave us just a small taste of what Colorado had to offer, and only made our “to visit” list miles longer. After living in Colorado for a few years and not seeing much besides Denver and the ski resorts, it gave us such a better appreciation for our new home and got us excited to see more!
Did you take an alternate route? The same one? Let me know in the comments!
Want to know what we packed? Look no further than this blog post.
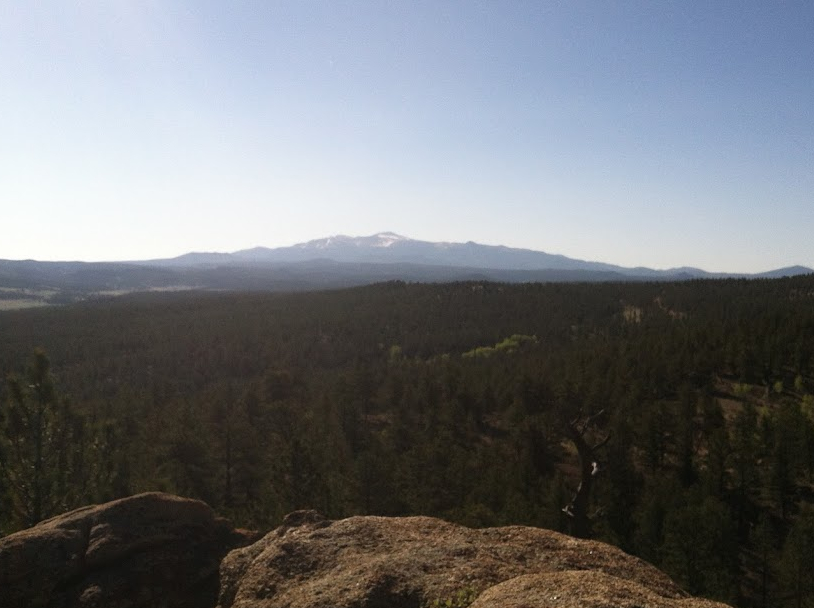
Despite the fact that our air mattress pump broke and we slept on the ground, Blue Mountain near Lake George was a fantastic and beginner-friendly first Colorado camping trip . Plus, you can find a campsite easily on a summer weekend, even if you randomly decide after work on Friday that you feel like camping (guilty).
When 2016 rolled around, I realized not only had I been neglecting this blog, but I also hadn’t gone for a hike since summer. Let me remind you – I live in Denver. Mere hours from some of the most spectacular outdoorsy-ness this country has to offer. And there I was, on my couch. Hours deep into Netflix binging. Eating cookie dough in a blanket nest.
And so was born my New Years Resolution: Go hiking (somewhere different!) once a month. Every. Effing. Month. And I’m happy to report I put the cookie dough aside (temporarily) for some good ole fashioned time with Mother Nature.
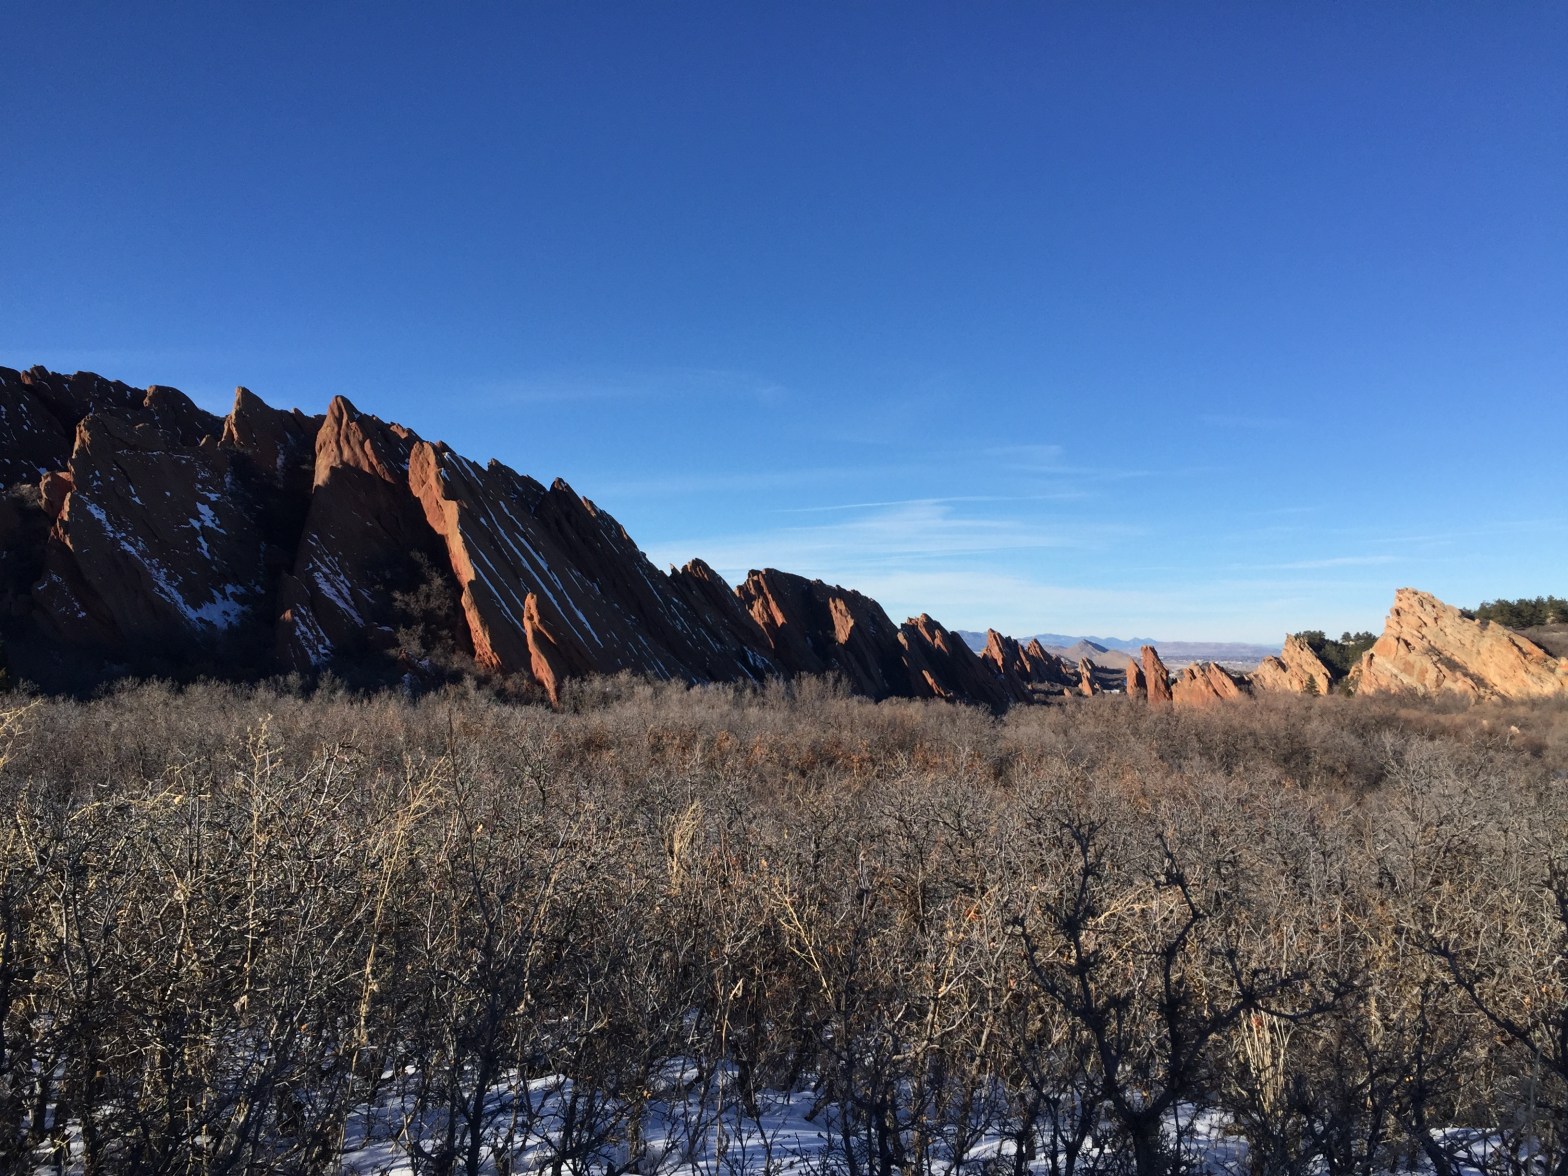
Roxborough State Park was a good gateway drug to getting back into hiking. It’s within an hour of Denver, so it was going to be reasonably warm in January, and it has lots of beginner-friendly options. I give this same spiel every time I write about a state park, but they really are close-to-home hidden gems for those of us on the Front Range.
If you’ve been spending a lot of your time watching Netflix in a blanket nest on your couch, Fountain Valley Loop is the perfect place to start. This 2.3-mile loop is mostly flat, very wide, and has several scenic overlooks with great views of the park. This also makes it a great option if you have family visiting from out of town, or if you’re trying to get into trail running. The trailhead is just past the visitor’s center – it’s the one on the right if you’re looking at both trails.
The trailhead is just past the visitor’s center – it’s the one on the right if you’re looking at both trails. Roxborough has great signage, so it’s not difficult to figure out which one to take.
All state parks are $7 to enter, but remember our state parks subsist solely off of parks pass sales and from lottery funds – they don’t get any taxpayer dollars. If you’re going to visit a state park every month, then you should take the plunge and get an annual pass ($70). It pays for itself pretty quickly, and you look like a legit Coloradan with it on your windshield. You can buy one at the gate, where you can also get a trail map.
Roxborough has a small parking lot, so if you don’t get there early on the weekends you may have to wait to get let in to park. We went in May around 11 a.m. and waited for about 10 minutes. In the winter this wasn’t an issue at all, making it the perfect winter hiking spot!
Shortly after you start on the trail, you’ll come to a fork. Go to the right – it’s the easier direction around the loop. Everyone we saw coming the other way was seriously hurting at multiple points. Don’t make their (completely unintentional) mistake. Counter-clockwise means you go down the big hills and up the small ones.
I highly recommend taking the short detours for both overlooks. You’ll run into the signs for Fountain Valley almost immediately after starting the loop, and Lyons Overlook is shortly thereafter. Both are short uphill trails, but be aware that they’ll be more narrow and a little rocky.
Lyons Overlook
This trail is perfect for beginners because you don’t sacrifice scenery for a more accessible option. There are great views and the trail is super straightforward (literally impossible to take a wrong turn because it’s the only trail on this side of the park). The elevation is only about 6,200 feet so if you live in the city you won’t be gasping for air, and because it’s so low you can still hike it without snowshoes in the winter!
Seriously there were all kinds on this trail – angsty teens in street clothes, blatant out-of-towners (I see you in jeans sir), bearded Denver hipsters in flannel, families with babies (the scariest part is that each year these people look closer and closer to my age…). So don’t be shy and get out there! Tag me in your pics on Insta or Twitter @outdoorbeginner. See you out there!
I’d never put on a pair of skis before I moved to Denver at age 23, so learning to ski was both exciting and mildly terrifying. Skiing seemed really cool, but I was learning as an adult that was acutely aware of my own mortality, the cost of hospital bills, and obligations to work.
I had absolutely no idea what to expect.
One of my more charming qualities is that I am not good at accepting help (what I like to refer to as “unsolicited criticism”) from my husband. Since I wanted my relationship to survive this day on the mountain, I opted for a lesson so a professional could show me the ropes.
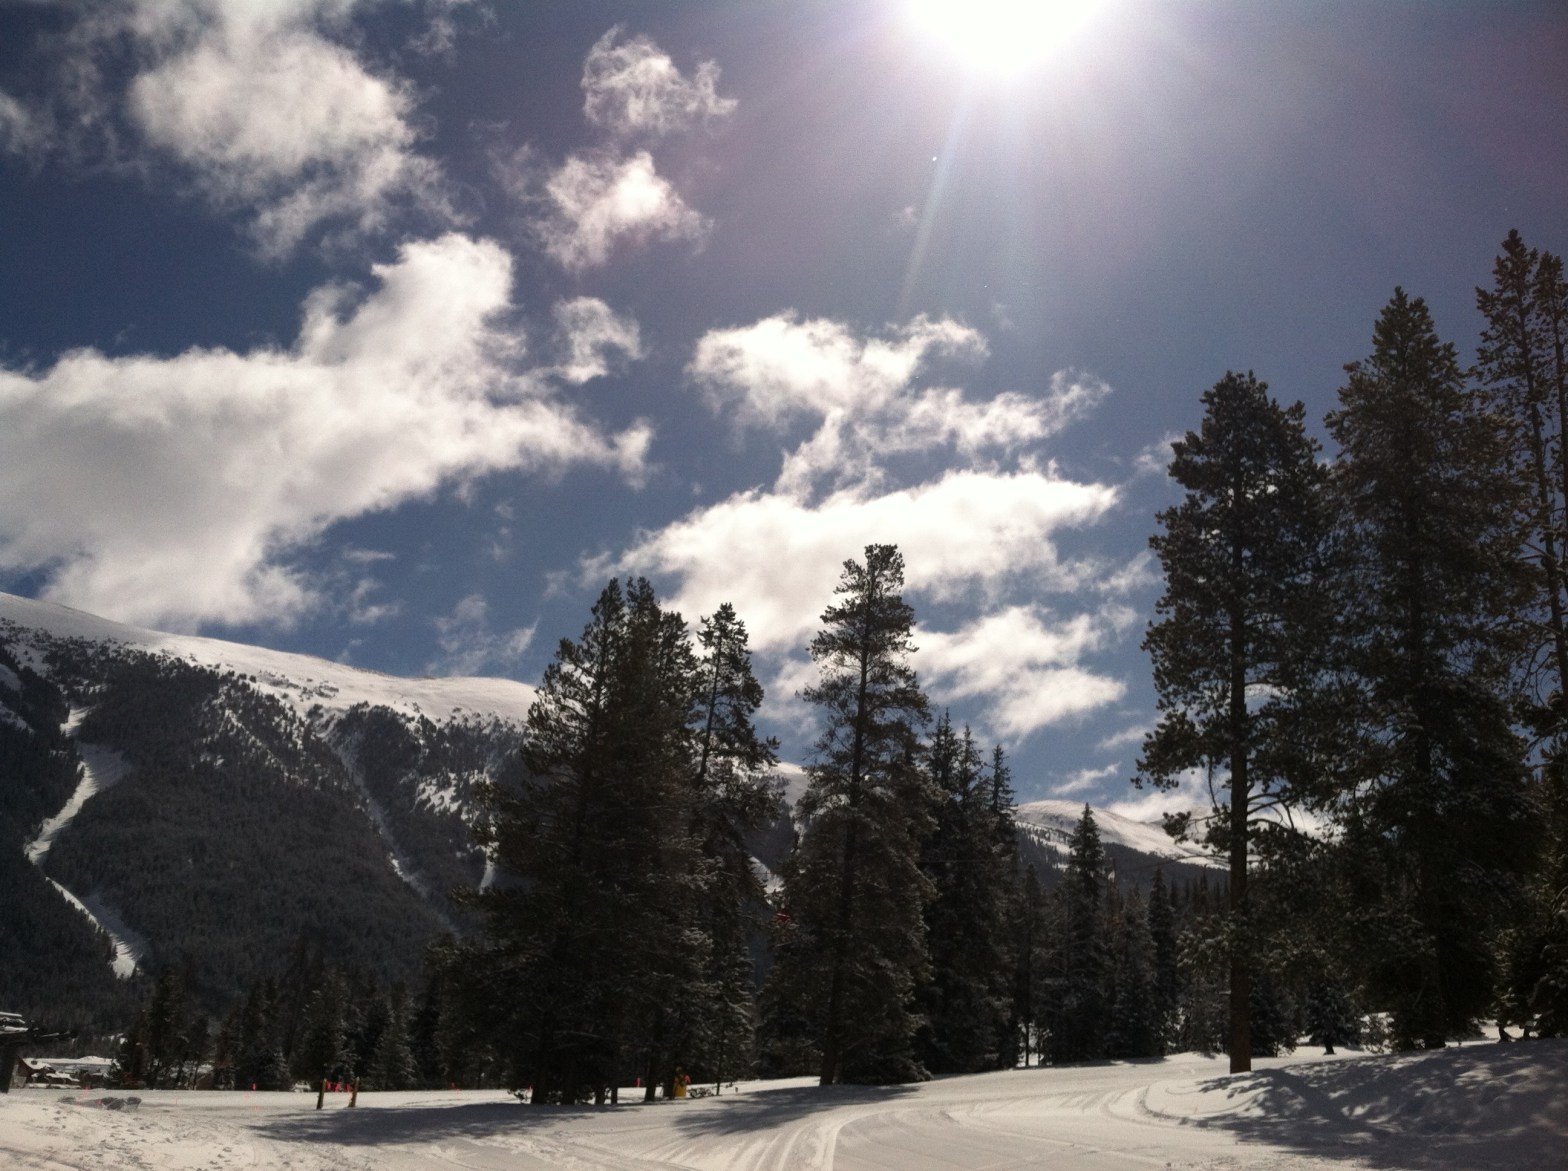
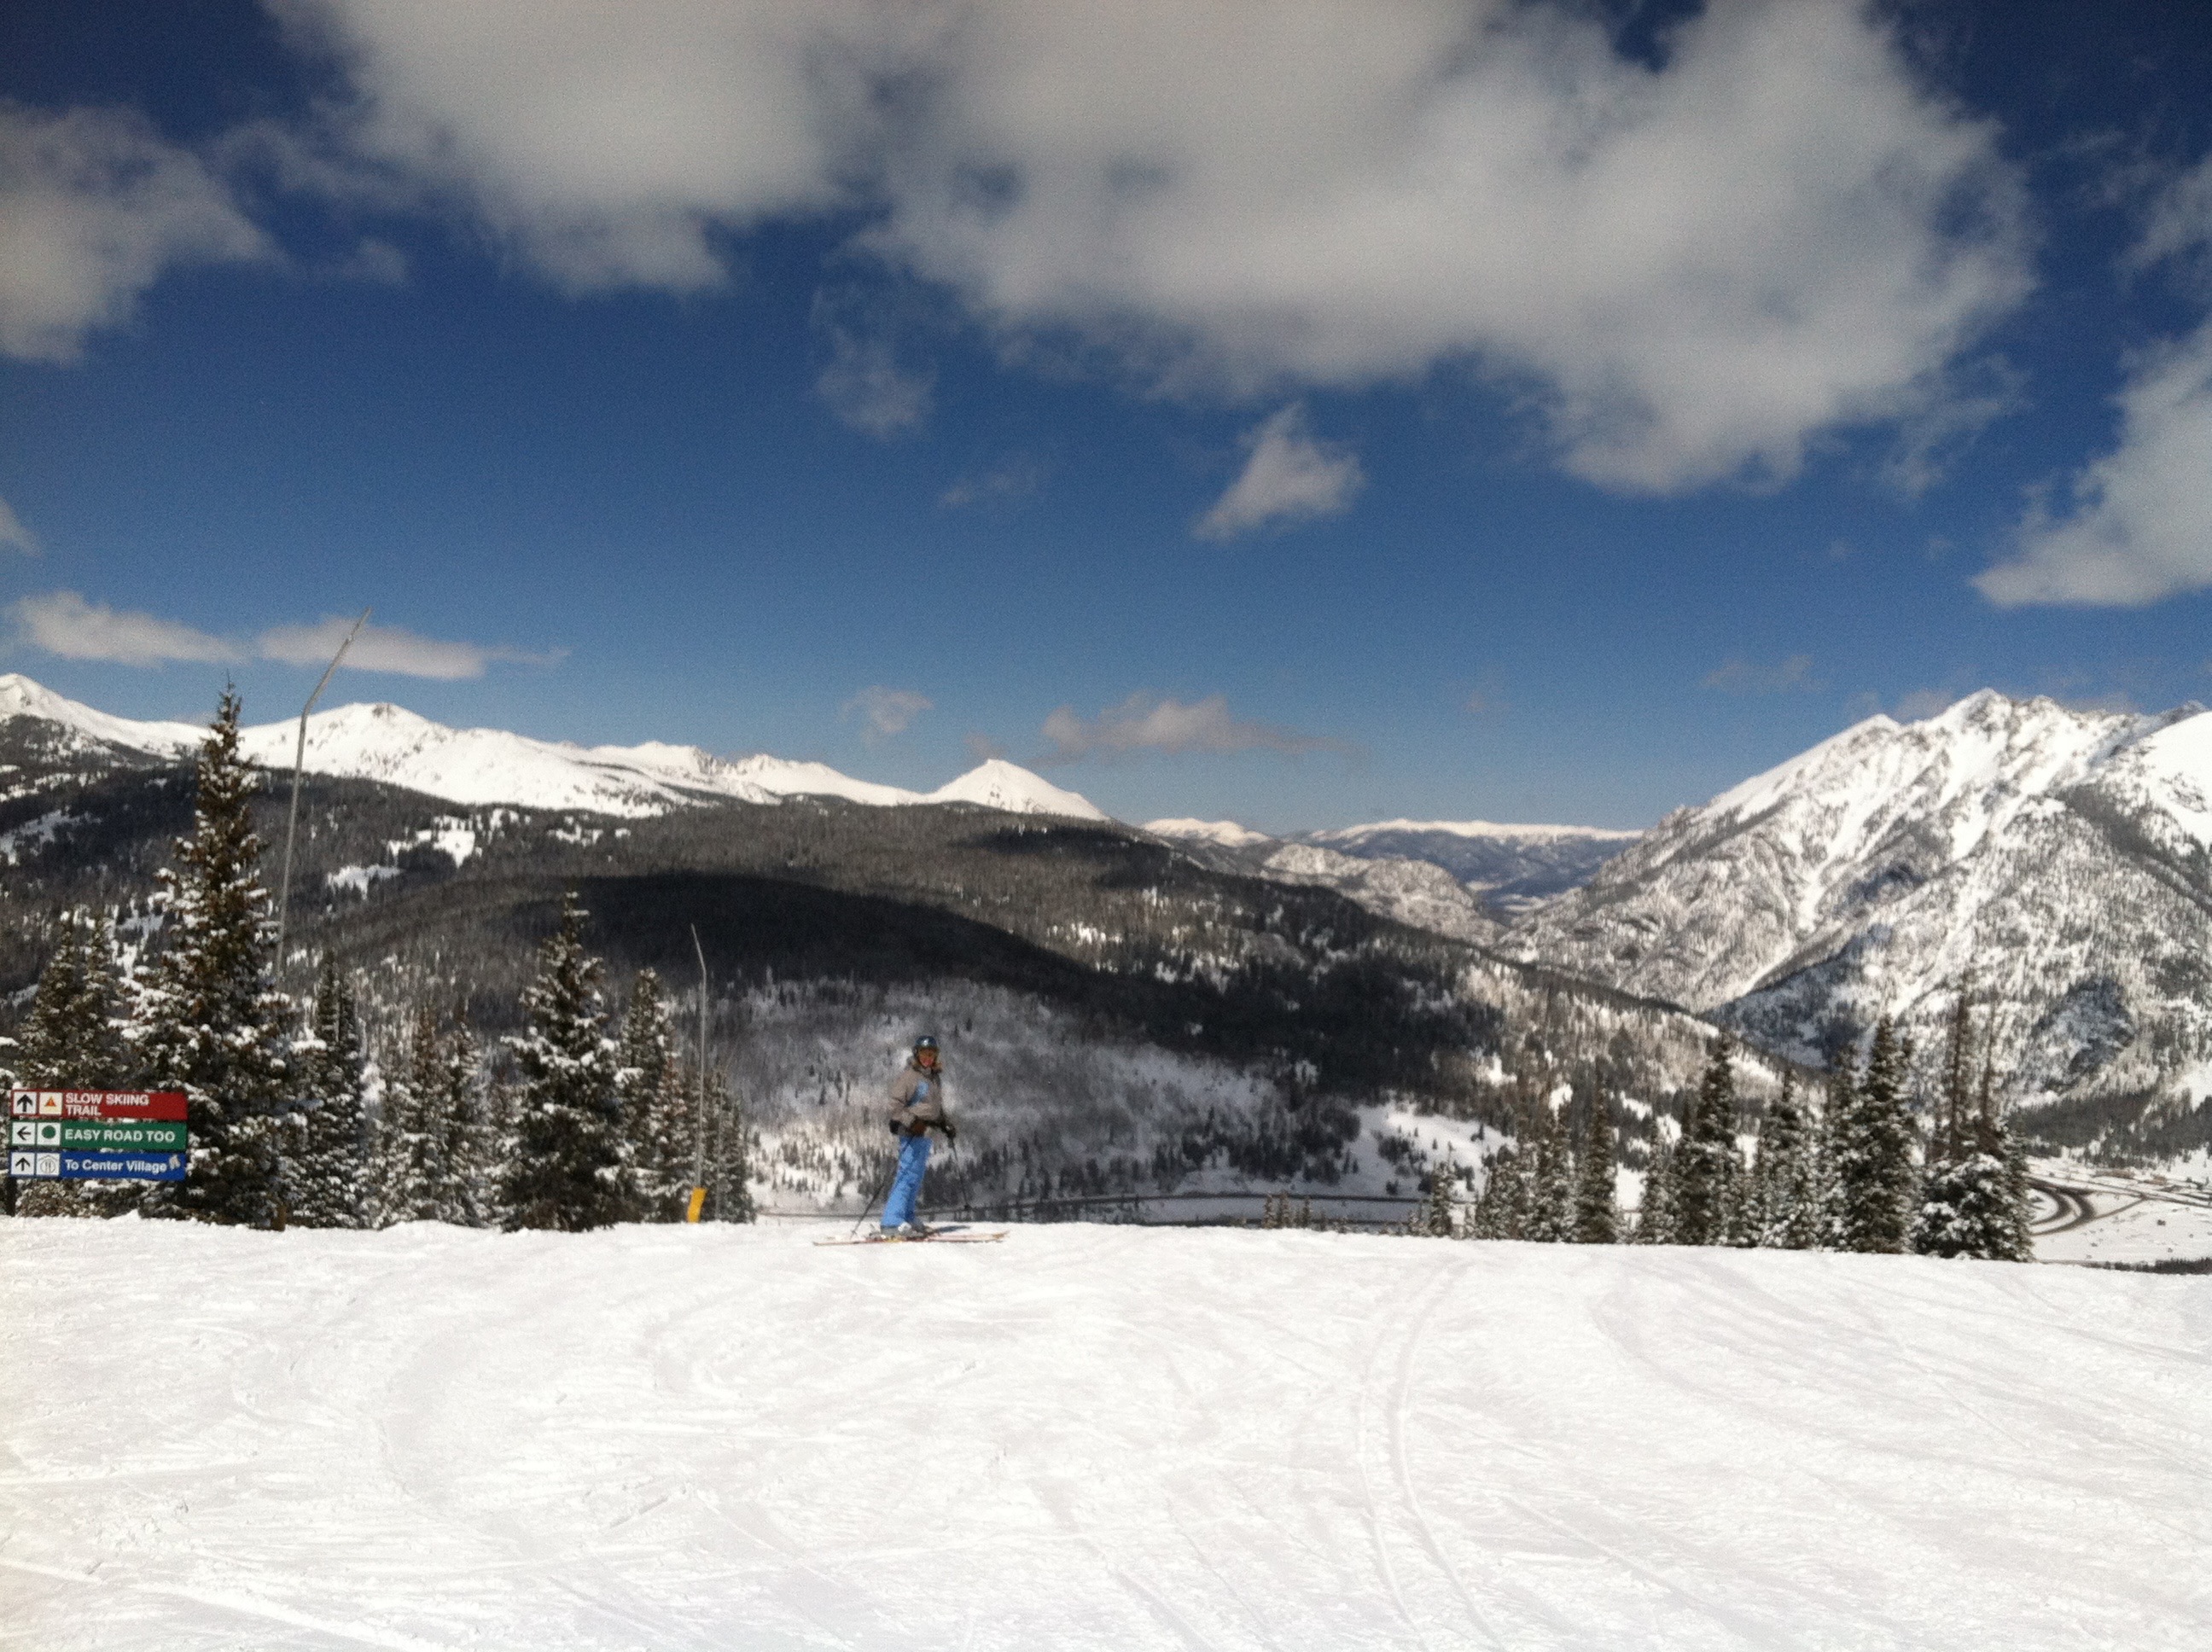
This guide to ski lessons is based on the two I’ve had at Copper Mountain in Colorado, which I highly recommend for anyone living in Denver. Copper is easy to get to and has an affordable (for skiing, not normal life) four-pack that I get each winter. I (tragically) have not been compensated by Copper to write this blog and all opinions are my own.
Don’t worry, this isn’t where you start out. I just wanted to use a scenic picture.
What To Bring
My guide to dressing for your first ski lesson is here. Beyond that, bring:
Hand warmers
Toe warmers
A comfy pair of shoes that you can walk from the parking lot to the rental desk in (this is of varying distance, but at Copper it’s about a five-minute walk). Because I’m a grown adult, I often wear my Uggs from college.
SUNBLOCK. Yes, in the winter! Don’t forget the bottom of your nose. Speaking from experience, it’s a place you NEVER want to get a sunburn in. Wear chapstick with SPF in it, too.
A good attitude. For reals, skiing is not easy to pick up. You’re going to fall. You’re going to struggle. Check your ego at the door and embrace looking like a fool for the day (or in my case, days).
What They Provide
Your lesson includes a lift ticket and rental equipment. This means a pair of skis, boots, and poles. A helmet is not included, but can be added on for less than $10, so it’s worth it to protect your noggin.
Water is also provided at the bottom of the bunny slope at Copper, and you’ve obviously got a resort full of food, albeit a little overpriced. But you’re participating in one of the most expensive sports possible so that shouldn’t be a surprise.
When To Book
Lessons are cheaper at each end of the season – think early December and late March/early April. The only drawback is that the super easy beginner section of the mountain (beyond where you learn to ski initially) usually isn’t open during either of those times. This is my one major complaint about Copper, but I’m sure it has to do with “weather” or “the limits of snow-making” or “science.”
I would recommend taking your first lesson in early December so you can get a taste at the beginning of the season. You can do a half day or full day (with a lunch break). That’s a personal choice, but I can only handle about half a day. I also have bad knees from riding horses (the other most expensive sport known to mankind) so you do you.
The Actual Lesson
If you have never skied before and live in Colorado, you will probably be the only non-tourist in your beginner group. Own it.
My first lesson, the group was small, only about four of us. The second lesson was a bigger group, about six or seven, which was not ideal. I didn’t like the instructor as much for the second lesson, but I also felt like I just didn’t get enough individual help. Yes, I know I signed up for a group lesson. But still.
At my first lesson, we started out learning the absolute basics – how to put on your skis, how to take off your skis, how to move around on your skis, how to carry your skis. Then, you trudge over to the bunny slope. This alone will get you sweating, but don’t worry they shuttle you back on snowmobiles.
Next, we went down a “hill” that barely qualified as a sloping surface, which was the perfect start. You can get a feel for the balance of skis, and you learn how to slow down and stop. You’ll also cover steering, and your instructor will make sure you’ve mastered these skills before moving onto a hill that actually does resemble something with an incline.
Don’t fret – it’s still a small hill, and the turns are very gentle. We went through a bunch of different exercises that got progressively more challenging, but everyone moved at their own pace and our instructor did an excellent job of adjusting to the very different skill levels.
You can practice as much as you want before learning how to get on the chairlift and taking on the main bunny hill. It does get pretty busy with all the other lessons, so this also helps you learn how to maneuver in traffic (although the instructors do a good job of managing this) and gives you a little taste of a slightly large hill. Still, nothing wild.
Once your lesson is over, you can use your lift ticket to go down the bunny hill as much as you want.
The Next Step
It’s really important to leave your first day feeling confident. My number one recommendation is not to over face yourself, even if you pick it up quickly. I tried going down a big green run after rocking my first lesson, and ended up crying and doing the walk of shame on foot down the mountain. Don’t be like me! Be patient. Just stick to the bunny slope for some extra practice after your lesson, eat some yummy cafeteria food, and head home feeling like you just shredded some gnar.