Beginner’s guide to Looe Key snorkeling

I used to spend my winters working in Florida (less glamorous than it sounds, believe me) and I’m willing to try almost anything once (unless it involves jumping out of anything or close encounters with carnivorous animals). On a weekend getaway to Key West, my then-boyfriend (now husband) suggested going snorkeling. Despite my initial anxiety about ocean creatures, we had a blast at Looe Key.

Why should I go to Looe Key?

The Looe Key Reef Resort and Dive Center is reasonably priced and came highly recommended by our resident Key West expert/friend who lives in the Keys. For $39 per person, you get a half day of snorkeling plus all the equipment that comes with. If forget sunscreen, they also sell biodegradable, reef-friendly sunscreen for only a few bucks (I was 100% convinced I would shell out $20 for an 8-ounce container. Not so!).

The dive center is actually located on Ramrod Key, about a 35-minute drive from Key West proper. We were staying on Summerland Key, so it was a bit shorter from there. It’s super easy to find and is literally right off the highway, so you can’t miss it.

What should I expect for my snorkeling trip?

The staff was super helpful and friendly, and we boarded the boat with about a dozen or so other people. Based on my first snorkeling experience, I assumed we would be staying right by the shore. I thought that was the only place you could go snorkeling – going further out was clearly for scuba diving and advanced people far beyond my bravery level.

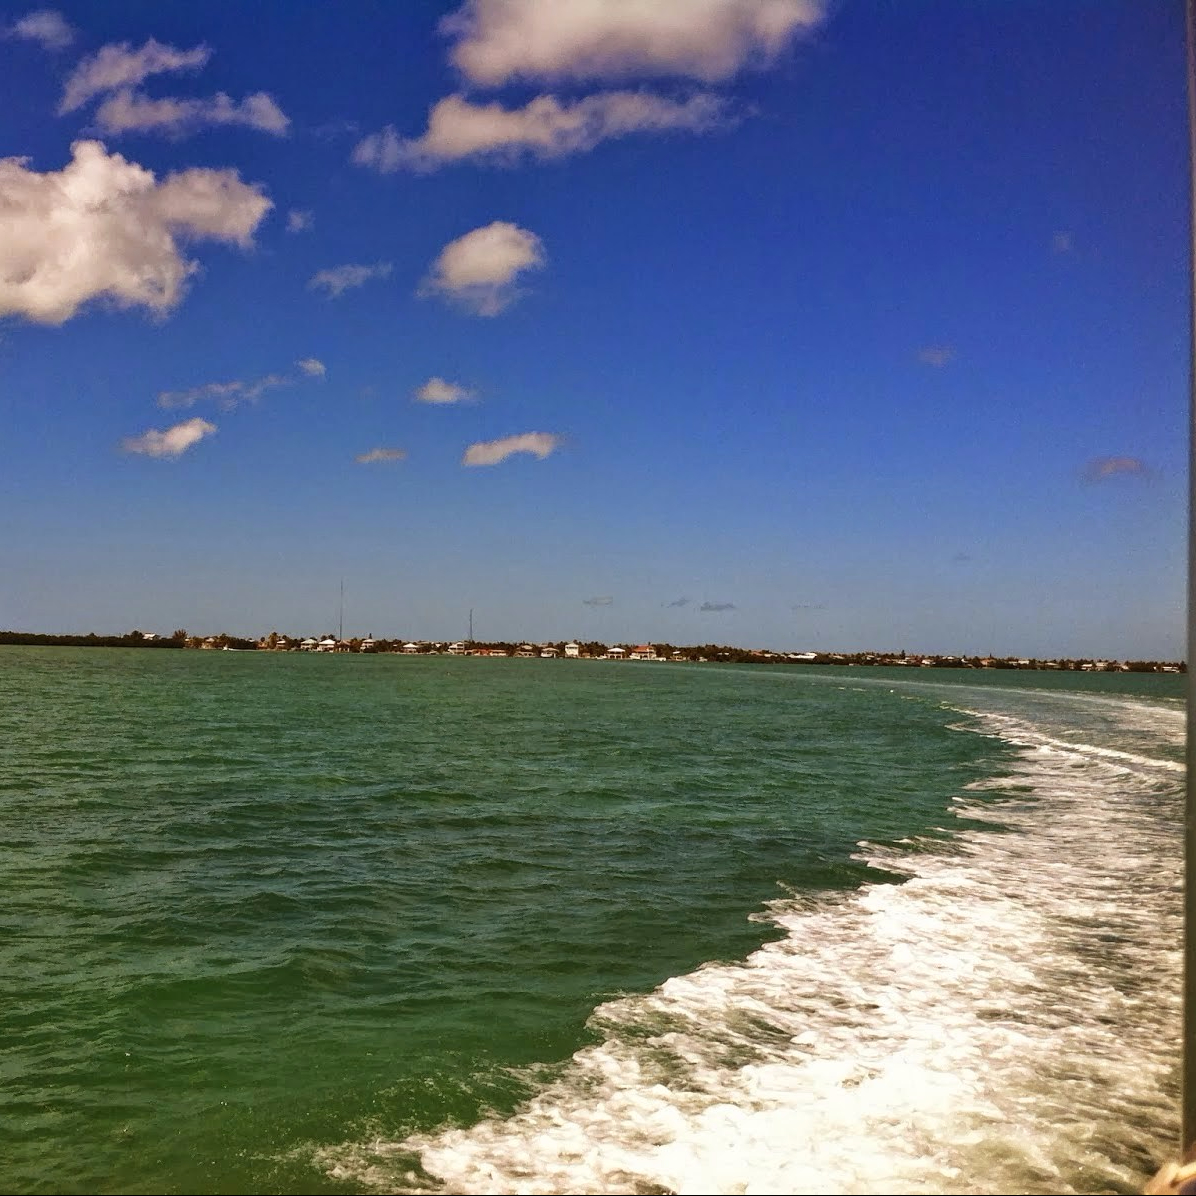
I didn’t realize we were legitimately going out into the ocean. Quickly, the shoreline disappeared as we motored into open water. Coupled with the fact that our boat captain told us we would see “anything and everything” (read: sharks), by the time we stopped at our first dive site I was starting to worry I was getting in over my head.

I reminded myself that thousands of idiots go snorkeling every year, and silenced the anxiety devil on my shoulder. I hopped in the water with only a sliiiight death grip on Billy’s hand. As soon as I looked underwater (again, no experience necessary – put on the mask, the fins, keep the tube above water, and breathe) I knew this adventure was going to be worth it.

Unfortunately, I have no pictures of the thousands of beautiful tropical fish we saw amongst the coral reef, so you’ll have to take my word for it that they were there. They have a professional photographer that follows you around, but I quickly discovered I looked much less graceful underwater than I imagined. We didn’t get any photos.

What do you see underwater?

We saw a ton of different fish, including a goliath grouper that scared the pants off of me. They weigh about 200 pounds, and this one was particularly friendly and kept trying to swim at my face.

And yes, we saw a shark.

A small-ish blacktip shark that was very far away and not swimming at me. Thanks to the herd mentality, I remained calm and could actually enjoy the fact that I was seeing this incredibly cool creature. It’s amazing what happens when you’re in a group of other people that are all dying to see a shark.

Is Looe Key super touristy?

The staff at Looe Key is awesome and have the sense of humor that comes with running a touristy business. We had everyone from experienced scuba divers to extremely stupid spring breakers on our boat, and we all had a blast. Except for the one spring breaker who got horrifically seasick, which was actually awesome because he wasn’t barfing, just sick enough that he stopped talking, which is what everyone really wanted.

What if I get hungry while we’re on the boat?

For the perpetually hungry, like myself, there were snacks on the boat and our captain even grilled up some hot dogs. You have to pay for lunch, but the captain just keeps a tab and charges your card when you get back, which is super convenient. After lunch, we motored around to another destination for more diving, before circling around a shallower area to look for sea turtles.

For completing your dive, you also get a drink ticket to the oh-so-Floridian tiki bar back on dry land. Delicious tropical drinks, excellent adventuring, and plenty of sunshine – what more could you ask for?
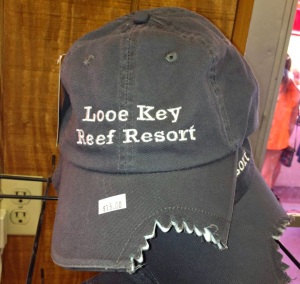
Answer: this hat.

souvenir shark bite hat at looe key reef resort in key west

Beginner’s Trail Guide: St. Mary’s Glacier

St. Mary’s Glacier is a bit of a hidden gem, and it’s definitely a hike you should do once. Obviously, it’s not hard to find spectacular views on hikes in Colorado, but how many chances do you get to hike on a glacier?!

To be completely honest, this was a doozy of a hike for me as a beginner because of the elevation. St Mary’s glacier starts at 10,000 feet (Denver is at 5,280), so it won’t be a walk in the park for you, but it’s also only 1.5 miles. Plus, I’m a big believer in shamelessly taking as many breaks as you need for water/getting oxygen as you need. The point of hiking is to enjoy your beautiful surroundings, so why put pressure on yourself to get done AS FAST AS POSSIBLE. It’s not a race.

The second-biggest obstacle was the wind. We went in mid-September, while it was still quite hot in Denver, and were bundled. Obviously, it will be higher up so it will be colder, but that wind whipping around certainly didn’t help. As always, check the weather, dress in plenty of layers, and carry a backpack. (Here’s my complete packing list for hiking).

Finding St. Mary’s does require some driving on non-paved roads, which can get a little rough. We didn’t need to use four-wheel drive, but just know ahead of time that you’ll have to take the end a little slow.

Take the St. Mary’s exit of off I-70, after passing through Idaho Springs (which, by the way, is the mother of all post-hiking lunch options. Hit up Tommy Knocker’s Brewery, BeauJo’s Pizza, or Smokin Yard BBQ. All are insanely good). It’s about an hour drive, depending on traffic, and Idaho Springs is your last stop for gas, food, and any other necessities.

Hiking St. Mary’s costs $5 per vehicle and you have to leave either cash or a check at the parking lot. Amazingly, if you do not have exact change and you leave your mailing address on the provided piece of paper, whoever manages the trail will actually mail you a check in the amount you are owed. There are trash cans and portapotties at the trailhead, and after that, you’re on your own.

There are a litany of reasons why you should always stay on a trail and never wander off, but most importantly at St. Mary’s you should stay on the trail because you’re otherwise trespassing on people’s private property. It’s always important to be respectful of where you are hiking, but especially important here since again, these people make their home at St. Mary’s.

The trail itself is fairly rocky, but pretty wide which is nice. Just make sure you’re wearing good, supportive shoes. If you want to buy some hiking boots, here’s my beginner’s guide.

dirt hiking trail lined with pine trees and rocks on a sunny day
The trail actually goes off the left, but there are a few sections where it it as rocky as what is straight ahead. Also, watch out for ice.

I may be dramatizing this hike in my beginner’s mind, but it seems like a very long 1.5-mile trip. Probably because I was gasping for air most of the time. Once you reach the lake, rejoice! Also, this is where the wind REALLY picks up. But you are looking at the glacier! I didn’t really know what to expect, but by the end of summer, it will look decidedly less glacier-ey and more like a patch of ice.

a man stands in front of st marys glacier near idaho springs colorado

You can keep walking up the glacier, but let this be my warning that if it’s extremely windy and you are a small lady (like myself), you may not want to go all the way up. It physically pains me to say this, because feminism, but I was almost getting blown over the day we went, so I only went about halfway. You still get an incredible view, and if there are crazy skiers there, you can watch them go down the glacier, which is actually pretty cool.

An REI employee later informed me that it’s actually a snowfield, but I prefer to say I climbed a glacier. Regardless of what the proper name is, the views are worth the trek:


St. Mary's Glacier Hike Colorado Idaho Springs Beginner Hiking
The view from halfway up ain’t shabby.


Jog A Dog at Denver Animal Shelter

Disclaimer: I take no responsibility if you fall in irreversible, head over heels love with any of the dogs you jog with. They are all up for adoption and I’m not liable for any severe cases of puppy love.
Do you live in the Denver area? Do you have a mild to moderate obsession with dogs? Do you enjoy walking and/or running? Would you like a Tuesday night activity that keeps you from binge-watching Netflix on the couch with a bottle glass of wine? Then Jog A Dog is for you!

I am SO excited for this new program at the Denver Animal Shelter, particularly because of how welcoming and beginner-friendly it is. As you may have guessed from the name, the premise is to take a shelter dog for a jog. The shelter is conveniently located adjacent to the South Platte River trail, which is nice and wide, paved, and generally quite lovely to stroll along.

Unlike the name indicates, you don’t have to jog, or even run, if you don’t want to. We take all sizes of dogs out, and while there is a marathon runner in our midst, there is also me. I am currently walk-running in intervals while I recover from an injury, and the midsize and small dogs I took out were perfectly happy with that. The really little guys were just happy to walk around.

The group is small, so we are hoping to grow. Right now it’s just five of us gals, so fellas if you’re into dogs and attractive women, come on down. Just kidding. Sort of. In all seriousness, it’s a small but awesome group of super friendly women of varying ages (I’m probably the youngest at 25) and abilities. No one is judgey and everyone goes at their own pace and distance.

You get yourself off the couch, you give a shelter dog the best afternoon of their lives (seriously, I have never seen a group of dogs that are so appreciative and happy), and our fearless leader, Melissa even brought us donuts to celebrate the end of a good day (because we totally earned it…right?). If you’re really lucky, you will also get some love from the pups you take out.

You do have to be a Denver Animal Shelter volunteer to participate, which requires you going through a background check. This process takes a couple weeks, and yes, it’s annoying.

**EDITED July 2017**

Getting involved in Jog A Dog used to be super easy. Unfortunately, that has changed since the shelter got a new volunteer coordinator (who is doing a lot of amazing things). You can no longer just be a volunteer for Jog A Dog, you have to commit to a weekly, year-round volunteer shift and at least one full day of training.

This sucks because it’s a huge barrier for people that just want to volunteer for Jog A Dog for an hour once a week in the summer. We (the current Jog A Dog) volunteers are hoping that once we get through a summer of the program, we can get that reconsidered for 2018. I know this is kind of a crappy update, but I noticed this blog post is getting a lot more traffic lately and I wanted to update it with accurate information.

Beginner’s Trail Guide: Gem Lake in Estes Park

This four-mile out and back trail was the first hike I ever did after moving to Colorado. The elevation in Estes Park is no joke, so if you’re new to town like I was, plan on taking lots of water and lots of breaks. It was slightly demoralizing that a very small fluffy white dog lapped me on this trail, but the views along the way helped ease that pain.

How do I get there?

You hook up with the Gem Lake trail after parking at the Lumpy Ridge Trailhead. As with every Colorado trail in the summer, you’re going to need to wake up early. We left Denver by 7 am on Labor Day weekend and found parking, but it was jammed by the time we got back.

Lumpy Ridge is an hour and a half away from Denver, right outside of Estes Park, pronounced EST-is (rhymes with west is, not a part of the male anatomy) Park. The trip is easy now that all the highways have been repaired from 2013 flooding, and is super scenic. You get to go through Lyons, which is a super cute mountain town. It’s your halfway mark to Estes, and a good place to stop for food or gas.

Before you head up to Estes for any reason, make sure you check the Visit Estes Park website for festival schedules. We narrowly avoided getting trapped in a McDonald’s parking lot because the streets were closing down for the Scottish-Irish Festival.

Estes has an awesome visitor’s center with tons of trails, and actually a very nice path to just walk along the creek/river that runs through town. I saw lots of elk in this area too, which is always a fun moment to screech at my husband to pull over so I can take pictures bonus.

Hiking in Estes Park is nice because you have everything you need fairly close to the trailhead. There’s obviously a McDonald’s, which is where we usually stop for second breakfast after waking up at the crack of dawn. There’s a Subway if you want to be Healthy, as well as a Safeway if you want to stock up on snacks. All the amenities are in Estes, so you don’t have to worry that you’re driving anywhere remote.

Where do I go?

Once you arrive at the trailhead, the trail is basically straight up from there. Make sure you follow the signs for the Gem Lake Trail – you parked at Lumpy Ridge, but you don’t want to go to Lumpy Ridge.

I moved here from outside of DC, elevation 36 feet, so I found myself wheezing and sputtering for air about 20 feet into our hike. Estes Park sits at 7,522 feet compared to Denver’s 5,280, so even if you’ve acclimated to Denver you may still be out of breath. Drink lots of water and take plenty of breaks to help combat this!

Before you leave, hit the toilets at the trailhead. They are non-flushing toilets, aka “vault toilets,” which is a polite way of saying, “We put a shell of a toilet over this very deep hole in the ground.” By the time you come back there will likely be a line, and you’ll have a very full bladder, so don’t make matters worse by not at least emptying it before you start out.

While I was waiting in line, I tried to get to know the teenage girls in line with me – excitedly commenting that we had the same hiking boots!!! They were not impressed. I started to realize I’m an Old in their eyes.

Anyways, bottom line there’s no running water, so be prepared for that emotionally and make sure to bring hand sanitizer. If you want to know what else I pack in my backpack for hikes, click here.

What is the trail like?

Once you’ve got going, prepare to zig-zag up for about two miles. Again, don’t be discouraged if you have to stop a ton. There’s no shortage of spectacular views along the way.

view from gem lake trail of the town of estes park, lake estes, and the Rocky Mountains

Once you reach Gem Lake, it’s very pretty, but make sure you go around it to look back from whence you came. We were such Colorado noobs that we didn’t realize the REAL view is if you hike up around the rocks that surround the lake and then look out over the incredibly scenic vista of the Rockies.

couple standing in front of gem lake in estes park colorado
Make sure to climb up on the rocks for the REAL view.

The way back down is equally beautiful (it’s the same trail, you’re just obviously facing the other direction) with lots of views of Rocky Mountain National Park.

vista of the rocky mountains with pine trees in the foreground

What should I pack and bring?

Four miles will take a few hours, and because of the elevation, you’re going to want to bring plenty of water. I never leave the parking lot without snacks, either. See my list of what to pack here. There’s a Safeway in Estes Park if you need to stop for any supplies.

Most of the trail is in the sun, and I was such a newbie at the time of this hike I didn’t think I needed a hat or sunglasses. I don’t recommend following in my footsteps.

In summer, make sure to check the weather since thunderstorms are very common. Otherwise, on a sunny day, you’ll be good to go in a t-shirt and shorts. You can wear hiking boots if you have them, but sneakers would be fine too.

Is it crowded?

In the summer, YES. Always. Estes Park is the main “gateway” to Rocky Mountain National Park, so it’s a very popular summer destination. Plus, it’s just over an hour from Denver and Fort Collins, and even closer to Boulder. That’s a lot of people who live close by!

But, that doesn’t bother me. Just don’t go thinking you’ll have the place to yourself. Be courteous and yield to people coming uphill, and let faster hikers by you.

Anything else I should know?

Estes Park is a great mountain town with lots of fun little places to check out. I personally love Ed’s Cantina for Mexican food, or you can stop in Boulder at Sun Mountain Brewery on your way back from hiking.

The views from Gem Lake are worth the huffing and puffing, just make sure to leave Denver early to beat the heat and (some of) the crowds. If you’re looking for other options or general tips, stop into the Estes Park Visitors Center for local information (and to hopefully see some elk!).

Beginner’s Trail Guide: Snowshoeing in Golden Gate Canyon State Park

After several weekends of hibernating with Netflix on my couch, I decided to be a real Coloradan and embrace winter.

After learning the basics from REI, I decided it was time to get out there and try it. Snowshoeing isn’t rocket science, but the two major blunders I made were picking a super hilly trail and forgetting poles. Both made for a strenuous, but doable, afternoon that was still a really fun way to enjoy the winter scenery.

REI rentals are super pricey, so if you’re headed in the direction of Golden, Bent Gate is your best bet. I found them on Google, and we got two pairs of snowshoes and powder tails (basically extra pieces of plastic to make your snowshoes stay on top of fresh snow) for $24, which coincidentally is the price of one rental at REI. If you don’t live near Golden, just Google snowshoe rentals near you and I guarantee you’ll find a more affordable place.

We headed to Golden Gate Canyon State Park, about an hour outside of Denver. It took us a little longer since we went to the main entrance of the park for some trail recommendations, and then had to drive all the way around to the trailhead at Rifleman Phillips Campground. Apparently, you can just drive to the campground straight from Denver:

07e2e-screen2bshot2b2015-03-142bat2b8-24-342bam

There’s a day fee for the park, so if you don’t have cash, you’ll also have to stop at Visitor’s Center and then went west, north, and back east to get to the trailhead (yellow circle). Our drive is outlined in blue below. The park’s roads were snowy, so I would recommend an all-wheel or four-wheel drive vehicle.

2e2db-screen2bshot2b2015-03-142bat2b8-28-052bam

We pulled into Rifelman Phillips Group Campground, where the Buffalo Trail leaves from (outline in purple above). The trail was absolutely gorgeous, but having it categorized as a moderate trail is a bit misleading, unless they were going for the average of “super easy” and “brutally difficult.”

The trail is basically all downhill all the way out, which is super easy, but then you’re hoofing it uphill the entire way back to the car (sweating, huffing and puffing, maybe some cursing). All of Golden Gate’s trails are pretty hilly, so I would recommend picking out a flatter park or trail for your first time out. Snowshoeing is definitely harder than hiking!

Snowshoeing is also more awkward than hiking. We walked around the campground a little bit just to get our bearings. It kind of feels like trying to walk in flippers or with skateboard decks attached to your feet, so it definitely took some getting used to. Also, the part where your foot straps into has sharp crampon spikes on the bottom to make getting through snow easier. It only takes one time to make sure you’re not clipping the inside of your ankle when you walk (I’ve got the battle scar to prove it!).

Once we were fairly confident we weren’t going to topple over, we started our trek. The trail started at a large green gate, which turned out to be the scenery that brought me to tears at the end of our hike. We quickly realized we had were hiking straight downhill. We passed a few snowshoers going the opposite direction and notice how winded they are. “Oh, they’re just olds. It can’t be that bad on the way back up, RIGHT?”

Spoiler alert: It was that bad! This is why you should choose a trail that is as flat as possible. Snowshoeing uphill was a million times harder than I thought it would be, mostly because we didn’t have poles. You can rent these with your snowshoes, or if you already have hiking or ski poles at home, use those, they’re all the same

woman snowshoeing

All complaining aside, it felt good to get sweaty (and by that I mean my base layers were completely saturated), and we had a blast snowshoeing. It’s a great workout, and snowshoes do really make it easy to navigate deep powder (I may have gone off the trail for a bathroom break). Falling in the snow doesn’t hurt thanks to all that white cushioney powder, which is nice if your significant other decides to give you a little shove:

65764-buffalo2btrail2bgolden2bgate2bstate2bpark2b2

The views on the trail were gorgeous, and the solitude you get in winter is really something else. It’s just SO quiet and peaceful (well, in between our horsing around). Plus, after burning all those calories, I could totally justify inhaling half a pizza when we got back to Golden.

For snowshoeing basics, like what to wear and how to pack, read my previous blog.