San Pedro vs. Caye Caulker: How to choose your ideal Belize beach spot

You can’t go wrong with the cayes of Belize (pronounced “keys”), but you can potentially go wrong when choosing between San Pedro and Caye Caulker. They’re both super popular destinations for American beach-goers, but they have distinctly different vibes.

To be completely honest, my husband Billy came up with the idea to create a quiz that helps people choose where to go. But these five questions will easily help you decide whether San Pedro or Caye Caulker is a better fit.

They both have beautiful beaches, rum drinks as far as the eye can see, and easy access to snorkeling (an absolute must do if you go to Belize). San Pedro is slightly closer to Hol Chan and Shark Ray Alley, but Caye Caulker is probably only another 10 minutes away. (If you want a more detailed description of snorkeling at Hol Chan, click here)

Without further ado, here are five easy questions to answer to help you decide where to book your Belizean beach vacation.

1. When you’re on vacation, you want to:

A) Go slow.

B) Hustle and bustle.

2. To get around, you prefer:

A) Walking or riding a bike.

B) Driving.

3. An hour-long, off-road drive to a beach sounds:

A) Potentially overrated.

B) Like a fun adventure worthy of exploring.

4. When it comes to dining out, you need:

A) Just a few tasty, local spots.

B) A new place to try every night.

5.  Your lodging must be:

A) Affordable and cool.

B) A luxury resort.


If you answered mostly A’s:

Caye Caulker it is! This sleepy beach town is the ultimate chill beach vacation spot. The island’s motto of, “Go slow” permeates everyone there, local or tourist. If you want to spend as much time as possible in a hammock with a rum drink, you’ll be right at home.

Jaw-dropping teal water beaches are a 10-minute water taxi ride away at Koko King, you can walk or bike anywhere, there are delicious local spots to eat, and affordable lodging abounds in this backpacker’s paradise. Don’t worry, if you want a step up from a hostel, there are plenty of other options that won’t break the bank.

How to spend three days in Caye Caulker >>

If you answered mostly B’s:

San Pedro is the place for you. This small, but bustling city is a 20-minute plane ride from Belize City.  You’ll like San Pedro if you want the beach, but you also want a little hustle-bustle.

There are dozens of dining and nightlife options if you like to try a new place each night. Taking on the streets of San Pedro as a pedestrian could satisfy your sense of adventure, but you’ll find the off-road drive to Secret Beach a worthy journey.

How to spend three days in San Pedro >>

Still have questions? I can answer them! Let me know in the comments what you’re trying to decide on.

How to beat treadmill dreadmill feelings

You may not like this. I don’t have a quick-fix or six things you can do to stop hating the treadmill. That’s because I’ve tried all of them.

I don’t do my best thinking in motion, so “solving the day’s problems” was not going to happen while plodding away. No matter how riveting a podcast I found or how well I matched music to my feet moving, the minutes dragged on. Who can do intervals to split up the time when even thirty seconds felt like 30 minutes?

Let me be clear that I went back to the treadmill because I was desperate. I hit that point in winter where I’m just SICK of frigid morning temperatures and pitch-black runs. I know, first world problems that I actually get to choose whether to be outside when it’s cold and crappy.

I was desperate to keep running, so I returned to the dreadmill.

The first time back was awful, as expected. But it felt good to get a run in, wear shorts, and not have a fountain of snot down my face (running is glamorous).  I clung dearly to that feeling of, “Ultimately, I am glad I did this.”

First, I had to let go of my goal to hit a certain mileage, because it’s my firm belief that treadmills don’t accurately track how far you’ve gone.

This is based on absolutely no scientific evidence, only my own frustration in knowing I’m running as fast as I do outside (measured ultra-scientifically by Spotify’s tempo detector and my own feelings), but having the treadmill tell me I’m going at a significantly slower pace.

I was getting SO annoyed watching the tenths-of-a-mile tick by infuriatingly slowly while the treadmill claimed I was running slower than 11 minutes per mile (a bit of personal news: I now run around 10:30 a mile, which has been a huge milestone). I had fought so hard to finally get under an 11-minute piece and now the world’s most boring piece of machinery was basically laughing in my face.

I could dedicate an entire blog post to this, but I digress.

Once I let go of running a specific number of miles and decided I would set a goal for time, I had to start learning patience. If you’ve ever met me in person, I’m the least patient person in the world so this has been the hardest part. But it’s the truth.

I’ve learned to tolerate like the treadmill by learning to be patient. Womp, womp.

Not super sexy or exciting or quick. It’s just a basic life skill that many of us are terrible at, particularly in (yes I know this is cliche) today’s instant gratification world. It’s part of why I started trail running – because road running was too boring for me. But I don’t always have time to get to a trail, much less when it’s dark and covered in ice.

Winter has made me retreat closer to closer to home, and here I am on a treadmill and kind of enjoying it. The first few times, I was still combating my aforementioned rage over accurate mileage and it felt like the longest 20 minutes OF MY LIFE.

But I was stubborn about clinging to my running fitness, because for the first time EVER, running is sometimes easy for me. I really enjoy it and it makes me feel strong and happy. I never thought I would get to the point that running two miles was “easy.” So I am determined to stay there.

I told myself I had to start with 20 minutes. I tried the fancy Zion National Park course feature (pictured). I listened to podcasts in Spanish so I had to concentrate harder, I listened to my favorite songs. I did whatever it took to get through those first few runs.

Eventually, I was able to get to 25 minutes without much second thought. Last week, I found myself feeling sad that I had to cut off my run at 27 minutes. Today, I was doing those intervals everyone always told me would make the time go faster…because all of a sudden one minute isn’t a long time. All of a sudden, it’d been 30 minutes.

I wish there was a secret cure for not hating the treadmill, but when it comes down to it, you have to be determined to do it in the first place, allow yourself to let go of what frustrates you, and learn to be patient.

…I should probably apply these lessons to other areas of my life.

Beginner’s guide to Peanut Island snorkeling

Once upon a time, I worked in Florida for four months every winter. When my then-boyfriend, now-husband came to visit, multiple people recommended we go snorkeling at Peanut Island.

This sounded very cool but I’d never been snorkeling before and the ocean freaks me out a little bit. Of course, I immediately convinced myself I would a) drown, b) run into a barracuda, or c) meet my untimely end in another maritime fashion.

Billy assured me this was a FUN IDEA. In a development that should surprise absolutely no one, it was a blast.

Peanut Island turned out to be the perfect place to try snorkeling for the first time. It’s beautiful, easy to get to, and the water (and wildlife) is very tame. You can go out into “open water,” but there’s an inlet that is nice and shallow with more private beaches.

peanut island snorkeling
Aerial view of Peanut Island, with inlet circled for reference

How to get there

Peanut Island is, as you may have guessed, an island. To get there, you have to take a water taxi. It leaves every 20 minutes from the Riviera Beach Marina. The water taxi costs $12 per person (round-trip, but still kind of pricey considering you’re going 10 minutes away). It picks you up every 20 minutes right where it dropped you off on the island, so it’s not hard to find your way back.

Where to rent gear

Most places charge at least $30 for renting snorkel gear, but Force-E Scuba Center only charges $15.50. Everyone there was also super friendly and helpful, so I highly recommend taking a few extra minutes to stop at Force-E on your way into Riviera Beach. Just don’t forget to drop your gear back off if you’re already 30 minutes in the other direction…yes, we did that.

Where to eat and drink

Pack a lunch and snacks since there aren’t any restaurants on Peanut Island. This is more affordable than stopping at the tiki bar back in Riviera Beach, which has very mediocre Yelp reviews. I remember having tropical drinks at an actual tiki bar right on the water, but I can’t seem to find it now. If you find it, let me know so I can add it to this post!

You can’t drink alcohol on Peanut Island, but that wasn’t a dealbreaker for us. If you are that desperate to day drink, get a friend with a boat. Lord knows all the boats parked off Peanut Island are getting shwasty.

The actual snorkeling

There’s a trail all the way around Peanut Island that you can walk around to scope out your spot if you want to stay on the shore. We opted for the inlet because it was more sheltered from the wind (it wasn’t super warm that day) and I was more comfortable in the shallow water.

There was also minimal wildlife in this inlet, which was preferable for me. I realize I’m likely in the minority, but I did not want to see any manatees or large fish. Once I got closer to the mouth of the inlet, I did see a few fish. But by that time, I was feeling pretty confident and was actually excited to see something.

Wildlife aversion aside, I loved snorkeling in the inlet because I could get the hang of breathing through the mask in a very low-risk environment. I didn’t have to worry about drifting out with the tide, there were no waves so swimming was really easy, and if I accidentally inhaled water instead of air, I could immediately stand up while I coughed up a lung.

If you love Peanut Island so much you want to stay the night, that’s also an option! I’ve always wanted to camp on the beach, but unfortunately, we didn’t have time, mostly because we had no idea that was even doable before arriving on Peanut Island and were therefore quite unprepared.

If you don’t want to go snorkeling at all, you can also rent kayaks and stand-up paddleboards from a number of places. If you don’t want to do anything at all, just bring a beach towel and park it on the beach! Especially tucked away in the inlet, you feel like you’re all by yourself and the island is absolutely beautiful. It’s a great spot to just relax and soak up the sun.

Bottom line

No matter what you end up doing, Peanut Island is a great getaway for a beach day in the Palm Beach area. It’s particularly great for your first time snorkeling, and Force-E Scuba Center will help you save money on your rental gear.

couple in snorkeling gear at Peanut Island 
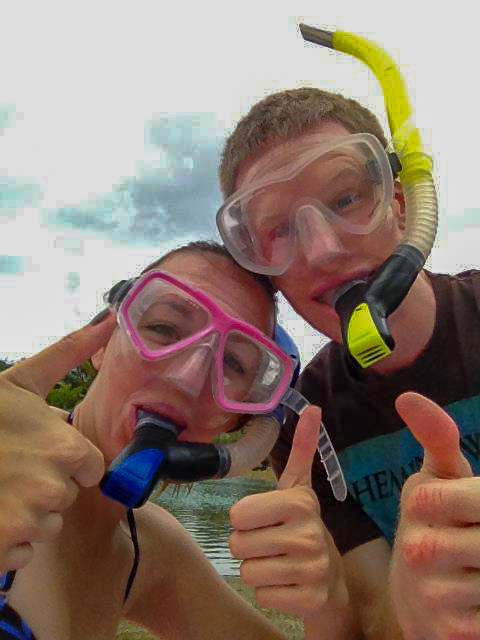
Forgive the image quality…2014 was not a good year for smartphone cameras.
Continue reading “Beginner’s guide to Peanut Island snorkeling”

What to bring hiking when you’re just starting out

As a beginner, you’ll probably always have cell service and not be far from civilization, so you don’t have to be prepared for the apocalypse on your first hike. BUT (there’s always a but) bringing a few basic supplies will make sure you have a good time and can deal with minor mishaps.

Here’s what I put in my backpack every time I go for a hike.

1. DIY first aid kit

Even if you’re not going very far, you should always bring a few first aid supplies in case of emergency. Buying the pre-made kits is more convenient, but ultimately WAY more expensive. You’ll only get one or two uses out of each item, when you could just spend a little more upfront and get a ton more supplies. You’ll need:

  • Antiseptic wipes (these ones don’t sting!)
  • Antibiotic ointment (get the generic at the grocery store for your cheapest option)
  • Band-Aids of varying sizes (the one thing I don’t go generic on since cheap ones always fall off)
  • Gauze squares
  • Ibuprofen (optional but have saved me when cramps hit while hiking – buy a big bottle and then dump 20 pills in your kit)
  • Tums (optional, but make sure to put them in their own bag so they don’t get powder all over everything)
  • Generic Benadryl (optional if you don’t have pollen allergies)

Put all of this into a regular plastic baggy and keep it in your backpack so you don’t ever forget it. I also bring a travel-size pocketknife just to make sure I have a way to cut things.

2. Extra clothes

I always pack an extra long-sleeved layer (like a raincoat) and a hat just in case the weather suddenly changes (or is just not as warm as I thought it would be).

3. Food and drink

Always bring water with you. Buying a reusable water bottle once is cheaper in the long run and more environmentally-friendly than buying plastic bottles from the store. REI sells a cheaper basic bottle that works great. Another option is a collapsible water bottle that folds up super small once it’s empty.

If you are going for a longer hike or carrying water for multiple people, you can also look into getting a reservoir that holds a liter or more of water at a time. In general, pack a little more than you think you’ll need.

I’ve got an entire blog about hiking snacks, so just because my photo has Pro Bars in it doesn’t mean you have to spring for those. Bring something filling and easy to eat on the go – trail mix, beef jerky, or a PB&J are all great basic options.

4. Sunscreen, hand sanitizer, chapstick, and bug spray

Chapstick with SPF and regular sunscreen are essential, along with bug spray. Bringing a travel-size container of hand sanitizer is also really nice considering most trailhead bathroom options don’t have running water, and therefore, no way to wash your hands.

Bottom Line

You may not use any of these things (besides water) your first time out, but eventually, you’ll need one (or all) of them while hiking. Whether you get hangry, the weather changes suddenly, or you trip and get a minor injury, you’ll be eternally grateful that you’re prepared to handle it.

Beginner’s guide to packing everything you need in one carry-on

Whether you’re going on a weekend getaway or taking a big trip to a foreign country, packing is truly the worst. Most of the burden is figuring out where to put everything, how the eff it’s all going to fit, and how in the world I’m going to find it again once I’m trying to unpack.

Enter packing cubes.

My husband bought these packing cubes for our honeymoon after a lot of internet research (confession, this is basically how I find anything good online). Until this point, I was a total travel beginner and never even dreamed of only bringing one carryon somewhere, mostly because that would require actually fitting everything in one bag.

I was skeptical at first that these little pouches were actually going to help me. But I quickly realized they let me pack a lot more into a lot less space and kept me organized when I was on the go. I’ve since abandoned my previous packing tactic of throwing a bunch of crap into a duffle bag and calling it good. I use cubes to pack for every trip now (as usual, my husband’s internet research has greatly improved my quality of life even though I was initially skeptical).

My husband bought the six-pack of cubes instead of the four-pack because we wanted enough for both of us, but I also really like this set because it comes with a hot dog-shaped bag. It’s perfect for underwear, socks, sports bras, really any undergarments.

I pack one type of thing into each cube, which is insanely helpful for staying organized, even if I’m only traveling for a few days.

For example, when I went skiing last weekend I put all the super warm outer layers in the XL cube, underwear/bras/socks in the hot dog cube, and then regular shirts and pants (like flannel and a pair of jeans) in the mid-size cube. I could easily get dressed in regular clothes without having to dig through all of my skiing layers, and my underwear didn’t get jammed in a random corner of my bag, never to be found again.

In warmer weather, like when I went to Greece, I packed all my tops in one cube, all my bottoms in another, all undergarments in the hot dog, and then put dresses in a separate section of my suitcase. Being away from home is so much less stressful when you can actually find everything you brought with you (I know, novel concept) and the packing cubes help keep me organized since I’m not tearing apart my bag trying to find something.

Even better, you can fit so much more stuff when you pack with these. I cram as much stuff as I can into the cube by rolling my clothes, zip it shut (which helps compress it), and then gently place it smush it into my suitcase (which further compresses it). Particularly with winter clothes, they compress everything down so much more than just putting piles of clothes in on their own.

Now, let’s say you’ve really jammed your cubes in tight – don’t worry, these have a handle on them for pulling them out of tight spaces (like your full-to-the-brim carryon).

These cubes also come with a laundry bag, but if I’m not going to be gone for long, I just shuffle everything dirty into one cube and everything clean into another. It makes laundry super easy when you come home because you just dump everything from that cube into the hamper. You could of course also do this with the laundry bag, I just don’t want to bring something extra with me (or more accurately, we’ve lost it and I don’t know where it is).

Bottom line, everyone hates packing/unpacking and cubes make it a million times easier to bring as much as you want and be able to find it once you’ve arrived.

Screen Shot 2018-02-04 at 12.56.30 PM